Basic Postback Configuration
Enable standard postback configurations for your ad partner in the Branch Dashboard.
Overview
When Branch measures a conversion (install or other event), it determines which ad network or partner is responsible for generating the action, then attributes credit to the proper partner accordingly. Branch notifies partners of these events via postbacks which are turned on when you enable any Universal Ads integrated partner.
Branch’s postback system is highly customizable; set up postbacks for specific events, as well as specific subsections of events, filtered by link data, user data or event properties.
Universal Ads partners support pre-defined postback templates to simplify the generation of the proper postback URL. If they require any additional information (such as an event-specific Goal ID), Branch displays empty fields for you to input that information that are automatically appended to the postback URL.
Add Postbacks
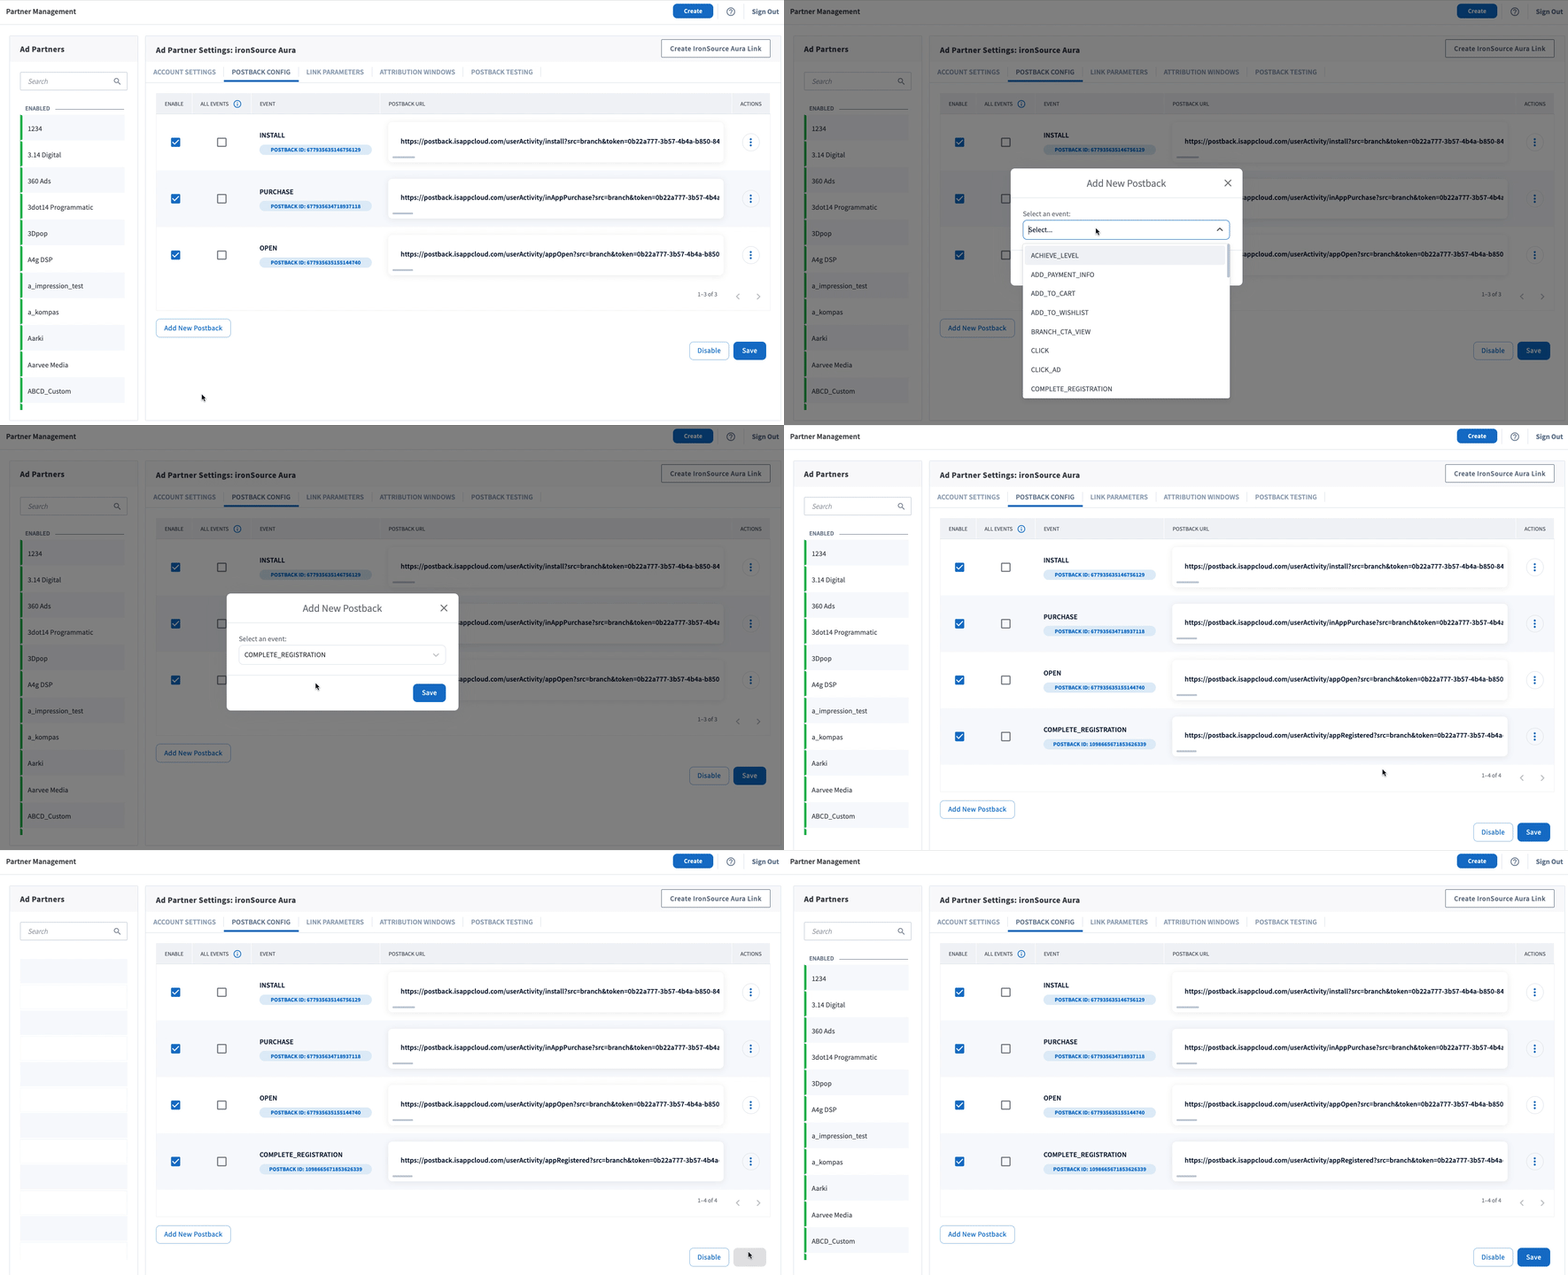
Basic postbacks are automatically activated for events like INSTALL and PURCHASE when you enable your ad partner. You can then add additional postbacks, for example, if you wanted to add postbacks for custom events that are specific to your app like Account Created.
To add a postback:
- Under Partner Management, select the partner for whom you want to add/edit their postback.
- Click on the Postback Config tab on said partner’s page.
- Click the Add New Postback button at the bottom of the screen.
- A modal will appear with Branch default events, as well as any commerce (reserved events like PURCHASE) or custom events you've set up.
- Click Save.

In some cases, you will also be prompted to enter a Postback URL. This means that Branch does not already have a pre-configured postback template for that partner and you need to provide a valid URL for your partner. You can get this URL from the ad partner.
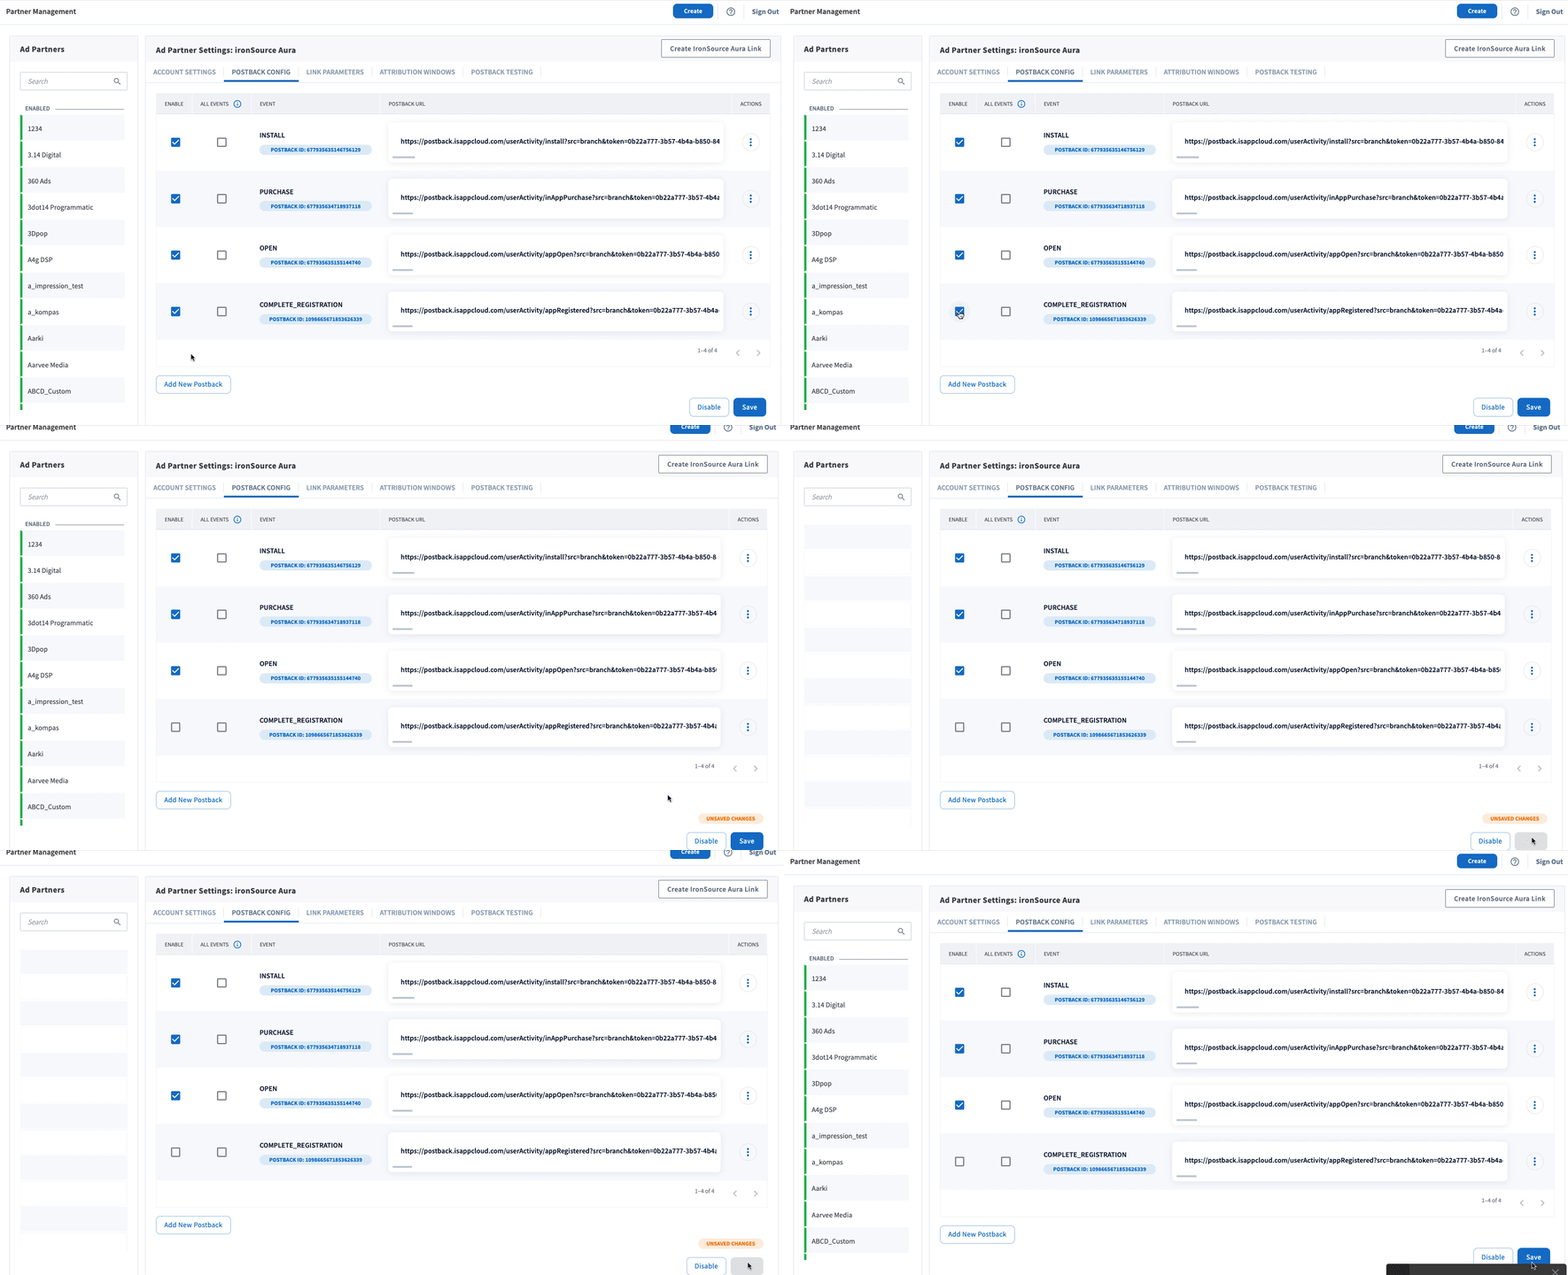
Disable Postbacks
To disable any postback currently enabled for an ad partner:
- Under Partner Management, select the partner for whom you want to disable the postback(s).
- Click on the Postback Config tab on said partner’s page.
- Uncheck the box in the Enable column for the postback you want to disable.
- Click Save.

Automated Postback Clean Up
Branch runs weekly jobs to disable all non-functioning postbacks. Any postback that has failed consistently over the last 7 days - throwing only 400/500 errors - will be automatically disabled.
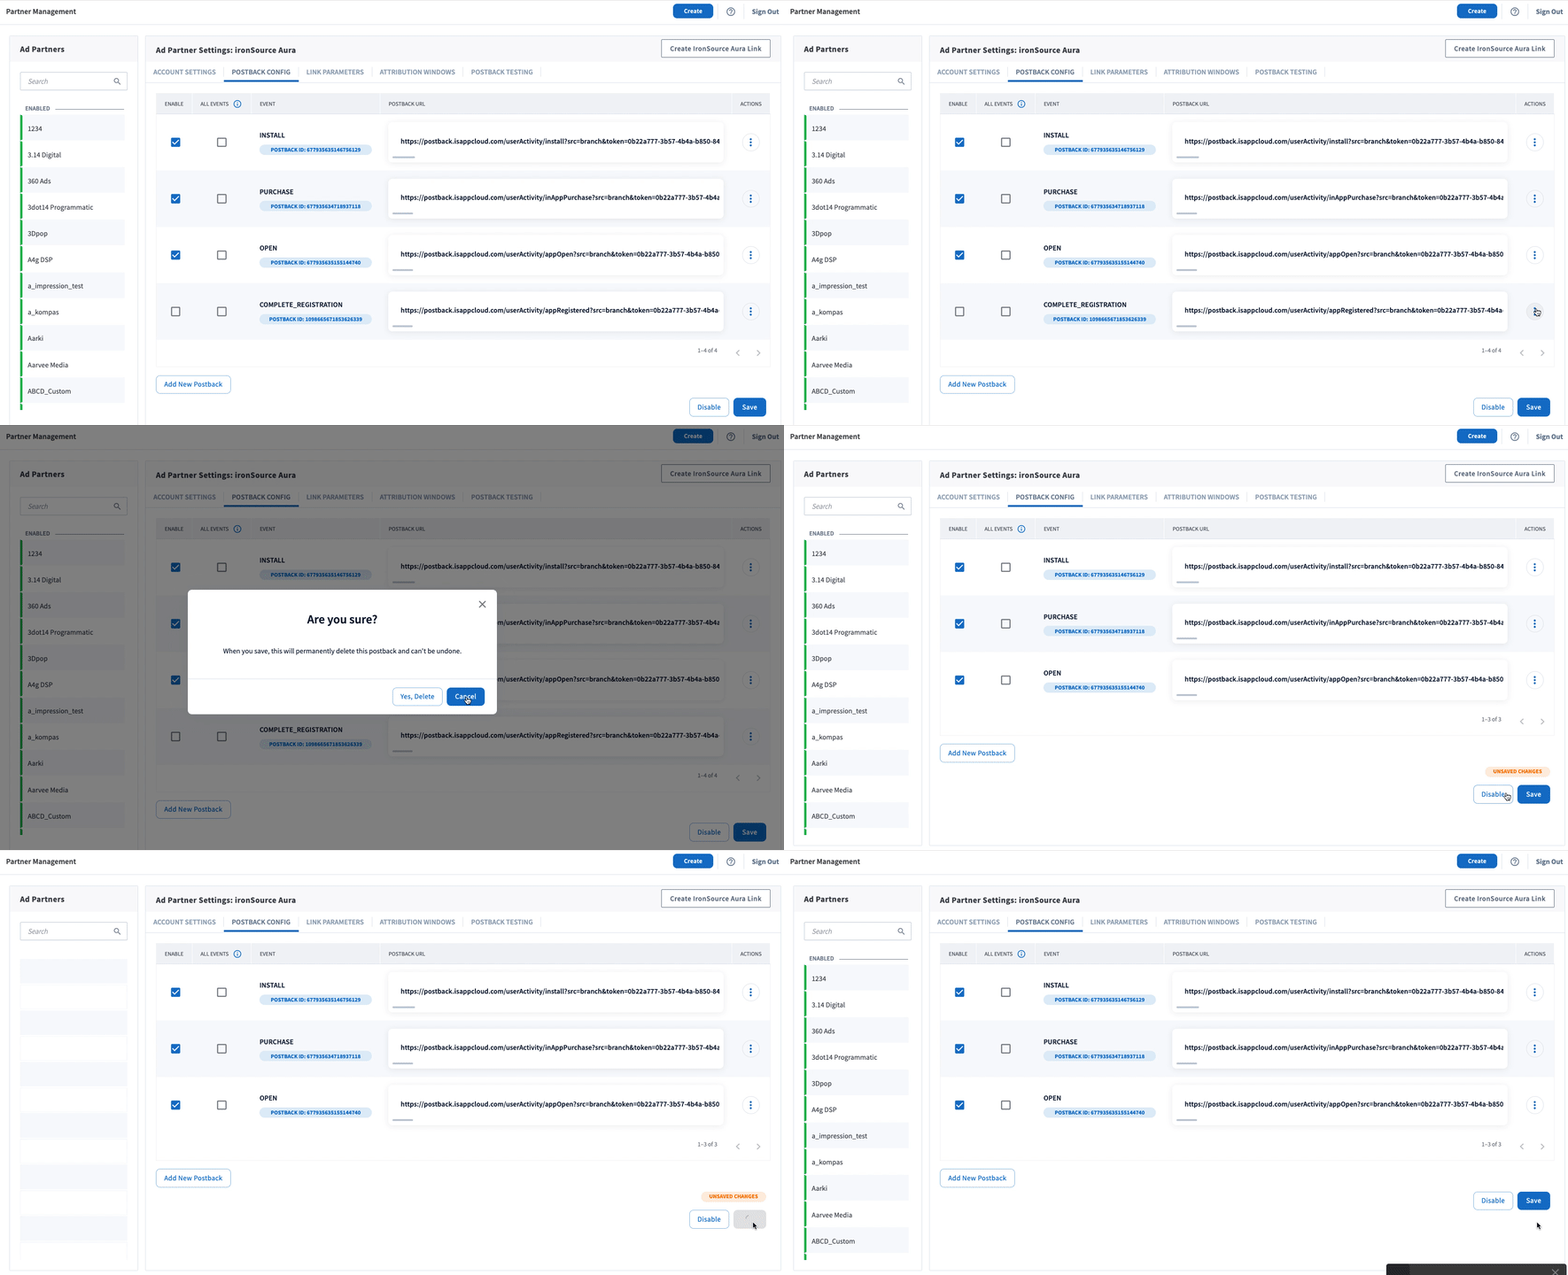
Delete Postbacks
To delete any postback currently added for an ad partner:
- UnderPartner Management, select the partner for whom you want to delete postback(s) for.
- Click on the Postback Config tab on said partner’s page.
- Click the three dots icon to the right of the postback and click Delete Postback.
- Click Save.

Sending All Events
Privacy Implications
As this setting will send All Events - with the name and customer event alias listed in this row, whether attributed to this partner or not - we recommend using caution when/if enabling, especially if you have enabled agencies to access your account.
If you want to send All Events you can enable this setting by checking the box on the All Events column on a per postback basis. When checked, all events will be sent regardless of attribution. Otherwise, the postback will only fire for events attributed to the ad partner.

Reset Postbacks
There may be times when you need to reset a partner's settings; i.e. when a partner updates their postback templates or when perhaps you've made a mistake during partner setup. Resetting a partner's settings allows you to re-enable the partner integration with the correct information to accurately measure and attribute conversion.
Reseting
Resetting partner settings will:
- Disable the ad partner.
- Clear out all of your saved credentials and postbacks that are already set up.
- Return the ad partner to its basic configuration.
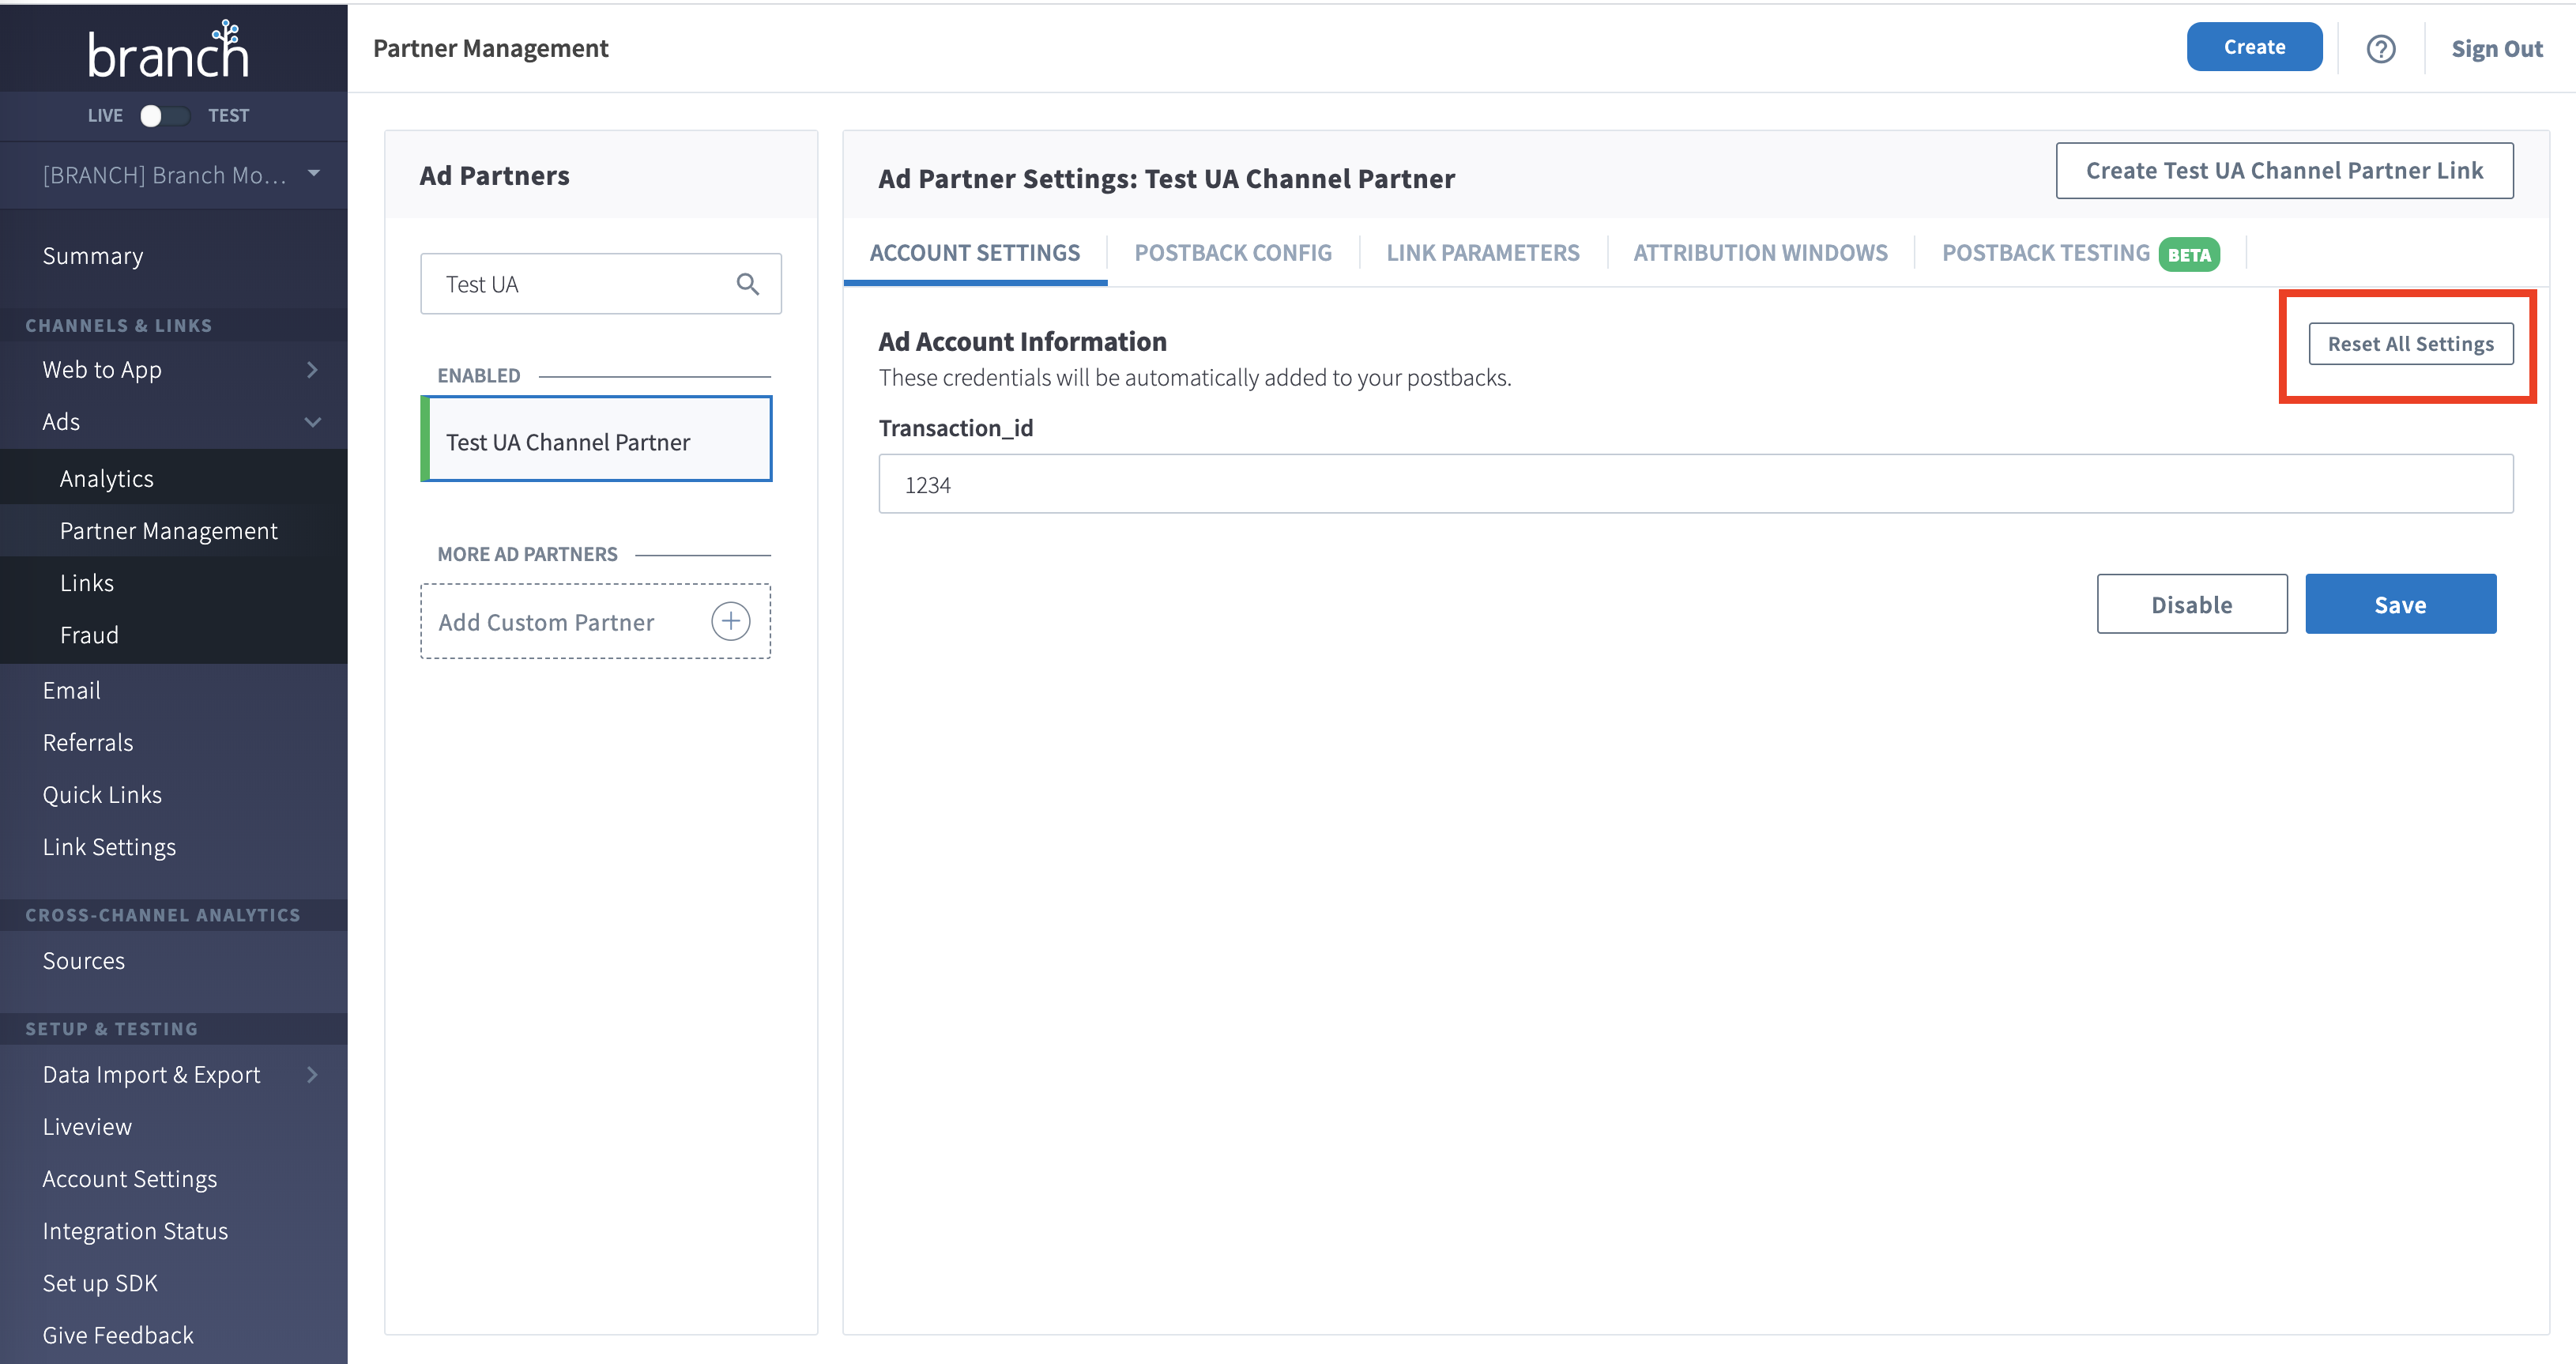
To reset a specific partner's postbacks:
- Click on the Account Settings tab of the partner in question.
- Click the Reset All Settings button in the right-hand corner.

Allowlist Postback IP Addresses
If you need to allowlist the webhook server IP addresses for security purposes, they are listed below:
- 52.9.159.121/32
- 52.9.176.205/32
- 52.9.188.221/32
- 52.9.188.236/32
- 52.52.143.205
- 52.53.45.79
- 52.8.3.171
- 54.176.26.254
- 52.8.85.213
- 54.153.26.149
- 54.153.41.111
- 54.176.133.14
- 54.193.10.161
Updated 10 months ago


