
Overview
Founded as Clickbooth in 2002, Perform[cb] is the culmination of years of pioneering in the world of performance marketing. Clickbooth grew organically and through a series of strategic acquisitions, including Adperio and IgniteOPM. In 2020, we rebranded as Perform[cb]. Our Think Bigger vision is of a future in which all marketers are empowered to maximize the ROI of their marketing dollars by paying only for customers acquired.
Partner Capabilities
| Capability | Details |
|---|---|
| Company Type | • Ad Network • Affiliate Network |
| Deep Linking | Supported |
| Attribution | • Click-Through Attribution |
| Ad Campaign Types | • Acquisition campaigns • Retargeting campaigns |
| Ad Formats | • Banner • Interstitial • Video • Recommendation • App of Day |
| Click Types | • Client-side click |
| Supported Platforms | • iOS • Android • Windows • Mac OS |
| Link Wrapping | Supported |
| Cost Ingestion Support | Not Supported |
| Cost Ingestion Types | N/A |
| Pricing Models | • CPI • CPC • CPM • CPA • CPL |
Before you begin
In order to enable Perform[cb], you need to have completed the following:
Created a Branch Dashboard.
Have Branch's Performance product enabled for your Branch Account.
Implemented the Branch SDK into your mobile app (iOS | Android)
Running campaigns through Perform[cb].
Enable Perform[cb]
1. Enable Perform[cb] in Branch
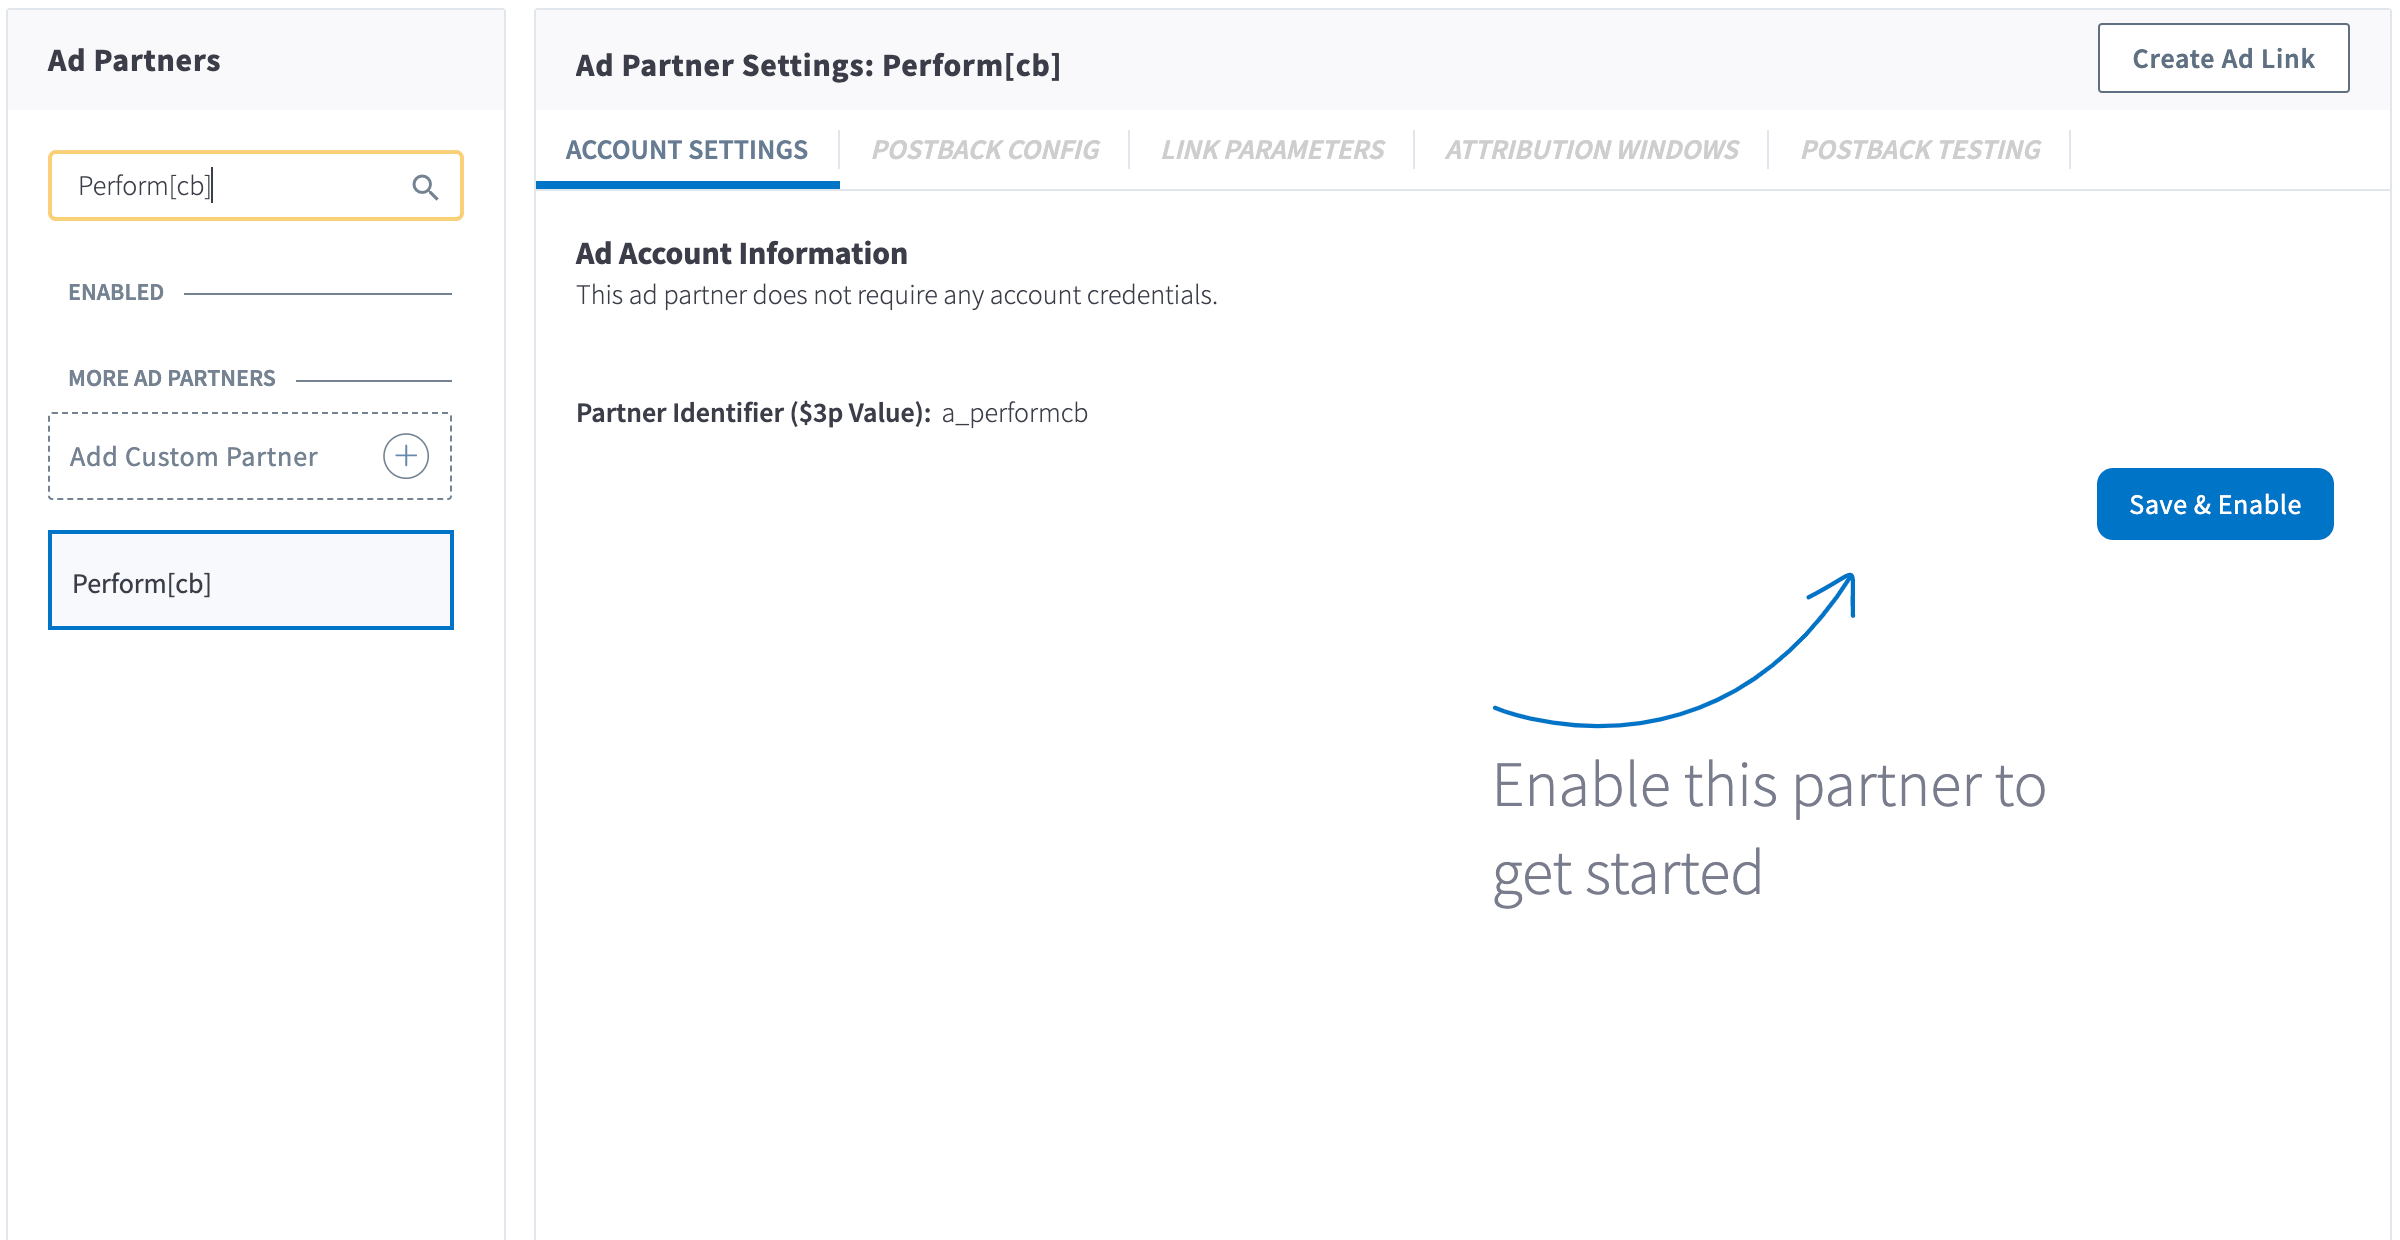
In the Branch Dashboard under Ads > Partner Management, find/search for Perform[cb]. If you're already logged into the Branch Dashboard, you can also click here to go there directly.
Click the Save & Enable button.
2. Configure Postbacks
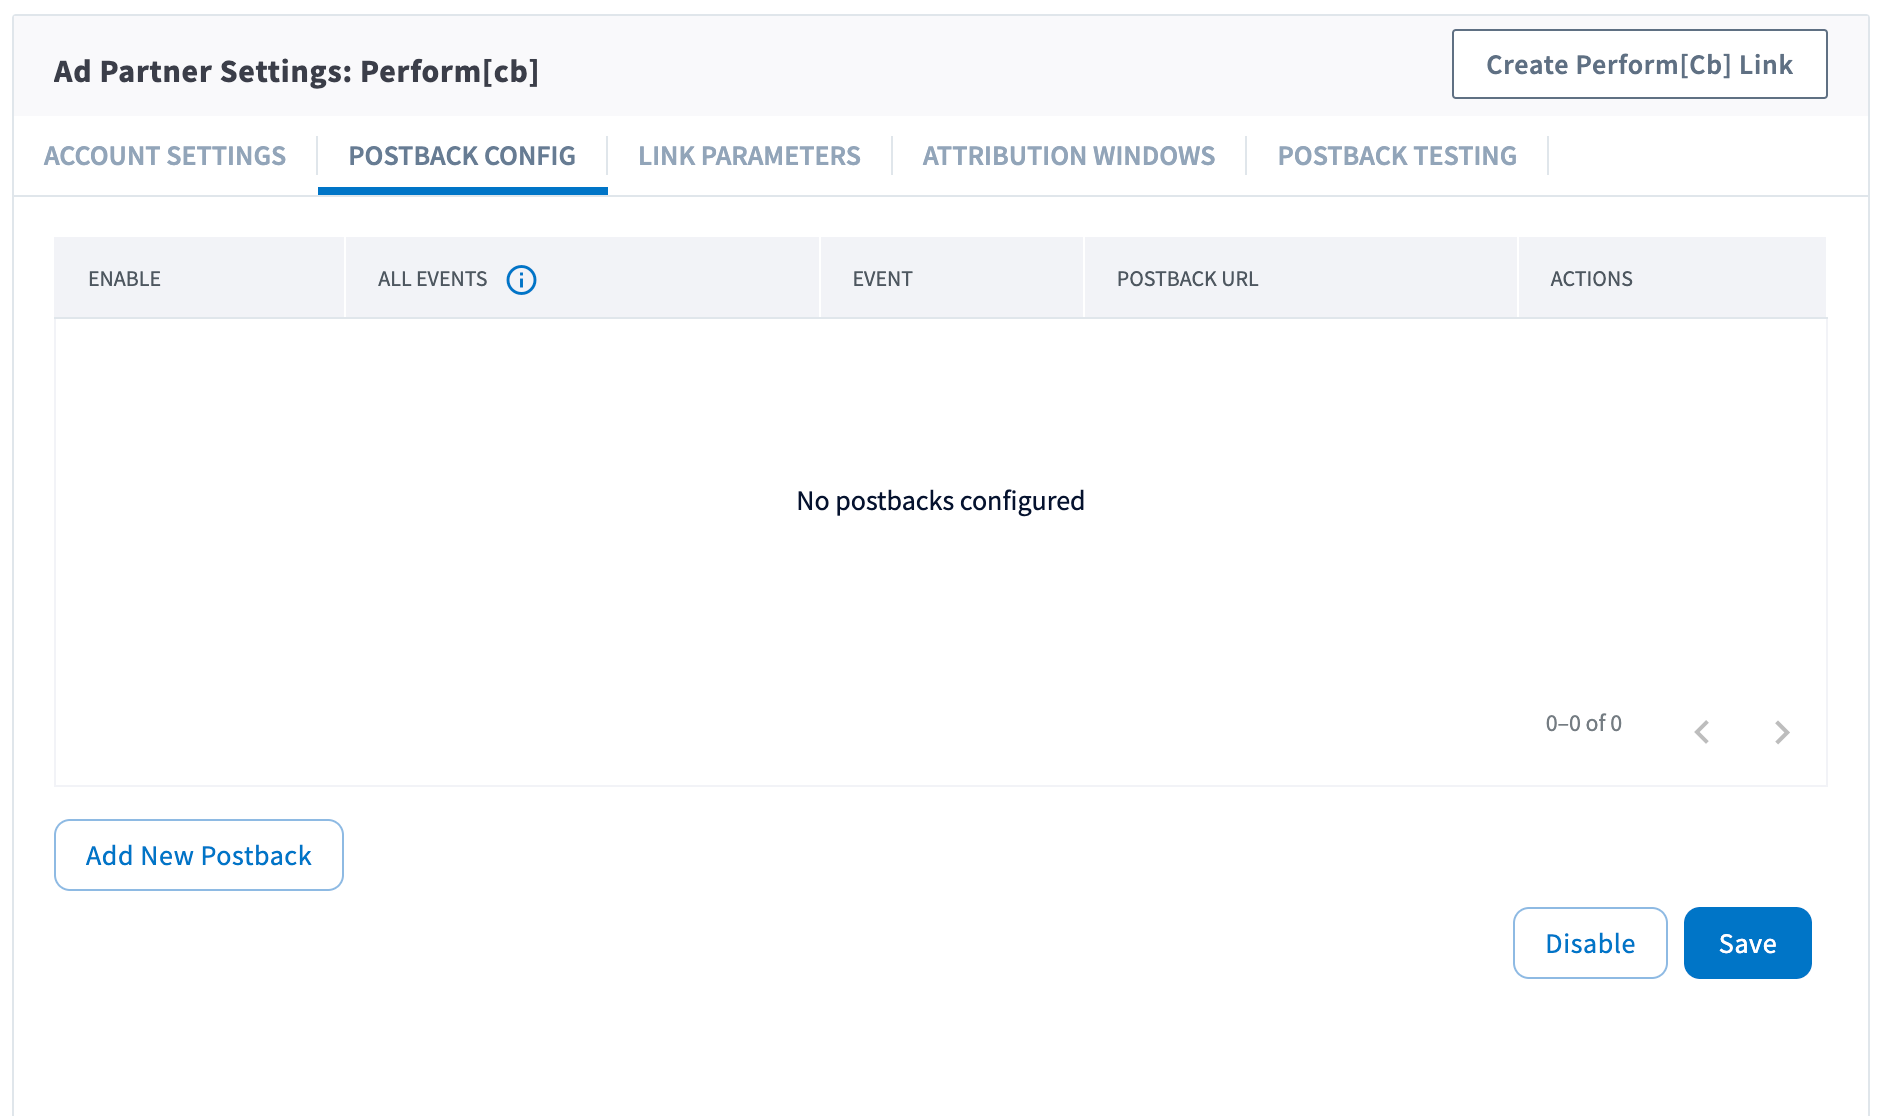
Enabling Perform[cb] does not automatically enable any postback. You can configure these postbacks under the Postback Config tab.
Send All Events
Optionally, you can check the checkbox for a given postback for sending all events. When checked, all events will be sent regardless of attribution. Otherwise, the postback will only fire for events attributed to Perform[cb].
Adding Postbacks
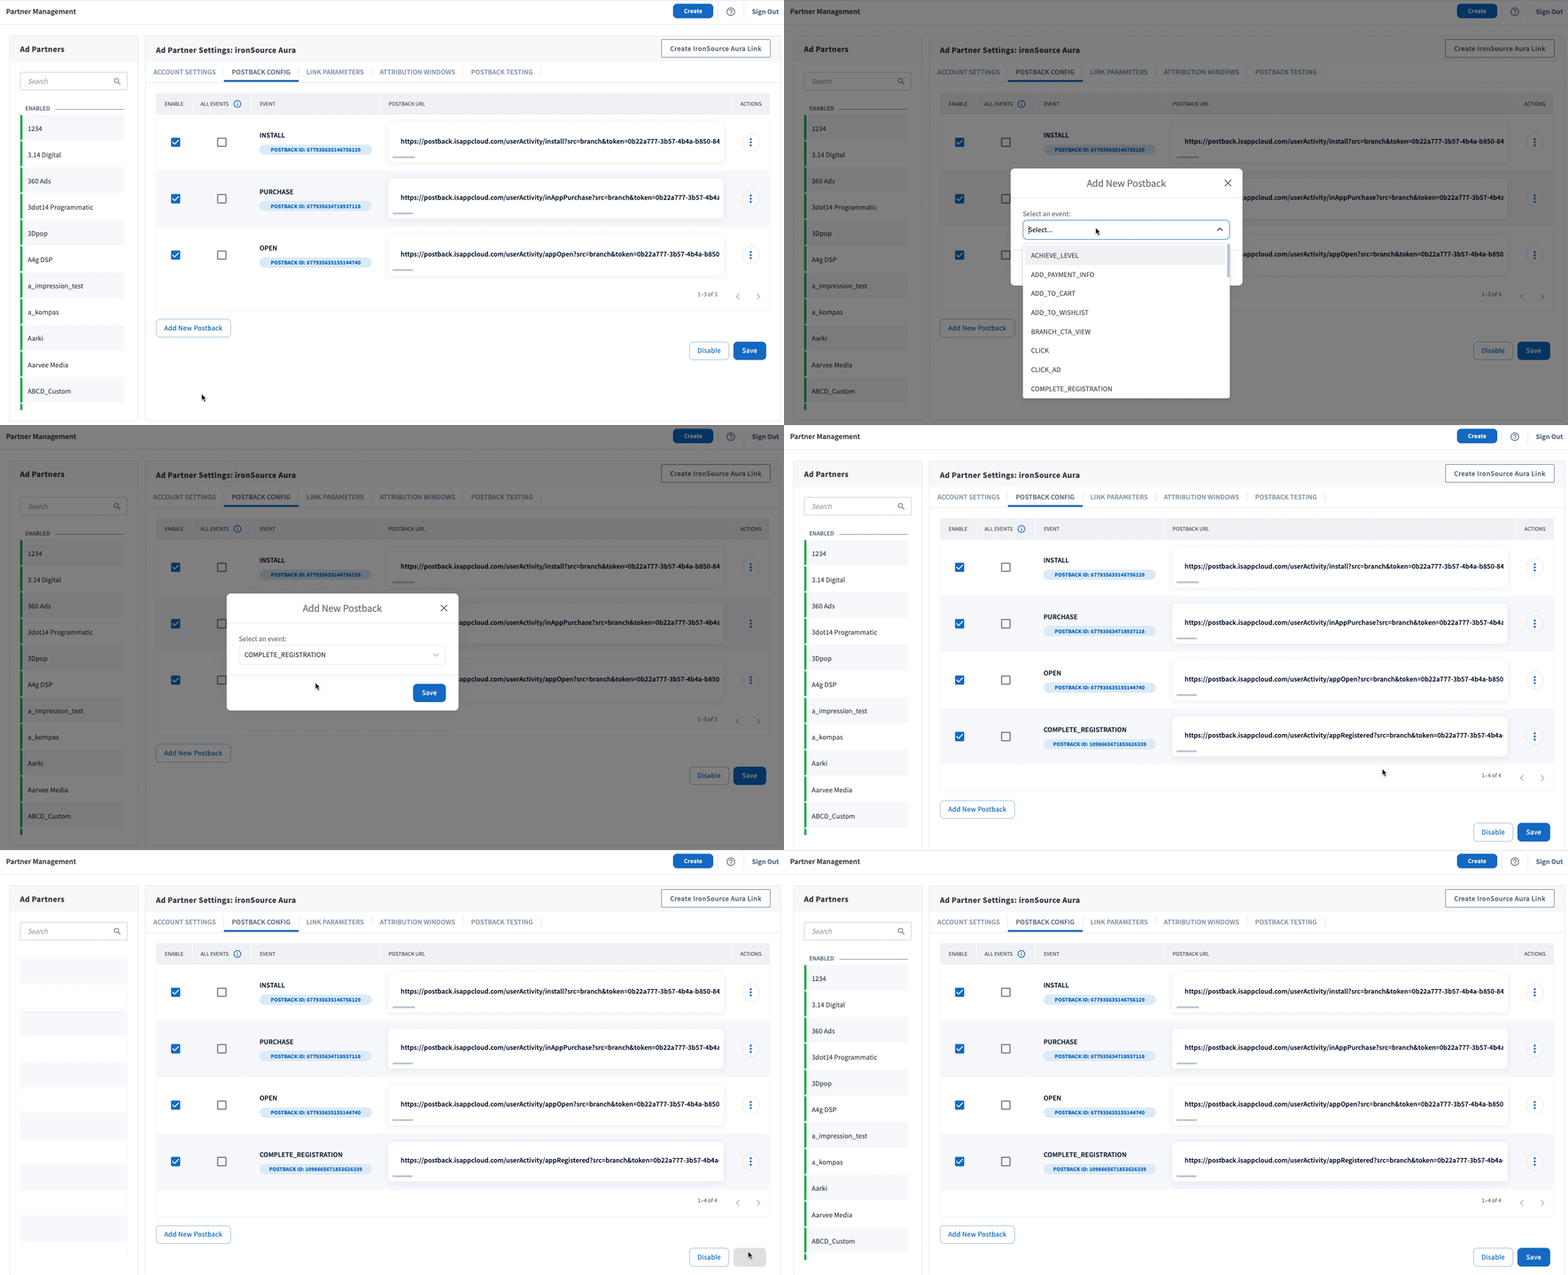
Click the Add New Postback button at the bottom of the screen. A modal will appear that will allow you to select an event that you are tracking with the Branch SDKs (including Custom Events).
For more in-depth postback configurations, view our guides:
3. Configure Attribution Windows
After configuring your events, navigate to the Attribution Windows tab to set windows by attribution type.
Recommended Attribution Windows
| Attribution Type | Window |
|---|---|
| click to session start | 90 days |
| click to install | 30 days |
| click to conversion event | 90 days |
| impression to session start | 1 day |
| impression to install | 1 day |
| impression to conversion event | 1 day |
4. Create Branch Ad Link
Next, you'll need to create a Branch Ad Link for your Perform[cb] campaigns in order for Branch to properly attribute conversions.
The Branch Ad Link you create will be placed in your Perform[cb] campaign.
5. Verify Data in Branch
After launching your Perform[cb] campaigns, and conversions begin to happen, you'll want to verify data is being sent from Branch to Perform[cb]. You can look at the Branch Dashboard's Liveview Webhook Records and apply the following filter:
| Filter | Operator | Value |
|---|---|---|
| ad partner (3p) | equals | a_performcb |
Once applied, data should flow through the Liveview, and you can see the data being sent to Perform[cb] from Branch.