
Overview
Criteo is the global leader in Performance Display. Criteo is a global technology company that enables brands and retailers to connect more shoppers to the things they need and love.
Partner capabilities
| Partner Capabilities | Details |
|---|---|
| Company Type | DSP |
| Deep Linking | Supported |
| Attribution | • Click-Through Attribution • View-Through Attribution |
| Ad Campaign Types | • Acquisition campaigns • Retargeting campaigns |
| Ad Formats | Contact support at Criteo for more information. |
| Click Types | • Client-side click • Server-side click |
| Supported Platforms | • iOS • Android |
| Link Wrapping | Supported |
| Cost Ingestion Support | Supported |
| Cost Ingestion Types | • via API • via scheduled email imports • via file upload |
| Pricing Models | • CPC • CPM |
1. Complete Ads Prerequisites
DEVELOPER MAY BE REQUIRED
The following Ads prerequisite includes providing URI schemes and other components that may require a developer:
2. Enable the Integration
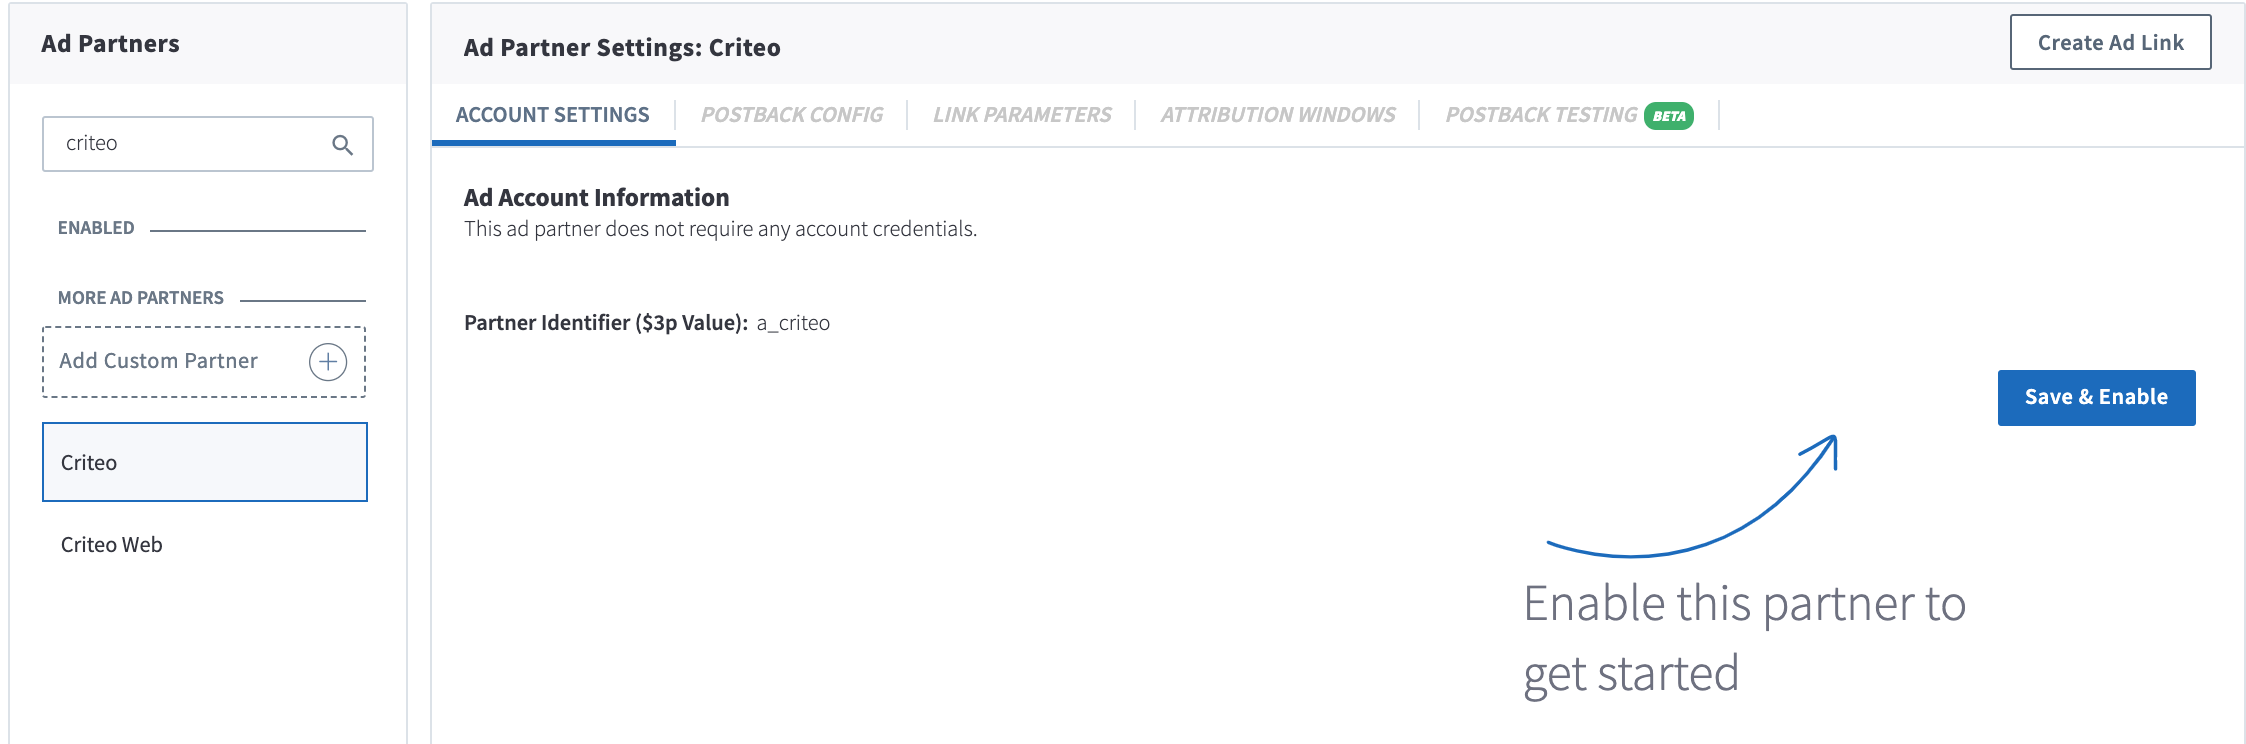
Visit the Ads page on the Branch dashboard.
Select Partner Management from the sidebar.
Search for Criteo.
Select Criteo, and click Save & Enable.
3. Enable Postbacks
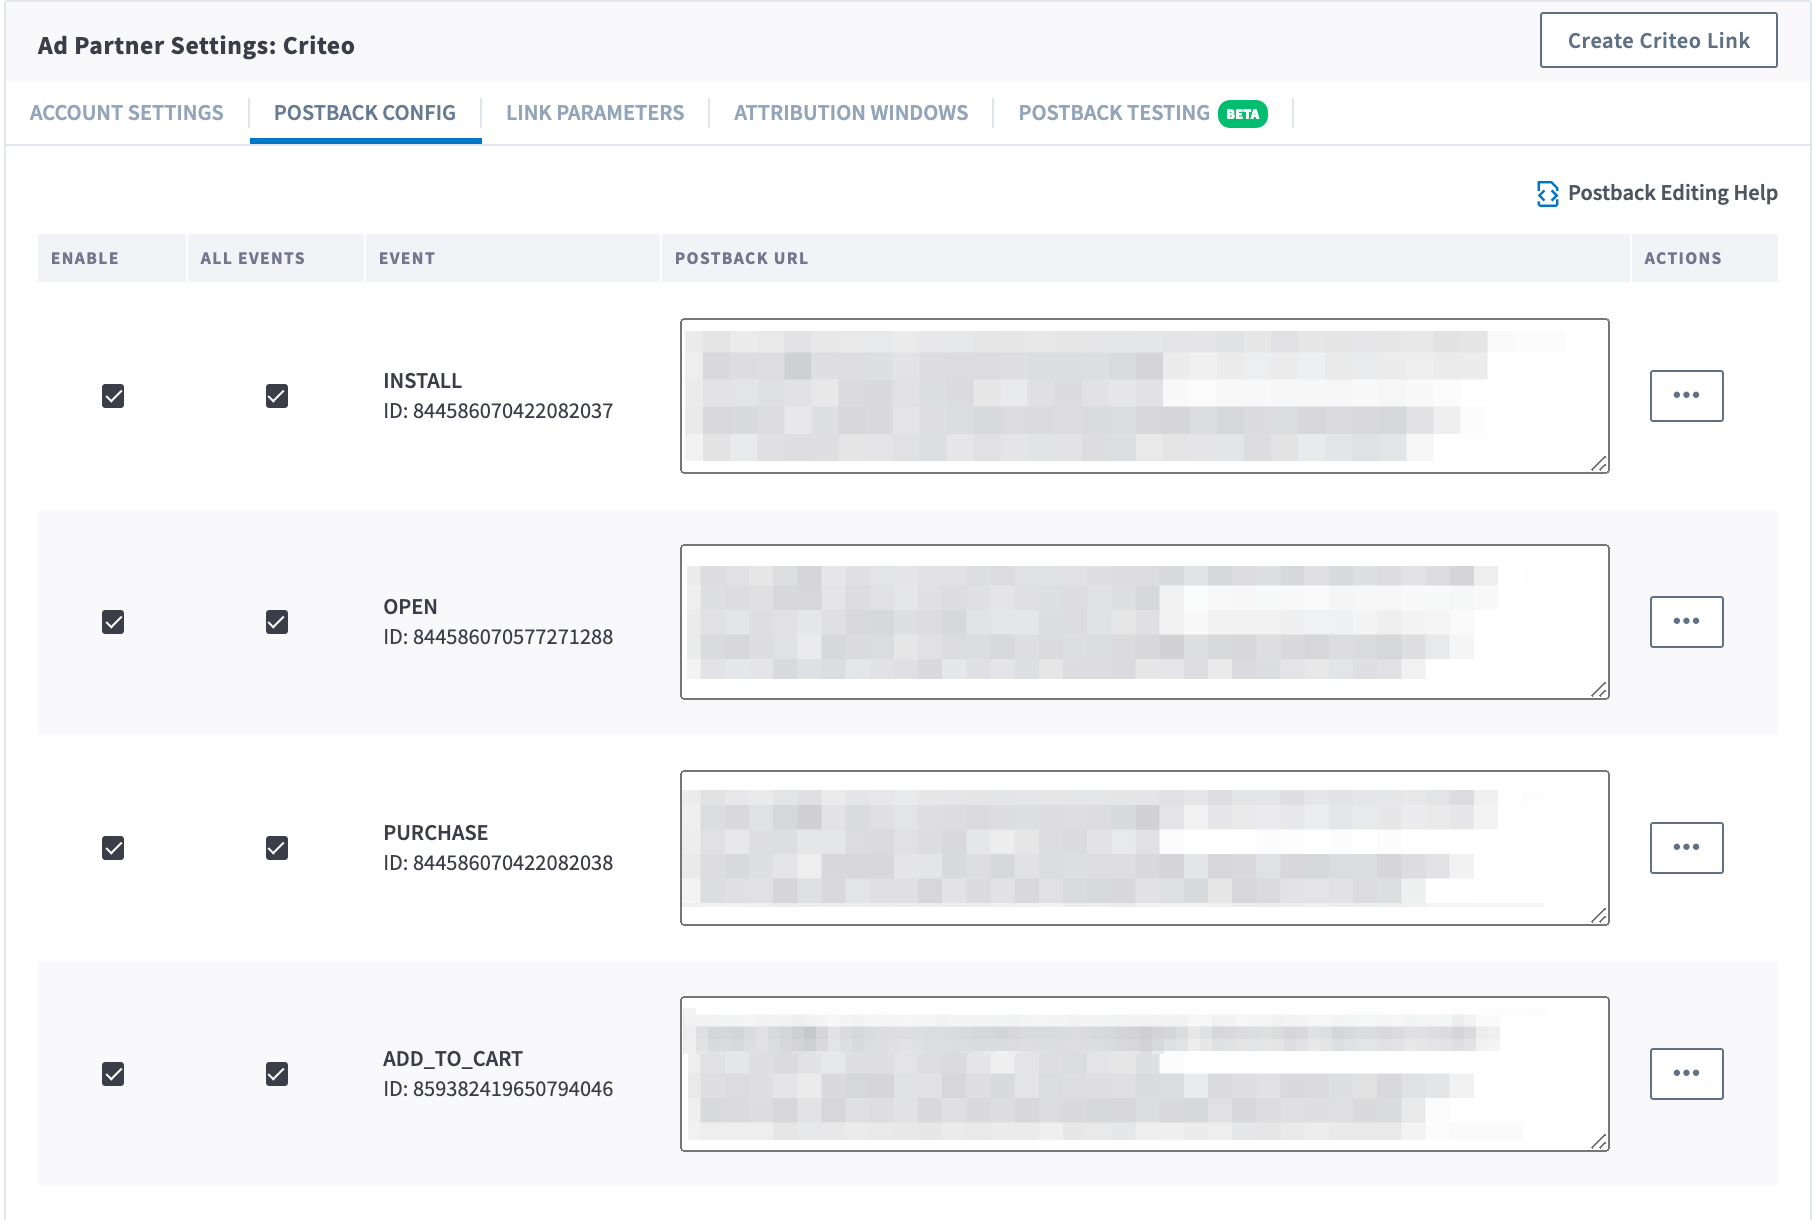
When Branch measures a conversion (install or other event), it determines which ad network or partner is responsible for generating the action, then attributes credit to the proper partner accordingly. Branch notifies the Ad partner of these events via postbacks which are turned on when you enable any Ads integrated partner.
Basic postbacks will automatically be activated for events like Install and Purchase when you enable your ad partner.
Branch’s postback system is highly customizable; you can set up postbacks for specific events, as well as specific subsections of events, filtered by link data, user data, or event properties.
You can then add additional postbacks, for example, if you wanted to add postbacks for custom events that are specific to your app like Account Created. You can also edit postbacks if there's additional data you really need to pass along to your ad partner.
Troubleshoot Postbacks
There may be times when you need to reset a partner's settings; i.e. when a partner updates their postback templates or when perhaps you've made a mistake during partner setup. Resetting a partner's settings allows you to re-enable the partner integration with the correct information to accurately measure and attribute conversion.
Note, by resetting your partner settings, this will:
- Disable the ad partner
- Clear out all of your saved credentials and postbacks that are already set up
- Return the ad partner to its basic configuration
4. Verify Integration Setup
View Link Parameters
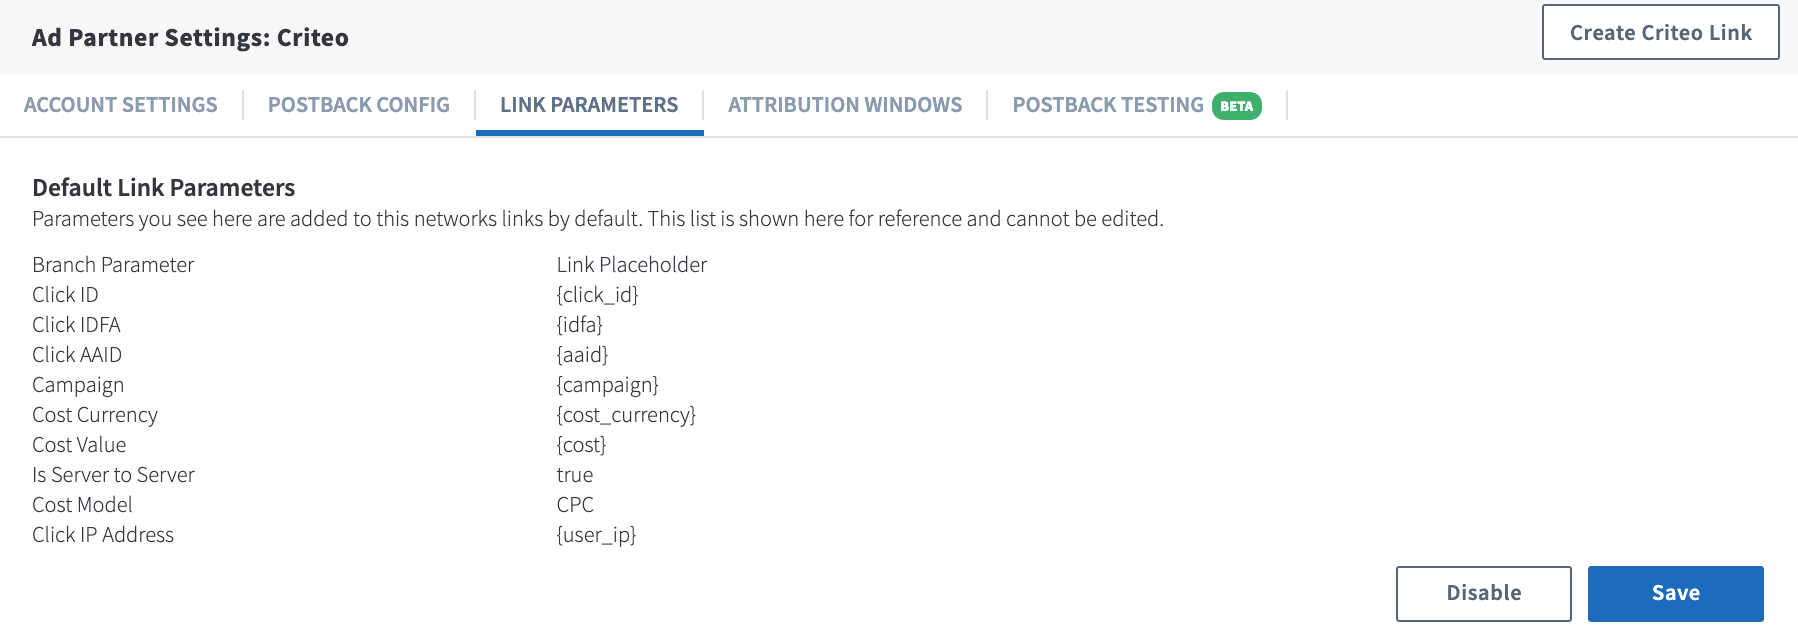
By default, Branch automatically appends partner-specific link parameters during the link creation process. When a user clicks on the link, Criteo provides the appropriate parameter values which Branch ingests and uses for attribution and reporting purposes.
Below are the link parameters that Branch automatically appends for this ad partner:
View Attribution Windows
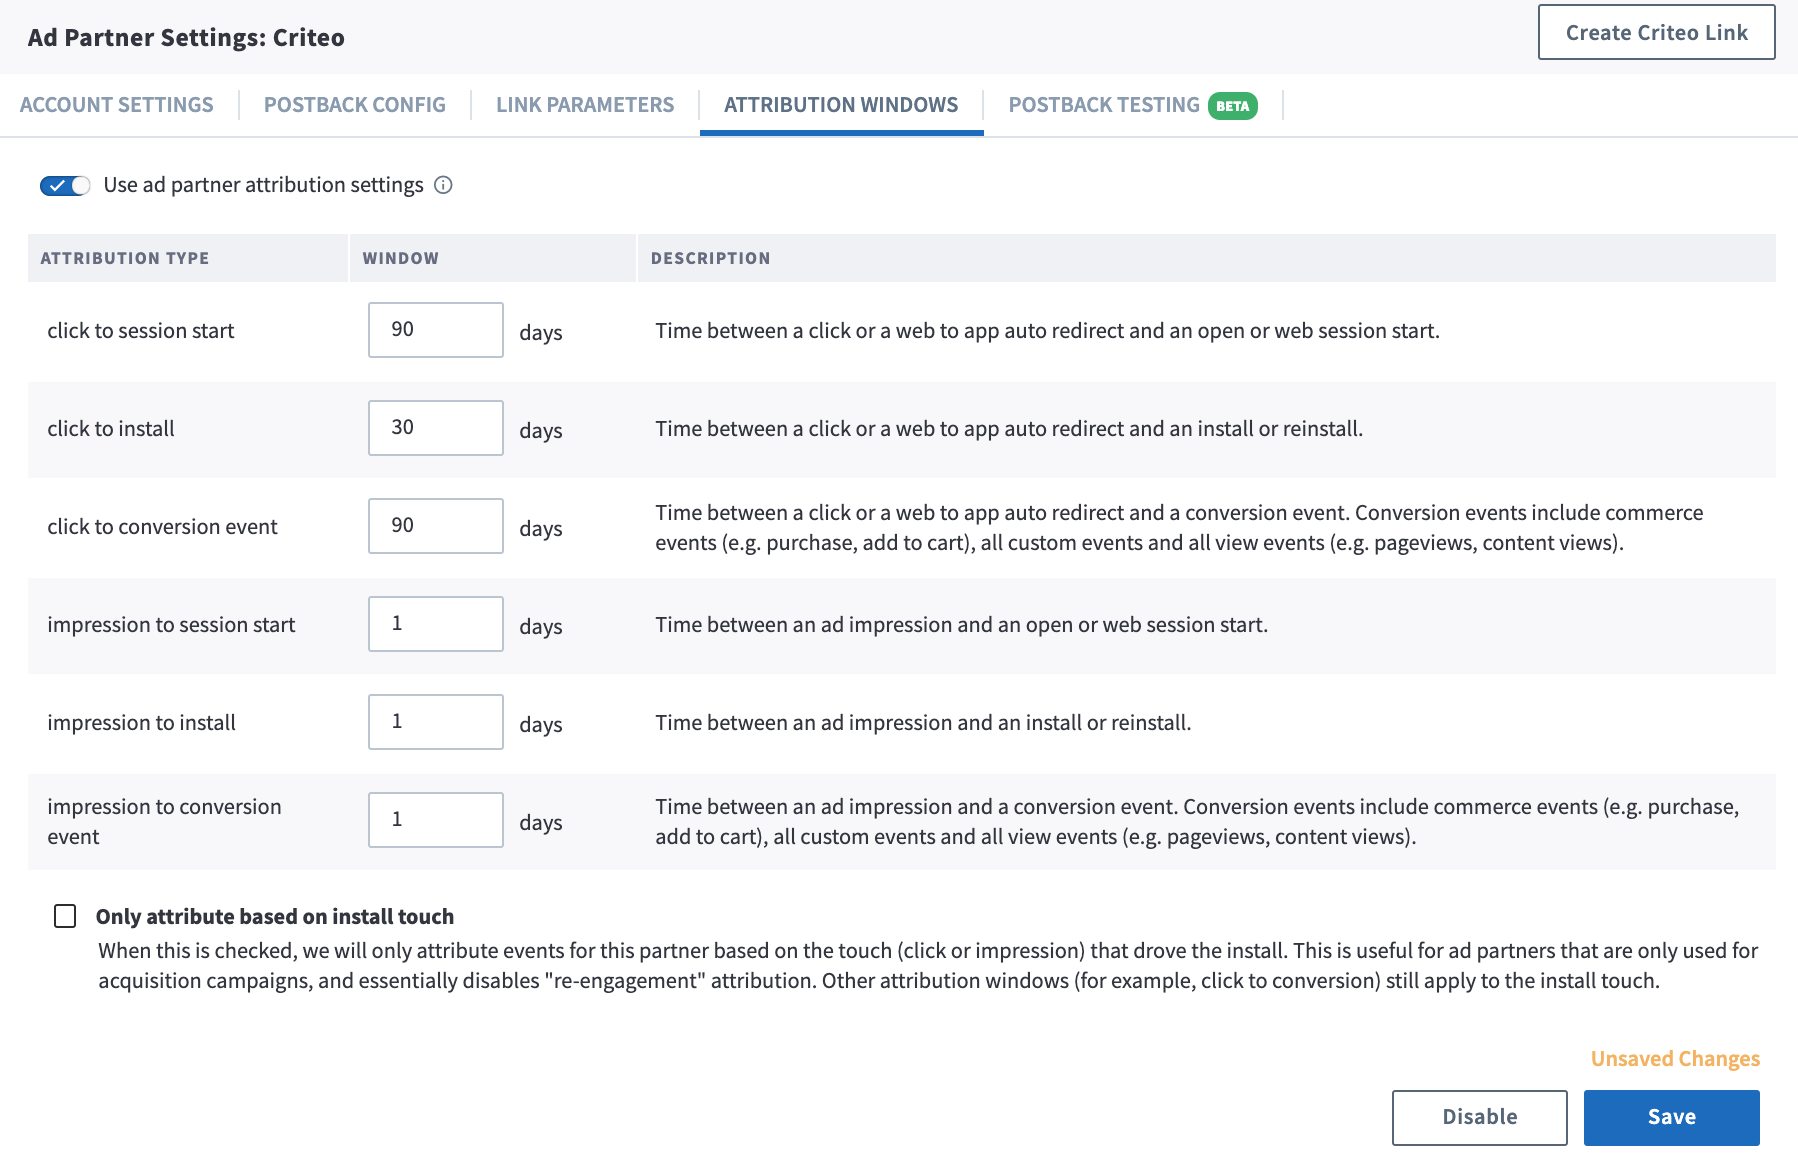
Branch employs Attribution Windows at both the app level and the ad partner level. When you enable Criteo, Branch uses the attribution windows you've selected at the app level.
However, you can choose to use the attribution windows provided specifically by Criteo. To do so, toggle the Use Ad Partner Attribution Windows to on. Please keep in mind that only conversions attributed to this ad partner will use these specific windows; otherwise, the app-level windows prevail.
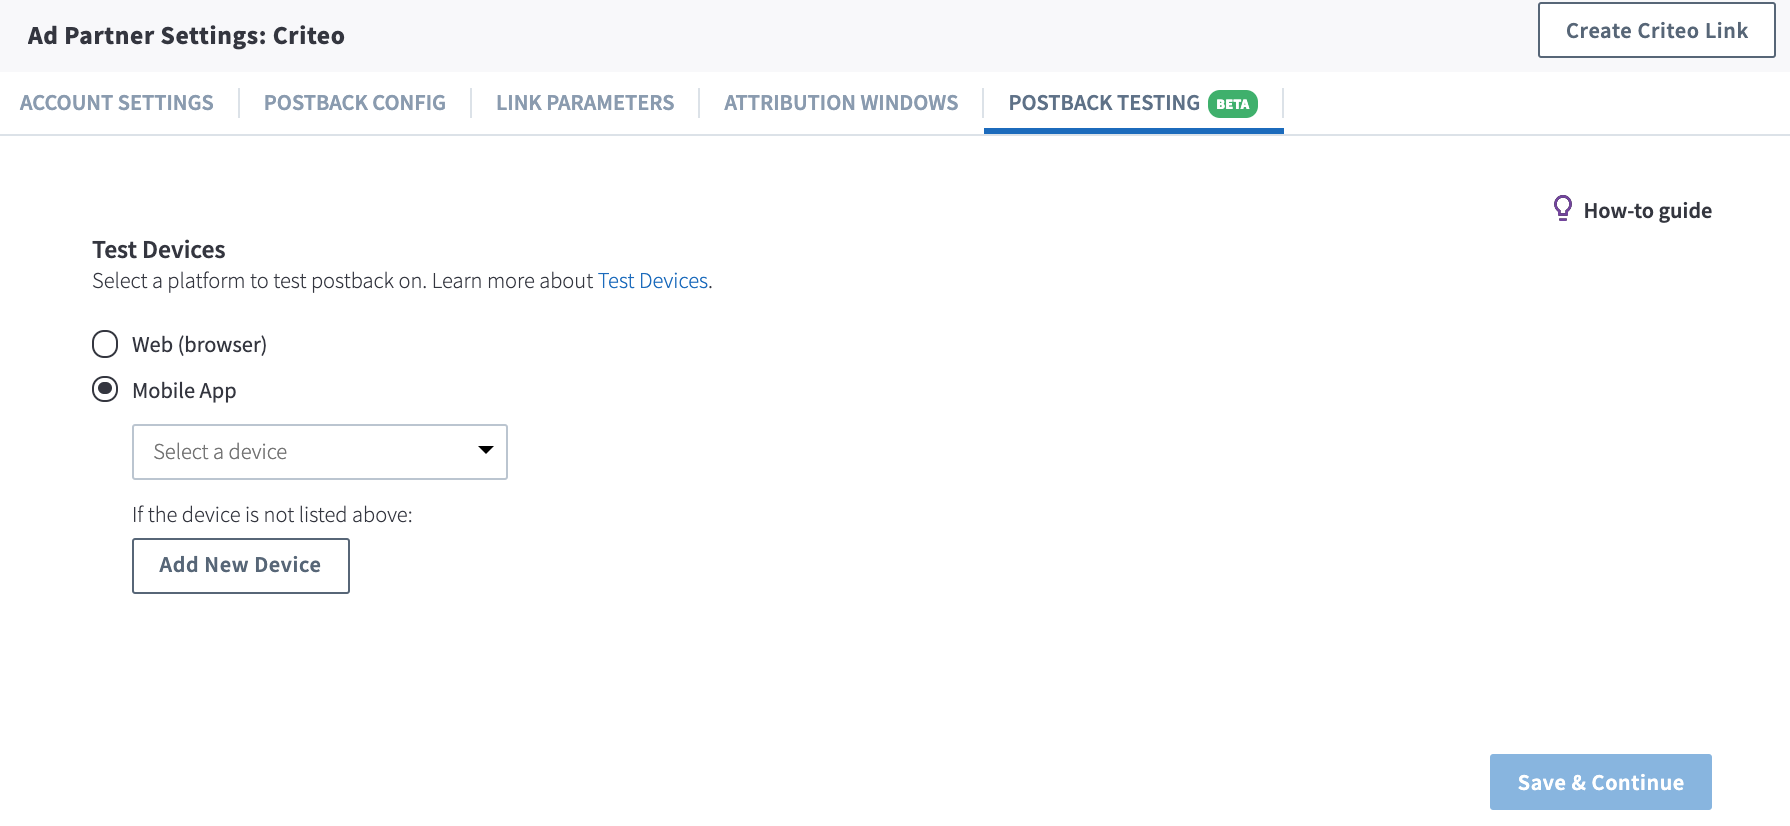
Test Postbacks
Testing your configuration is a very important step that we highly recommend you take the time to complete before going live with marketing campaigns.
Learn how to Test Postbacks.
5. Configure Attribution Windows
Navigate to the Attribution Windows tab of the ad partner settings to set windows by attribution type.
Recommended Attribution Windows
| Attribution Type | Window |
|---|---|
| click to session start | 90 days |
| click to install | 30 days |
| click to conversion event | 90 days |
| impression to session start | 1 day |
| impression to install | 1 day |
| impression to conversion event | 1 day |
6. Import Cost Data
To set up cost ingestion, see Cost Data via API Connection for non-SANs.
Catalog Deep Links - Recommended
Branch Links function as Universal Links or App Links, as well as deferred deep links, meaning better conversions on all Criteo campaigns.
The same Branch link will do measurement as well as deep linking, so there's no need for additional "tracking-only" links. In fact, if you're using Branch Links as your campaign links, you shouldn't use additional server to server tracking as well.
Criteo accepts a catalog with product details and links. We recommend replacing your web links with Branch Links.
Creating http deep links for your catalog
The easiest way to create deep links for your product feed is to create a "long link" for each product.
- Take your base domain, e.g. https://example.app.link
- Add your deep link data as query parameters. Be sure to URI encode each query parameter! e.g. https://example.app.link?product_id=123&category=shoes
- Add any fallback URLs for if the app isn't installed e.g. https://example.app.link?product_id=123&category=shoes&$fallback_url=https%3A%2F%2Fbranch.io%2Funiversal-ads%2F
- Finally, add this string, which contains the analytics parameters needed to categorize your data accurately. If you want to add more, go for it! %243p=a_criteo&~feature=paid%20advertising.
Your final link looks like this, and additional query parameters can be added.
https://example.app.link?product_id=123&category=shoes&$fallback_url=https%3A%2F%2Fbranch.io%2Funiversal-ads%2F&%243p=a_criteo&~feature=paid advertising
Creating URI scheme deep links for your catalog
Some types of Criteo campaign require URI scheme style deep linking instead of HTTP deep links. Fortunately, you can also create Branch compatible, URI scheme tracking links.
Start with your URI scheme example://
Append open?link_click_id=a-. For example: example://open?link_click_id=a-
Create a JSON blob of your link data, including "~feature":"paid advertising", "$3p":"a_criteo"
For example:
{"~feature":"paid advertising", "$3p":"a_criteo", "~campaign":"My Summer Campaign", "product_id":1234, "category":"shoes"}Static Campaign Deep Links
Just need a single link? It's easy to use the Branch dashboard to create a one-off link. The flow below provides examples of how to create links, but you'll want to consult with your Criteo Solutions Engineer to specify what you require.
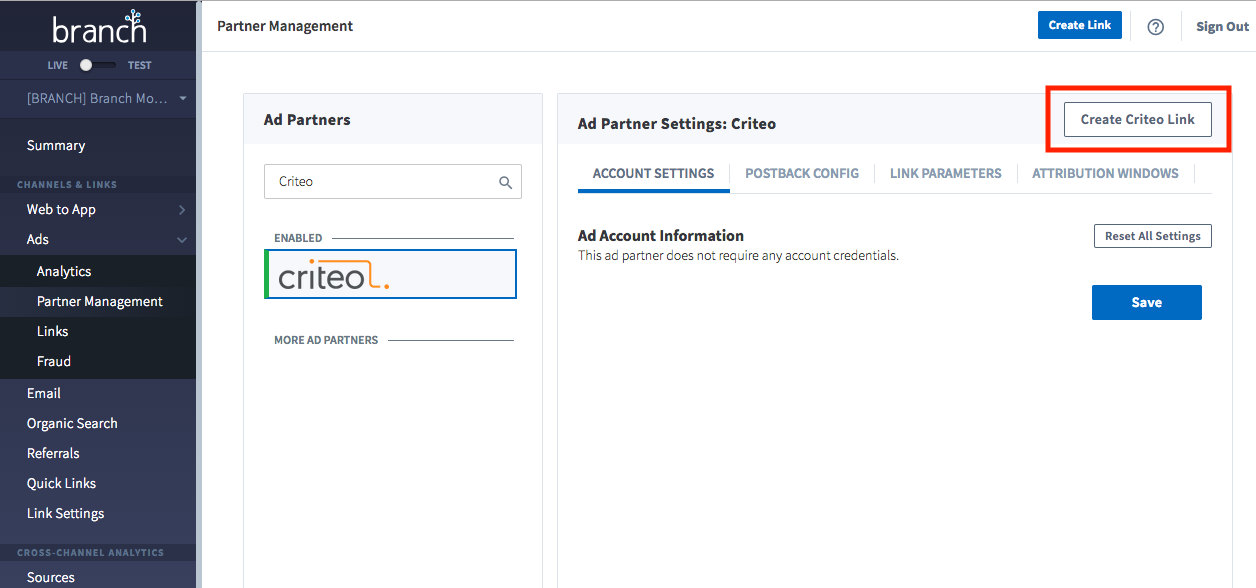
Click Create Ad Link in the top right-hand side of the Criteo Partner Manager UI.
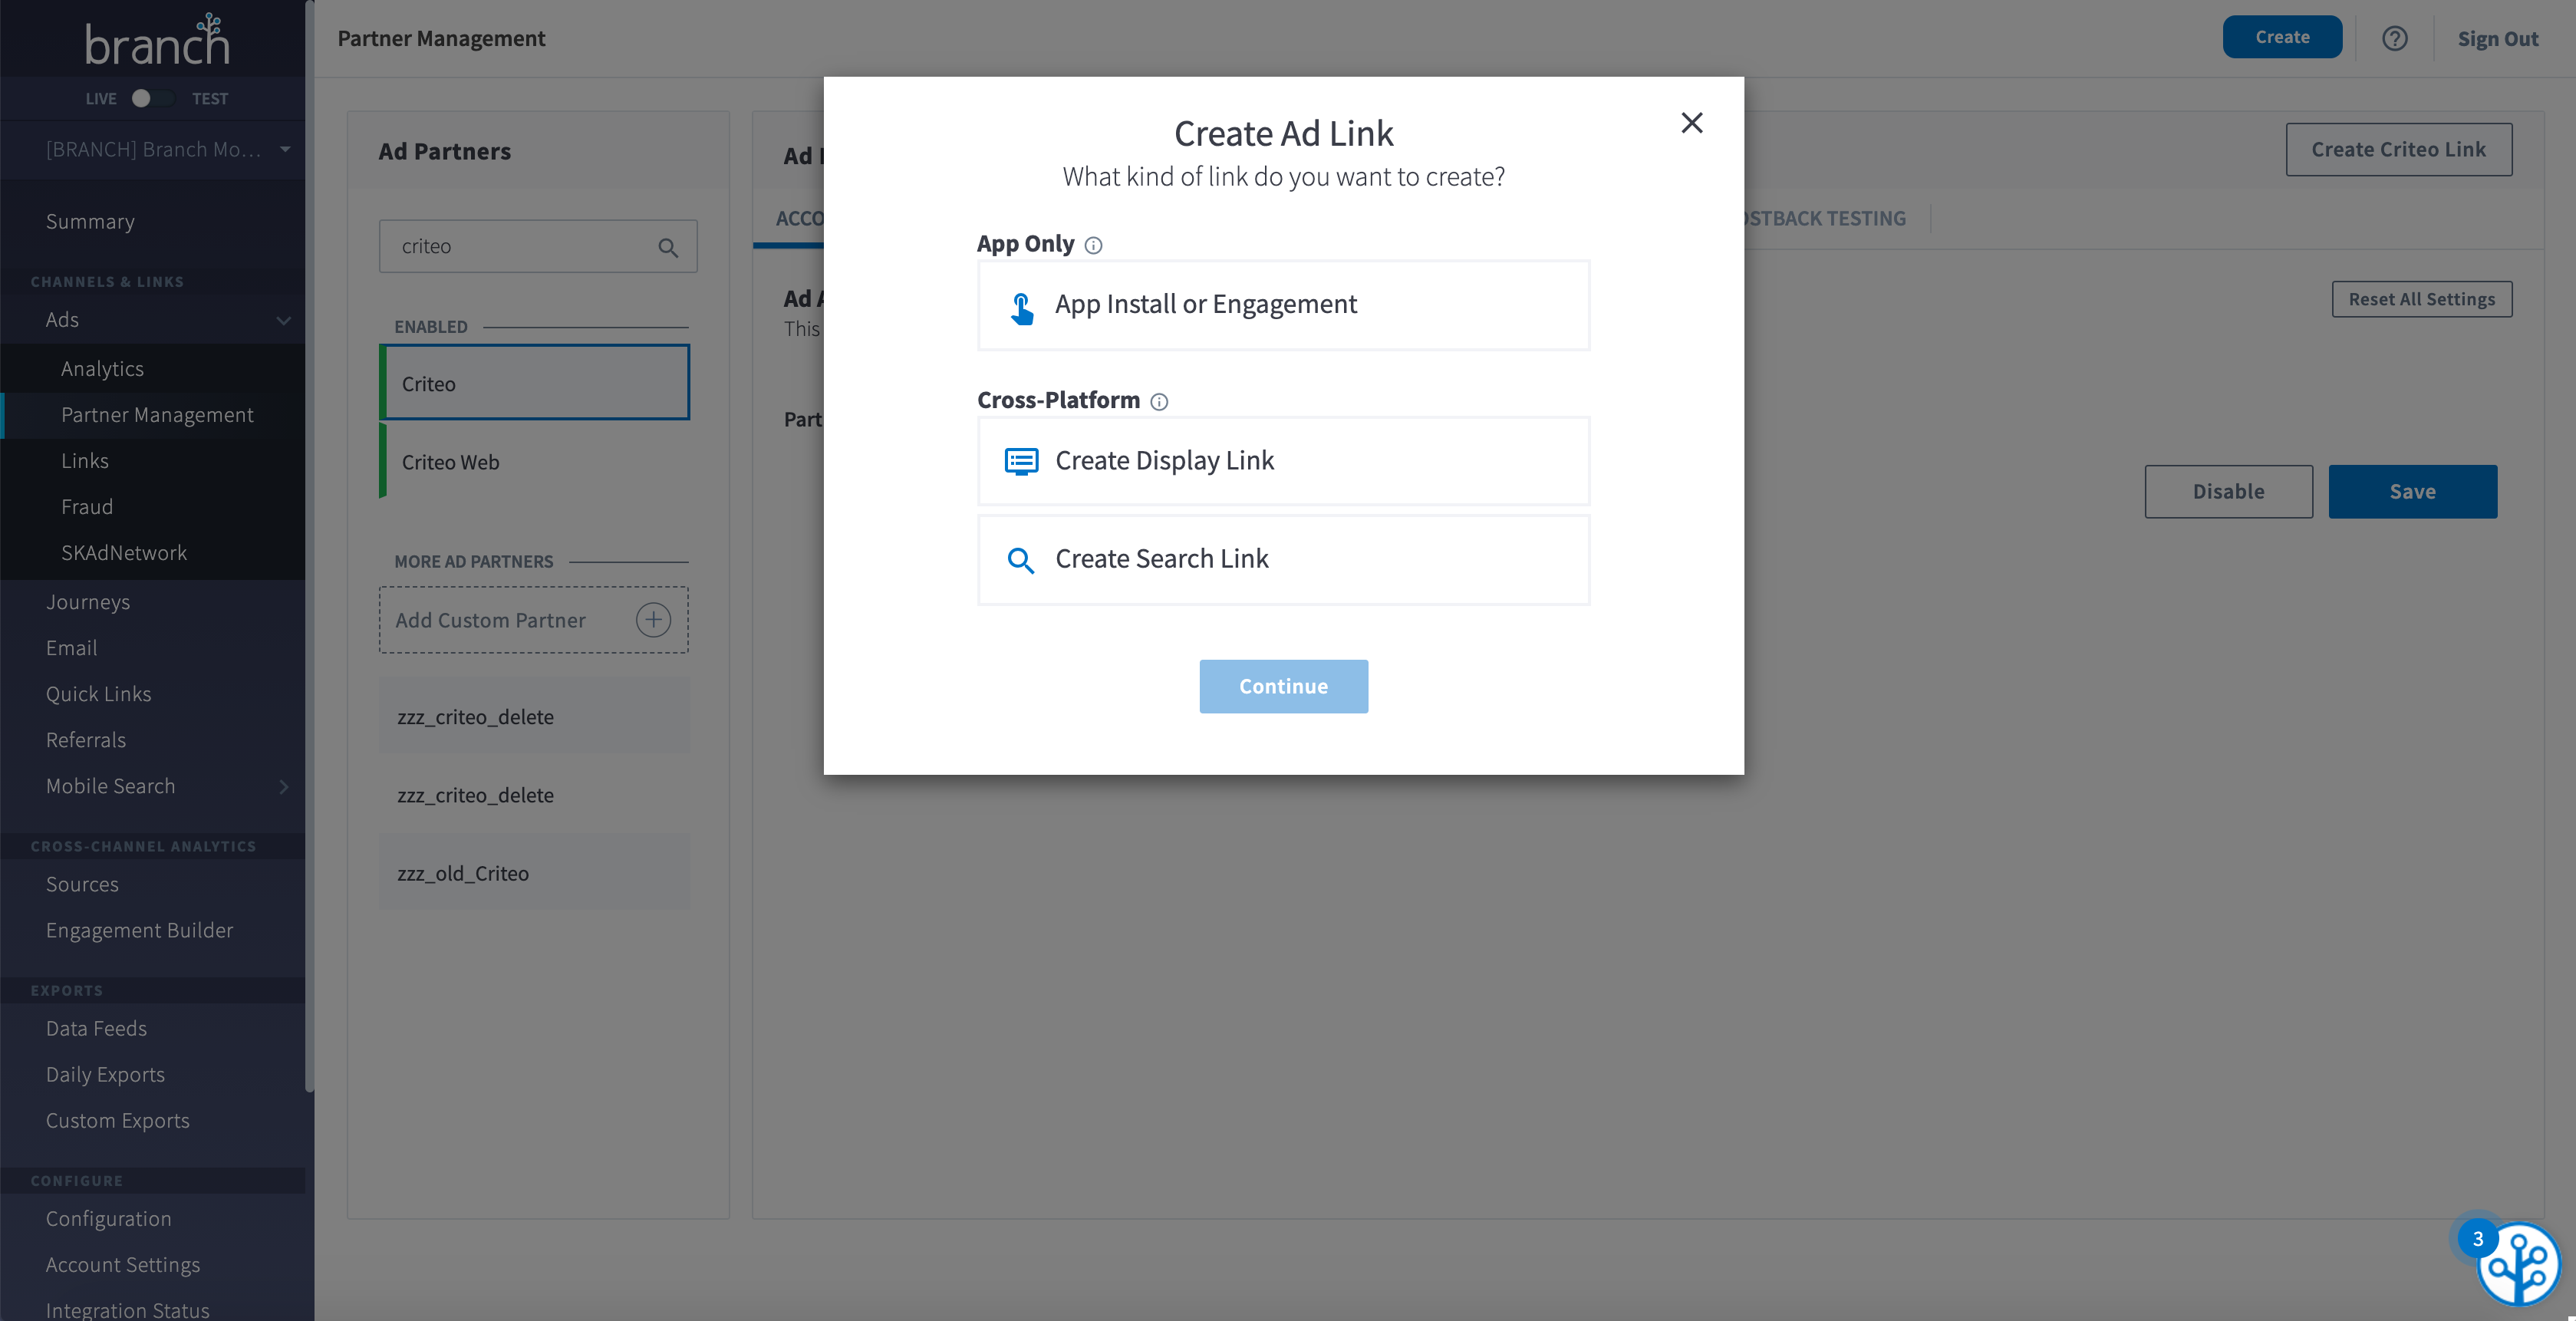
Select an ad format. For App Install or App Engagement campaigns you'll want to select the App Only format.
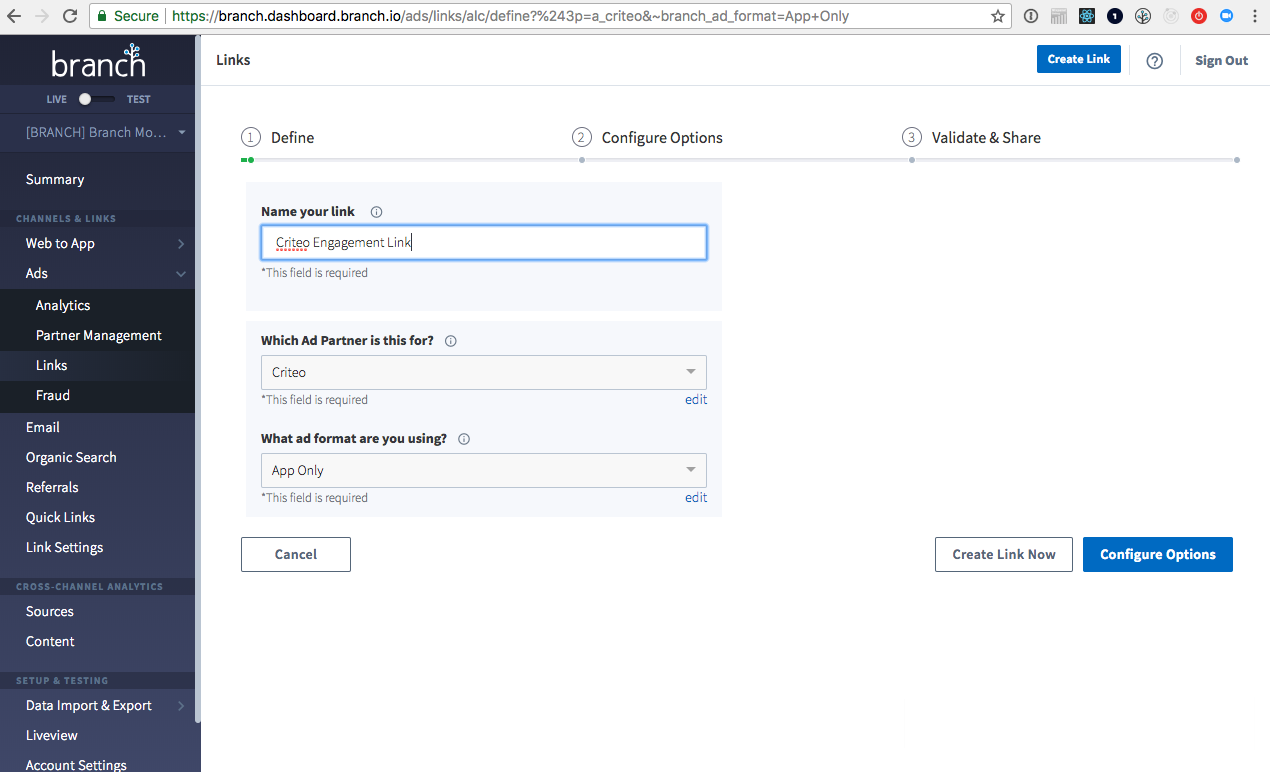
If you select a simple App Engagement link, you'll start with a name for it. Select something that will make it easy to find if you need it later. Your Ad Format and Ad Partner should be selected already, but feel free to choose one if they aren't. It's important that you select the right Ad Partner for analytics later on. Click Configure Options to continue.
Add deep link data and analytics tags.
- Deep Link Data is used to provide the app with product information, so the app can take customers to the right content.
- Analytics tags are important for later segmentation, so click the Analytics sub tab to add a Channel and Campaign value.
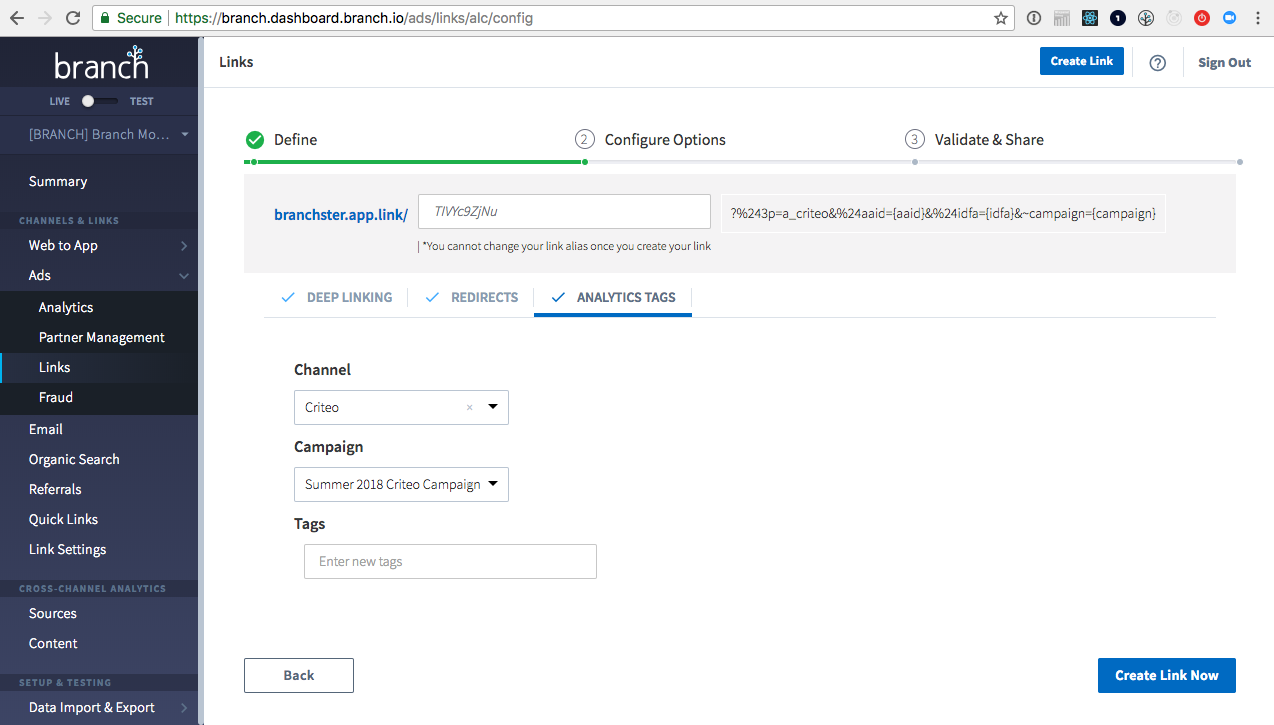
Click Create Link Now, and you have your tracking link! Take this link and give it to your Criteo Solutions Engineer as an example.
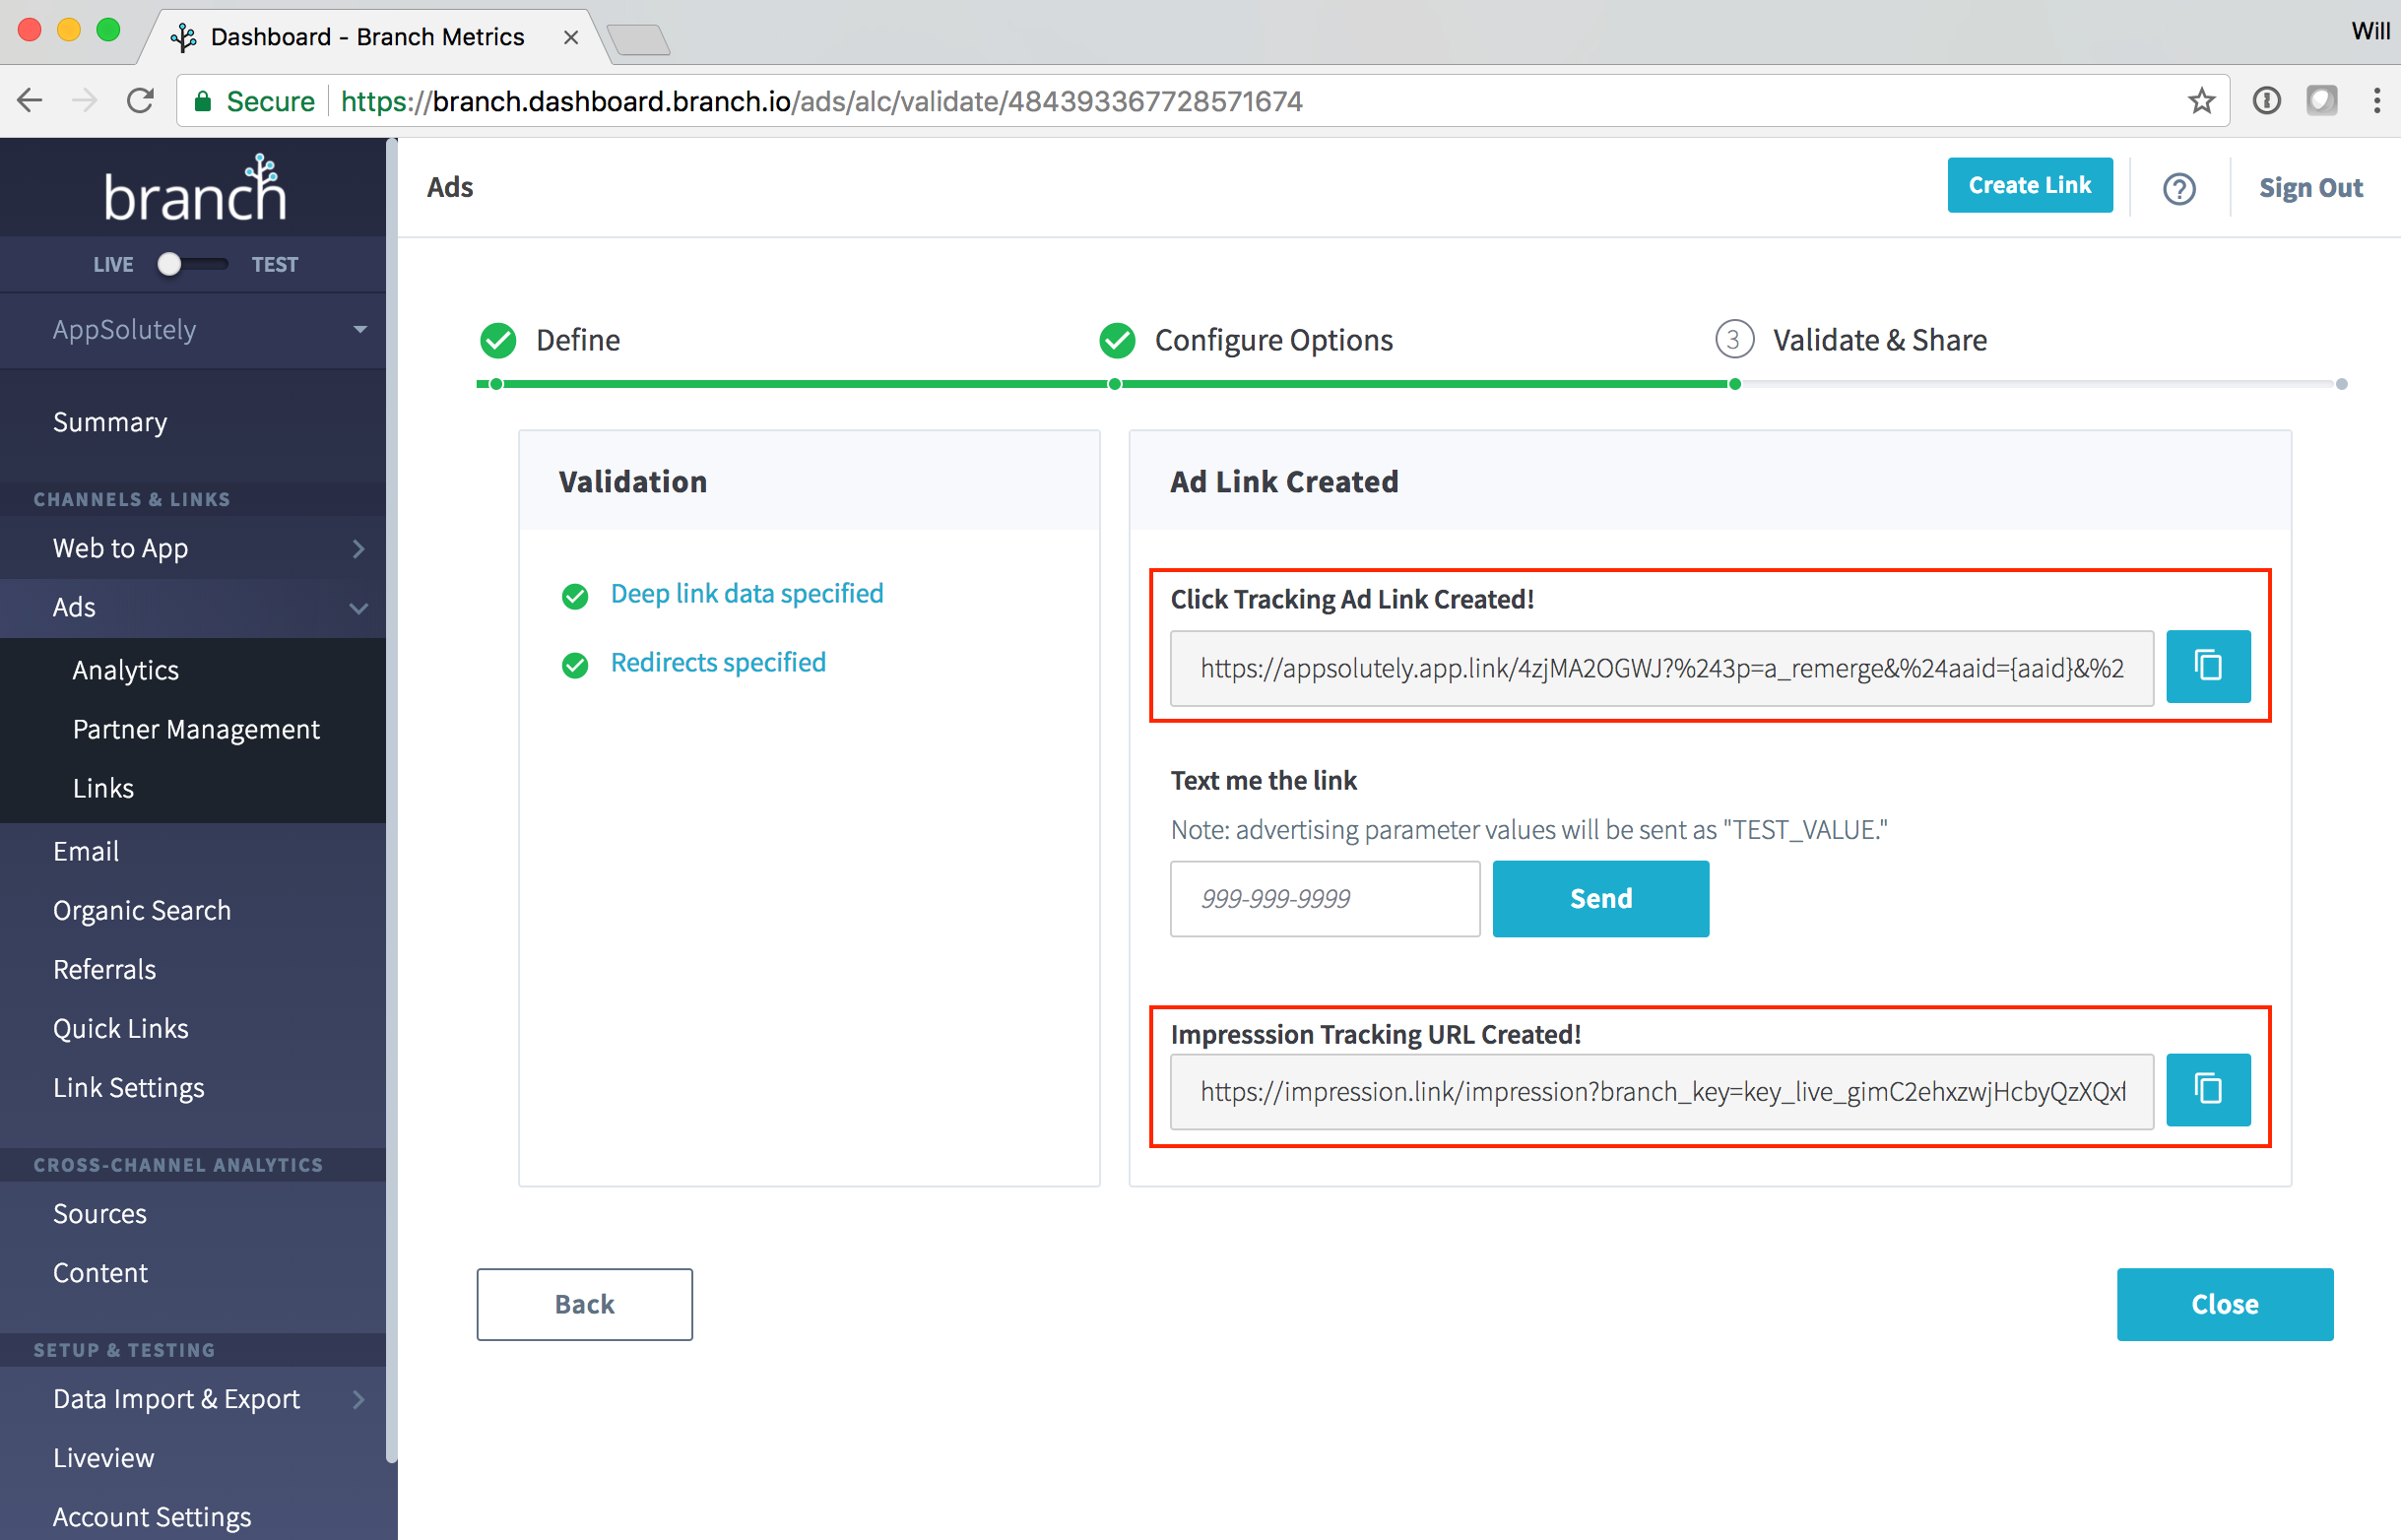
Server to Server Tracking Links
If you just need a server to server tracking link, you can use the same flow as above.
However, at the end, add the following:
&%24s2s=trueat the end of your link, so we know it’s a server to server link.- Device ID macro
&%24idfa=for iOS devices OR&%24aaid=for Android devices. - Device OS macro
%24os=for IOS or ANDROID. - Send IP client’s address via URL parameter or HTTP Header.
- IP Header to override the IP information on click. e.g.
x-ip-override: {IP ADDRESS}. - IP URL parameter
&device_ip={IP_Address}.
- IP Header to override the IP information on click. e.g.
Advanced Configurations
Adding Static Track Transaction
Static Track Transaction is a custom template that replaces the default PURCHASE (Track Transaction) template. You should see STATIC_TRACK_TRANSACTION as an event under the Postback Config in the Criteo Partner Manager UI. You can copy the postback template from STATIC_TRACK_TRANSACTION, and paste it into the PURCHASE postback, replacing the previous postback. Click Save at the bottom of the screen, and you're good to go!
Sending dates for Travel campaigns
Criteo can optimize campaigns based on travel search dates. To report travel search dates to Criteo, follow these steps:
- In your app, add custom metadata to your events with keys din and dout, and a date string in format 'YYYY-MM-DD' for the date of the inbound and outbound flight respectively.
- In the Branch dashboard, navigate to Postback Config within the Criteo entry of the Ads Partner Manager.
- Find the postback you want to edit, and add the following string in the relevant place. For VIEW_ITEM for example, it's another event in the events array.
{"event":"vs","din":<@json>${(custom_data.din)!}</@json>,"dout":<@json>${(custom_data.dout)!}</@json>}Sending hashed emails
Criteo accepts hashed emails from your ad campaigns. To send hashed emails, please follow the below logic.
- In your app, add custom metadata to your events with keys
md5_hashed_email, and a value of an MD5 hashed email address. Please do not send unhashed emails to Branch. - In the Branch dashboard, navigate to Postback Config within the Criteo entry of the Ads Partner Manager.
- Find the postback you want to edit, and add the following string in the relevant place. This will generally be as another event in the
"events"array. Please note that OPEN and INSTALL events do not support this parameter.
{"event":"setHashedEmail", "email":[<@json>${(custom_data.md5_hashed_email)!}</@json>]}Sending non-Branch deep links
Criteo requests all deep links (including non-Branch Links) to be sent to their servers upon app open. Branch doesn't provide this by default, so you'll need to update your SDK initialization to support this.
If you use any authentication or login libraries, please ensure you strip out all tokens, passwords, and other sensitive information before passing this information to Branch.
To pass the $criteo_deep_link_url to Branch, add this code to your AppDelegate or the relevant Activity/Application. You may already have some of this code inside your files, so simply copy the relevant Branch pieces.
iOS
- (BOOL)application:(UIApplication *)application
continueUserActivity:(NSUserActivity *)userActivity
 restorationHandler:(void (^)(NSArray *))restorationHandler {

    // NOTE: you should sanitize and ensure no sensitive is passed from
    // userActivity.webpageURL.absolutelString.

    [[Branch getInstance] setRequestMetadataKey:@"$criteo_deep_link_url" value:userActivity.webpageURL.absoluteString];
    [[Branch getInstance] continueUserActivity:userActivity];

    // Process non-Branch userActivities here...
    return YES;
}

- (BOOL)application:(UIApplication *)application
            openURL:(NSURL *)url
  sourceApplication:(NSString *)sourceApplication
         annotation:(id)annotation {

    // NOTE: you should sanitize and ensure no sensitive is passed from
    // url.absolutelString.

    [[Branch getInstance] setRequestMetadataKey:@"$criteo_deep_link_url" value:url.absoluteString];
    // Required. Returns YES if Branch link, else returns NO
    [[Branch getInstance]
        application:application
            openURL:url
  sourceApplication:sourceApplication
         annotation:annotation];

    // Process non-Branch URIs here...
    return YES;
}
Android
Before you initialize in your Application onCreate or Deep Link Activity's onStart.
You will want to persist the value from onCreate, or onNewIntent. mIntentData is a String field defined in the activity.
@Override
protected void onCreate() {
    // NOTE: be sure to remove sensitive / PII data from the intent data coming in.
    mIntentData = this.getIntent().getData().toString();
    // other operations below
}

@Override
public void onNewIntent(Intent intent) {
    // NOTE: be sure to remove sensitive / PII data from the intent data coming in.
    mIntentData = this.getIntent().getData().toString();
    // other operations below
}

Branch.getInstance().setRequestMetadata("$criteo_deep_link_url", mIntentData);

...

Branch.sessionBuilder(this)...init();
Identifying users with setIdentity
Branch allows you to identify your users and will send those user identities to Criteo.
The method used to identify users is called setIdentity, and the value you set is called the developer_identity. Set this upon a user login event in your app, and Branch will use it for all subsequent events attributed to that user.
Do not send emails or PII with setIdentity
To respect user privacy, please do not use names, emails, or other identifiable information as your developer identity.
Branch and Criteo Event Mapping
Branch supports the full suite of Criteo events. Please talk to your Criteo Solutions Engineer to ensure you've identified the right events for your app.
Important implementation details
- For events with Branch Event Categorization of "Custom Event," you must name the event as laid out in the below table.
- For events with Additional Metadata Keys, you must set the Custom Data on the event with a specific key so the postback is configured correctly for you.
For example, for "UI_STATUS" the code snippet looks like this:
iOS
BranchEvent *event     = [BranchEvent customEventWithName:@"UI_STATUS"];
event.customData       = (NSMutableDictionary*) @{
  "ui_status": "subscriber"
  };
event.logEvent() // Log the event.
Android
new BranchEvent("UI_STATUS")
        .addCustomDataProperty("ui_status", "subscriber")
.logEvent(MainActivity.this);| Branch Event Name | Criteo Name | Branch Event Categorization | Additional Metadata Keys |
|---|---|---|---|
| OPEN | View Home & appDeeplink | SDK Default | $criteo_deep_link_url |
| INSTALL | Install | SDK Default | None |
| VIEW_ITEMS | View Listing | Content Event | None |
| VIEW_ITEM | View Product | Content Event | None |
| VIEW_CART | View Basket | Commerce Event | None |
| PURCHASE | Track Transaction | Commerce Event | None |
| PURCHASE* | Static Track Transaction | Commerce Event | None |
| ACHIEVE_LEVEL | UI Level | User Lifecycle Event | ui_level |
| UNLOCK_ACHIEVEMENT | UI Achievement | User Lifecycle Event | ui_achievement |
| COMPLETE_REGISTRATION | Registration | User Lifecycle Event | None |
| COMPLETE_TUTORIAL | Tutorial Finished | User Lifecycle Event | None |
| UI_STATUS | UI Status | Custom Event | ui_status |
| UI_LOGIN | UI Login | Custom Event | None |
| SUBSCRIPTION | Subscription | Custom Event | None |
| LOW_PRIORITY | Low Priority | Custom Event | None |
| HIGH_PRIORITY | High Priority | Custom Event | None |
| ABANDONED_BASKET | Abandoned Basket | Custom Event | None |
The Static Track Transaction Postback is available as a custom version of the PURCHASE postback. Please see Advanced Configuration for setup.