
Overview
Branch Links can be used together with Meta Traffic and Conversion ads, allowing you to track engagement with your advertisements and ad-driven installs which deep link new users directly to content the first time they open your app.
Note: This documentation applies for Ad placements across Facebook and the Audience Network.
This documentation supports the following Meta ad campaign types:
| Meta campaign Category | Campaign Type/Objective | Branch Ad Format |
|---|---|---|
| Consideration | Traffic | Cross-platform Display |
| Conversion | Conversions | Cross-platform Display |
Meta campaign Advert Format Support Table
| Meta campaign Type | Photo | Video | Carousel | Slideshow | Collection | Dynamic | Canvas |
|---|---|---|---|---|---|---|---|
| Traffic | ✔︎ | ✔︎ | ✔︎ | ✔︎ | ✔︎ | ✔︎ | ✔︎ |
| Conversion | ✔︎ | ✔︎ | ✔︎ | ✔︎ | ✔︎ |
Meta campaign Types
Looking for other Meta ad campaign types? Please check out our Meta Ads Overview guide.
Setup
Prerequisites
To track installs from Meta Ads you should integrate the Branch SDK into your app.
To use Branch Links in Meta App Install Ads ensure you have:
- URI schemes configured on iOS
- URI schemes configured on Android
- iOS App Store ID set
- Android Package Name set
- Social Media Settings filled out (i.e. OG tags at the bottom of Link Settings)
If you want to deep link from your ads directly to content, you should configure deep link routing.
Ads is a premium product priced on Monthly Active Users. Sign up for the Ads product to enable this functionality.
Enable Meta Ads as an Ad Partner (for measurement)
Enable Meta Ads as an Ad Partner
Completing this section -- Enable Meta Ads as an Ad Partner -- will result in Branch sending app events to Meta in order to attribute them back to ad campaigns. This does not enable deep linking for the ad. Further work below is required for deep linking.
If you haven't enabled Meta Ads as an Ad Partner on the Branch dashboard follow this section to do so. Advanced options for sending events can be found here.
- Navigate to the Partner Management tab.
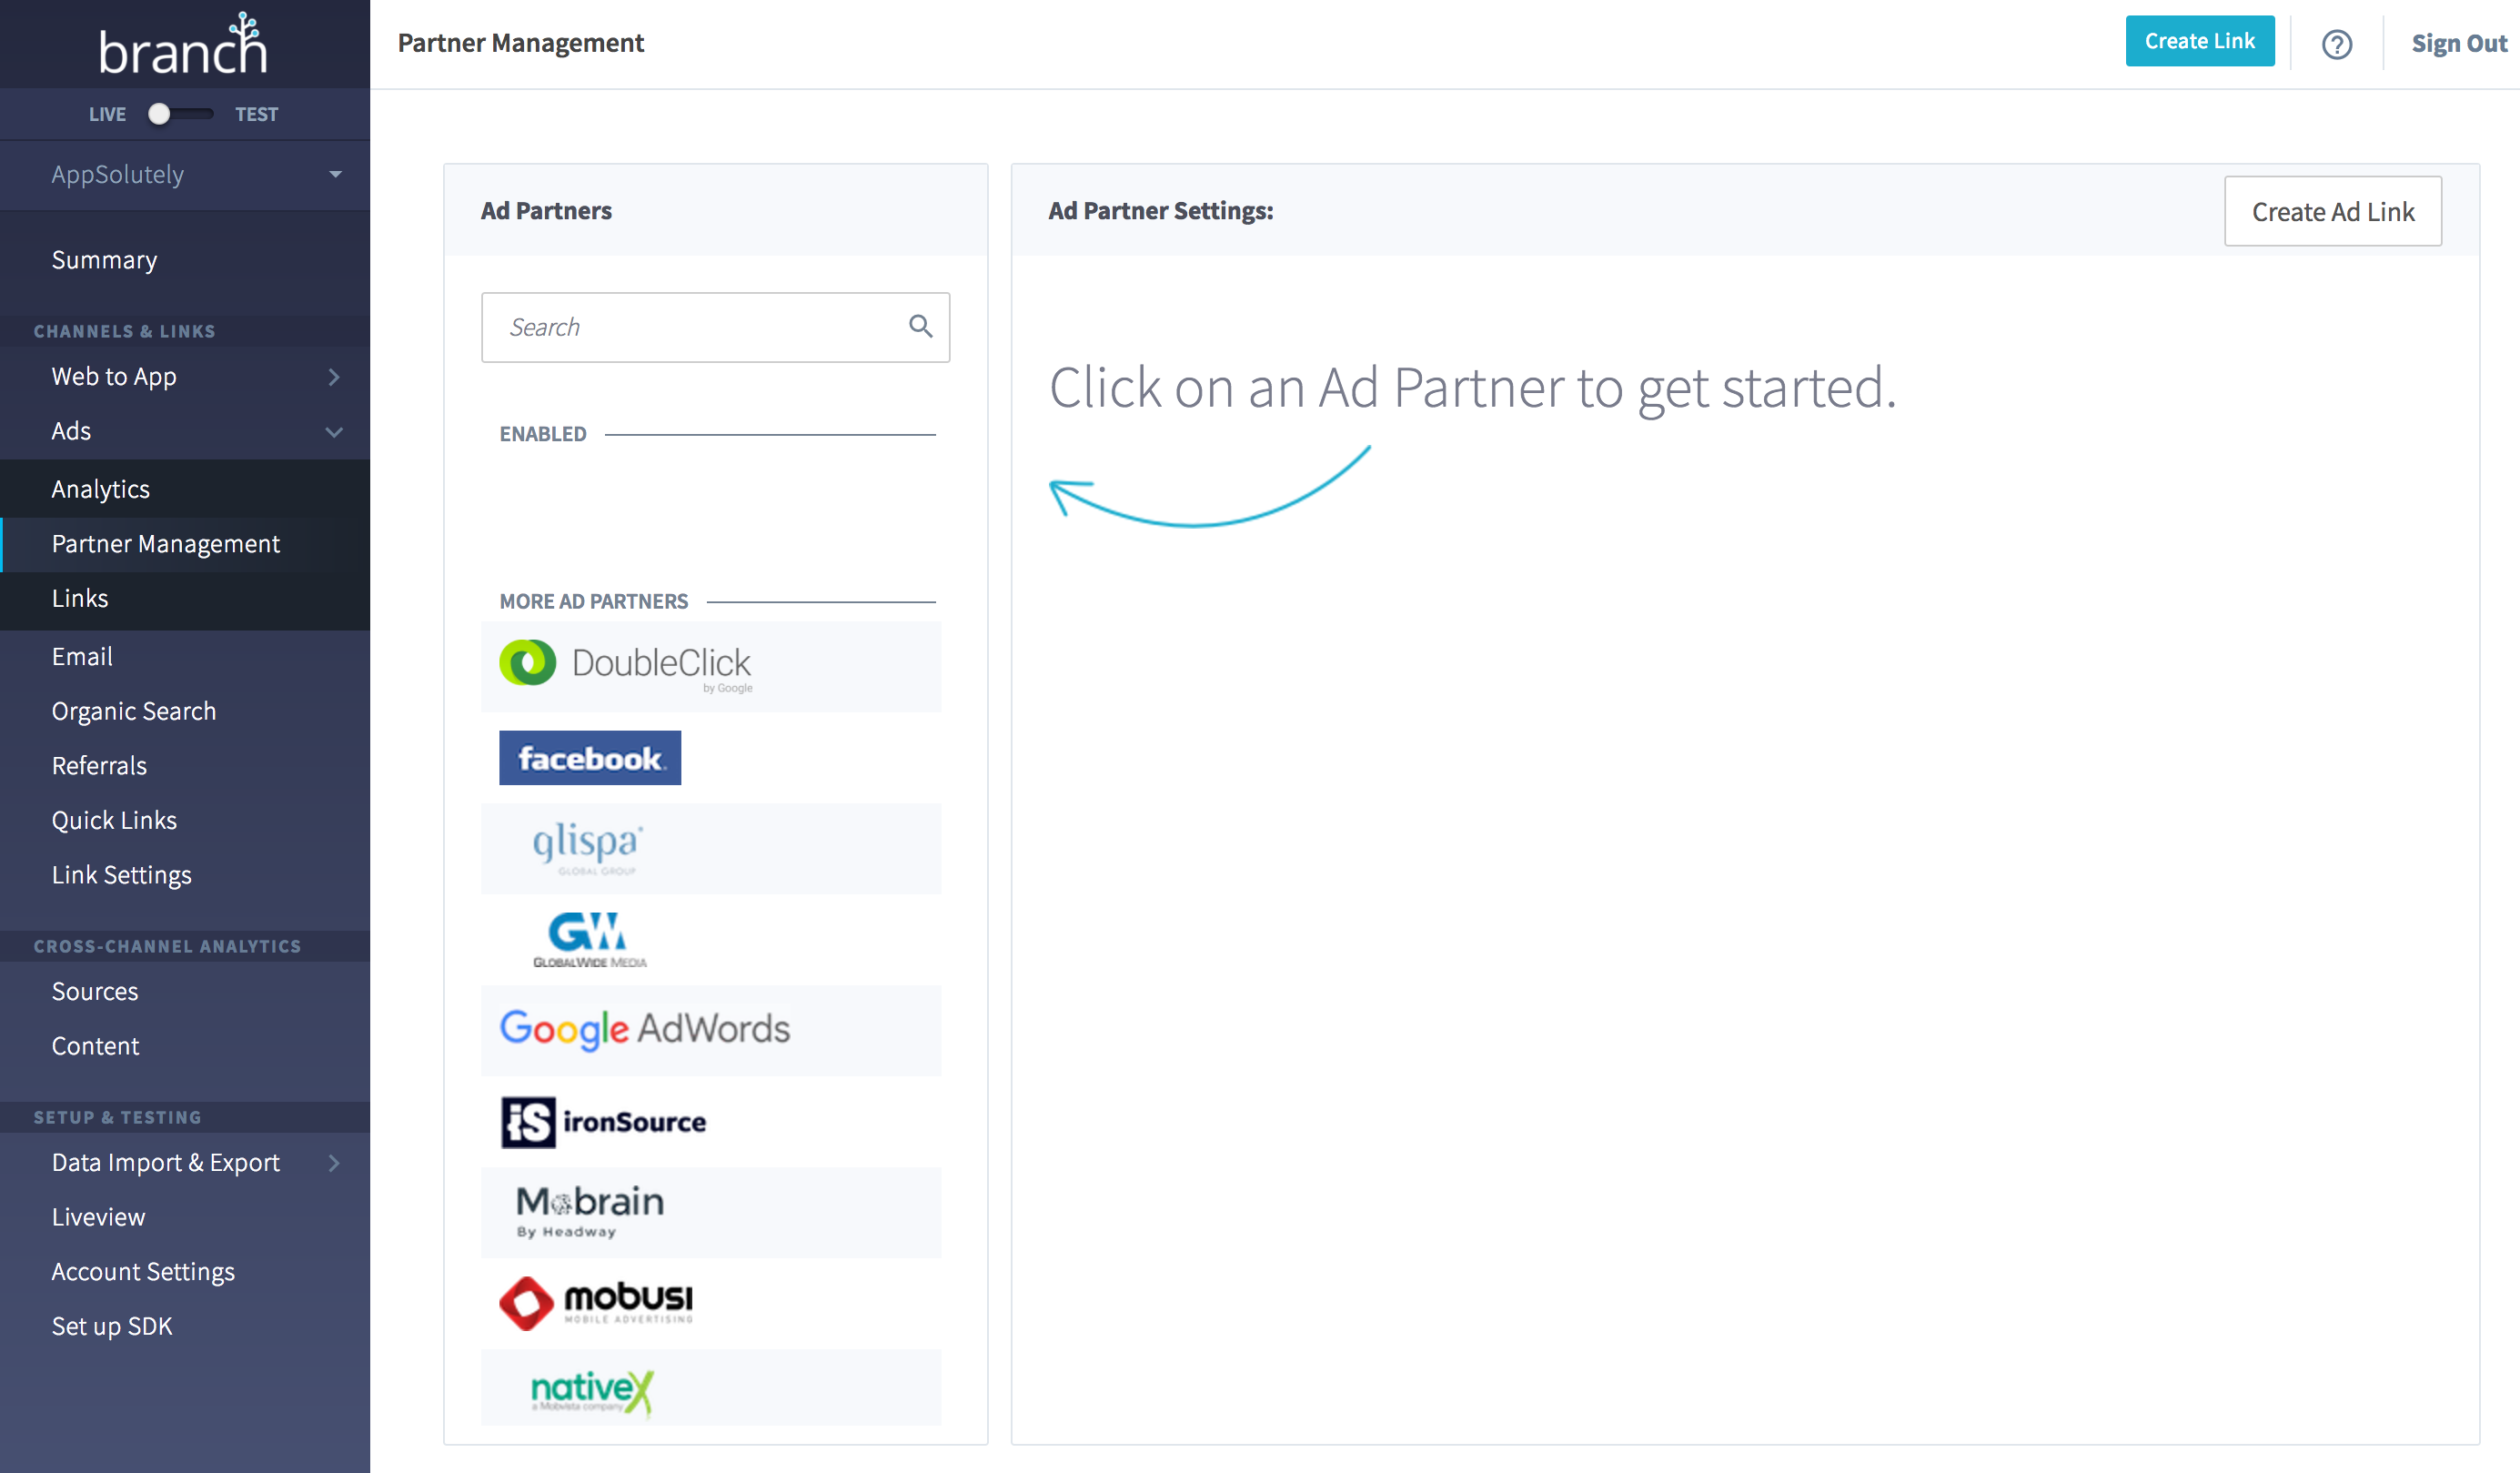
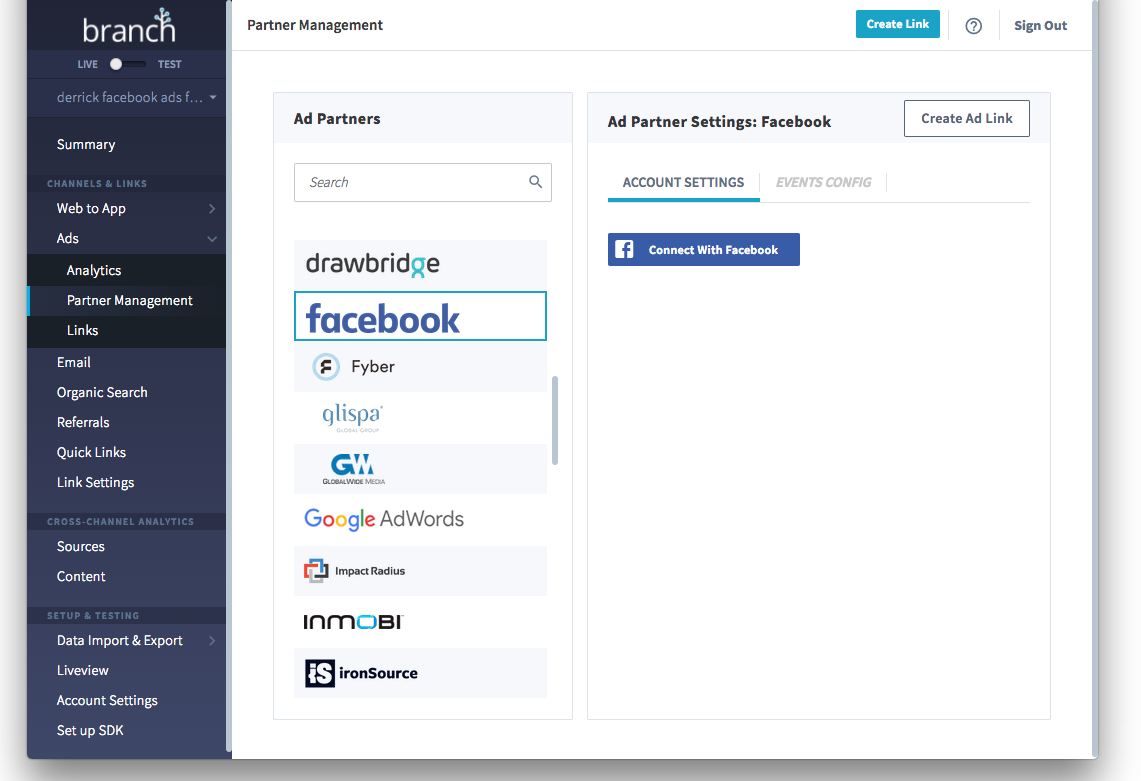
- Search for Facebook.
- Click Connect With Facebook
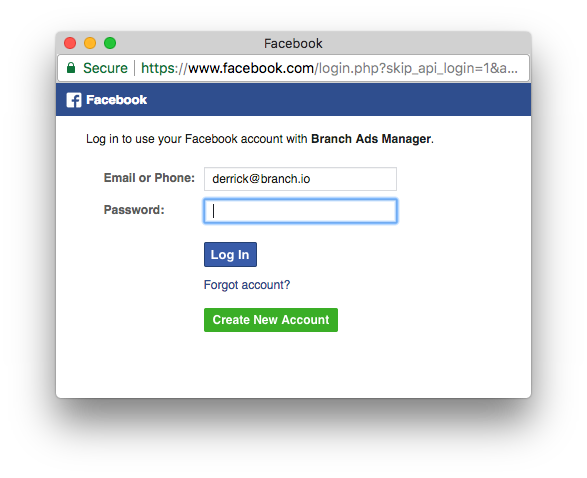
- Log in to Facebook if you are not logged in
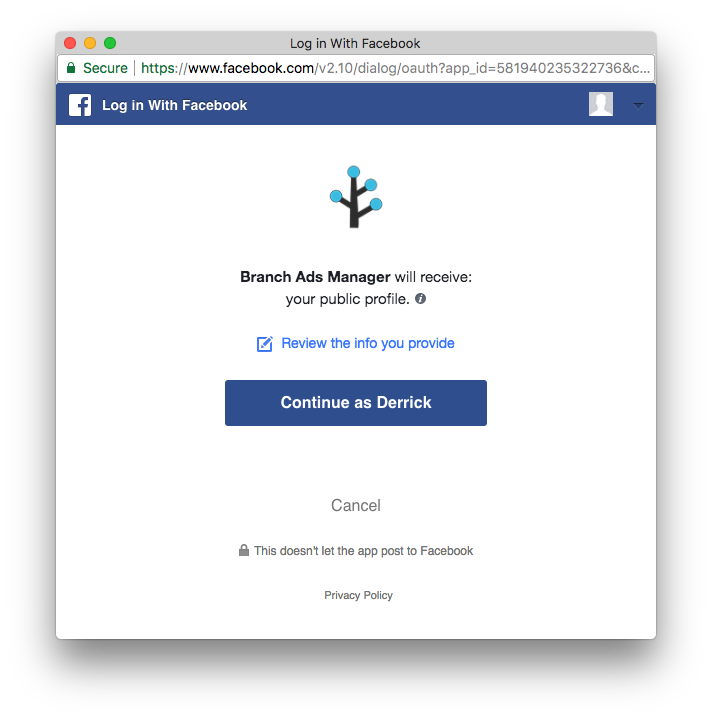
- Confirm that Branch can receive your public profile
- Confirm that Branch can have permissions
ads_read
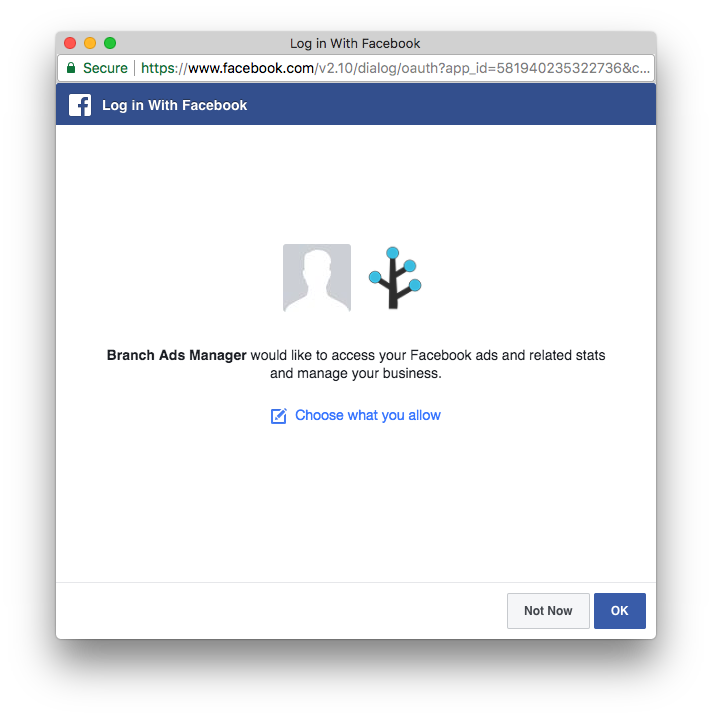
ads_read is used to surface impressions and clicks on the Branch Dashboard.
- Select the ad accounts for which you want to run app install ads or app engagement ads
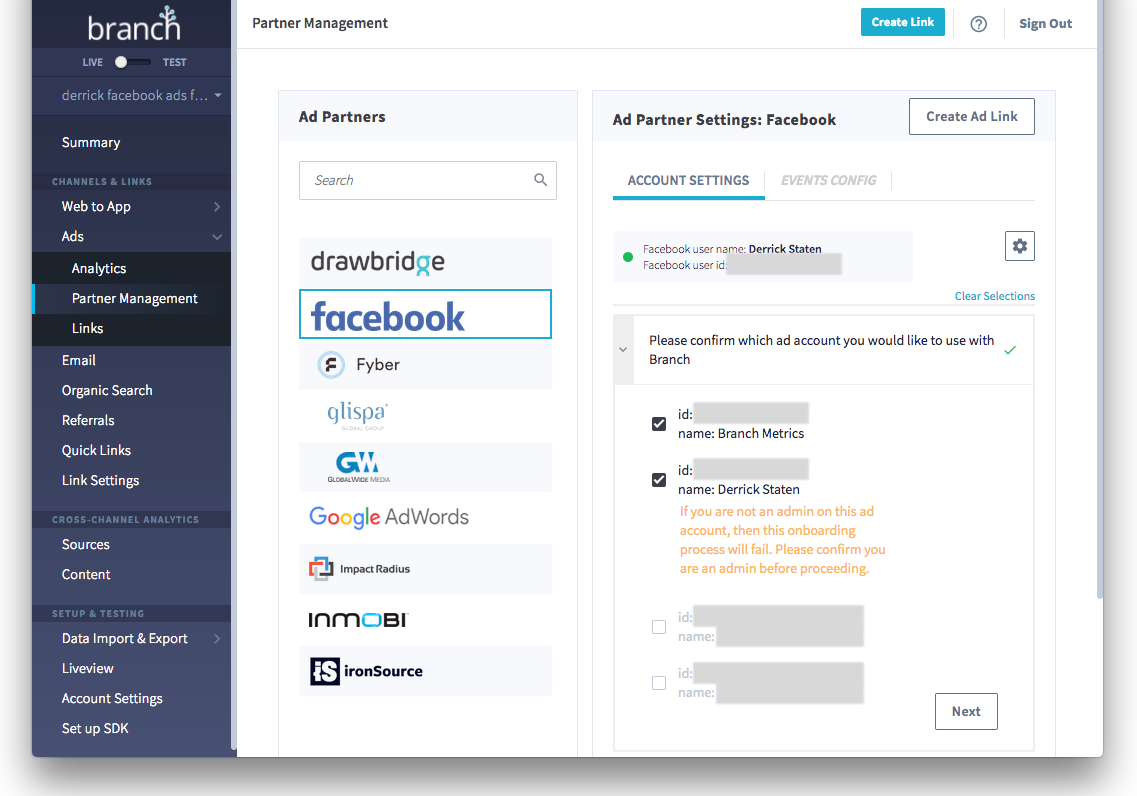
Ad Account FAQ
If you are having trouble finding or selecting the ad account(s) for which you want to run ads, please visit our FAQ.
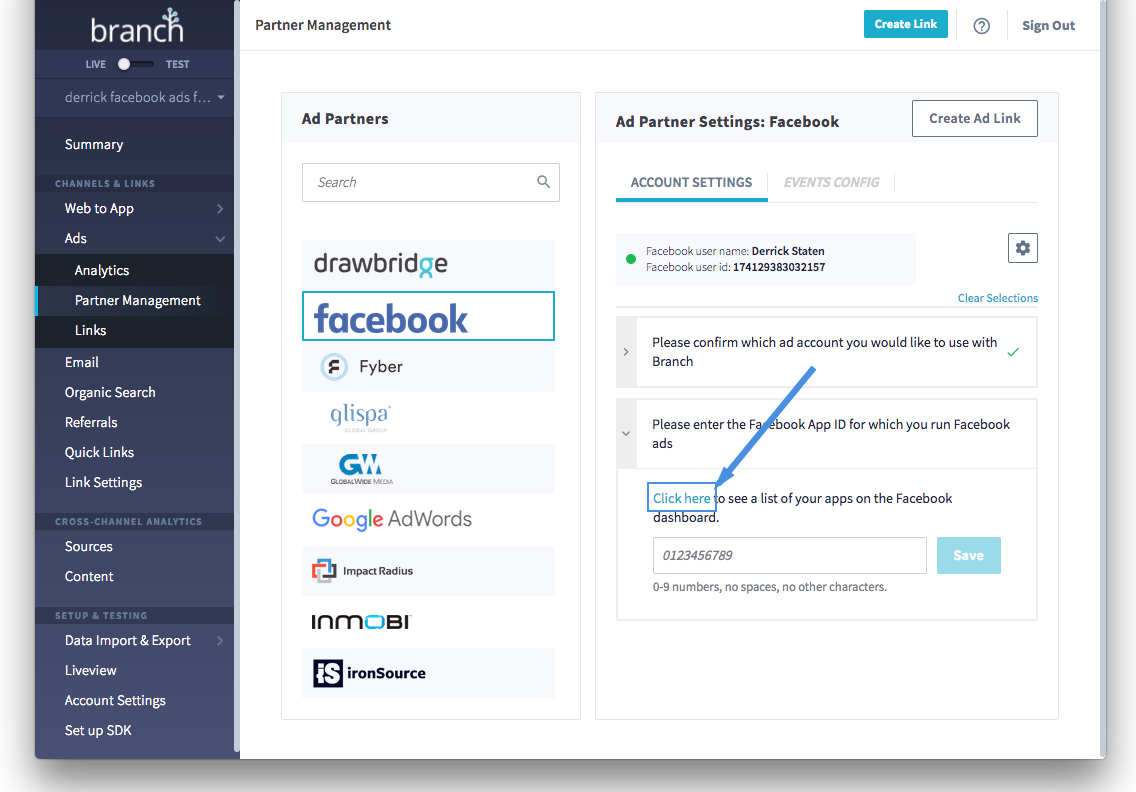
- Click to select a Meta App ID for which you want to run Meta ads
- Copy the Meta App ID
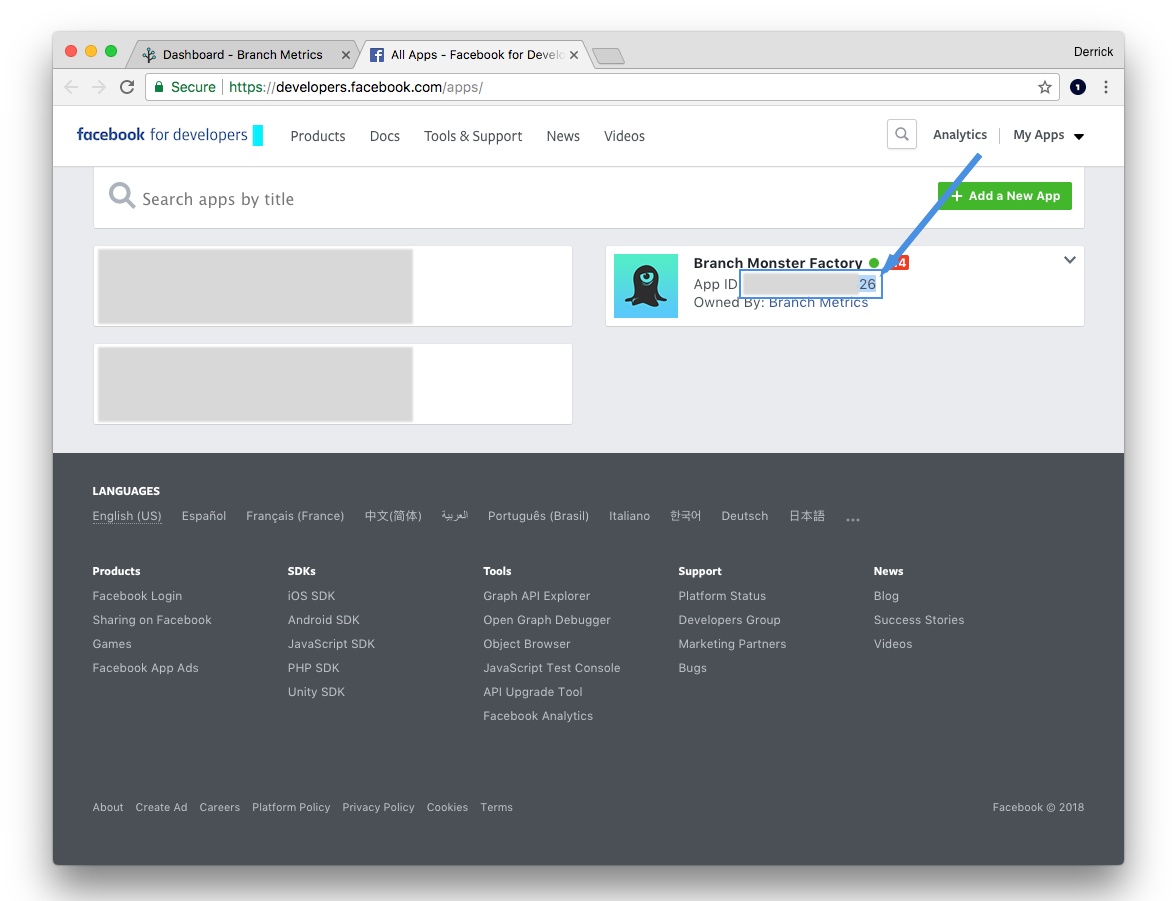
- Paste the Meta App ID and press
Save
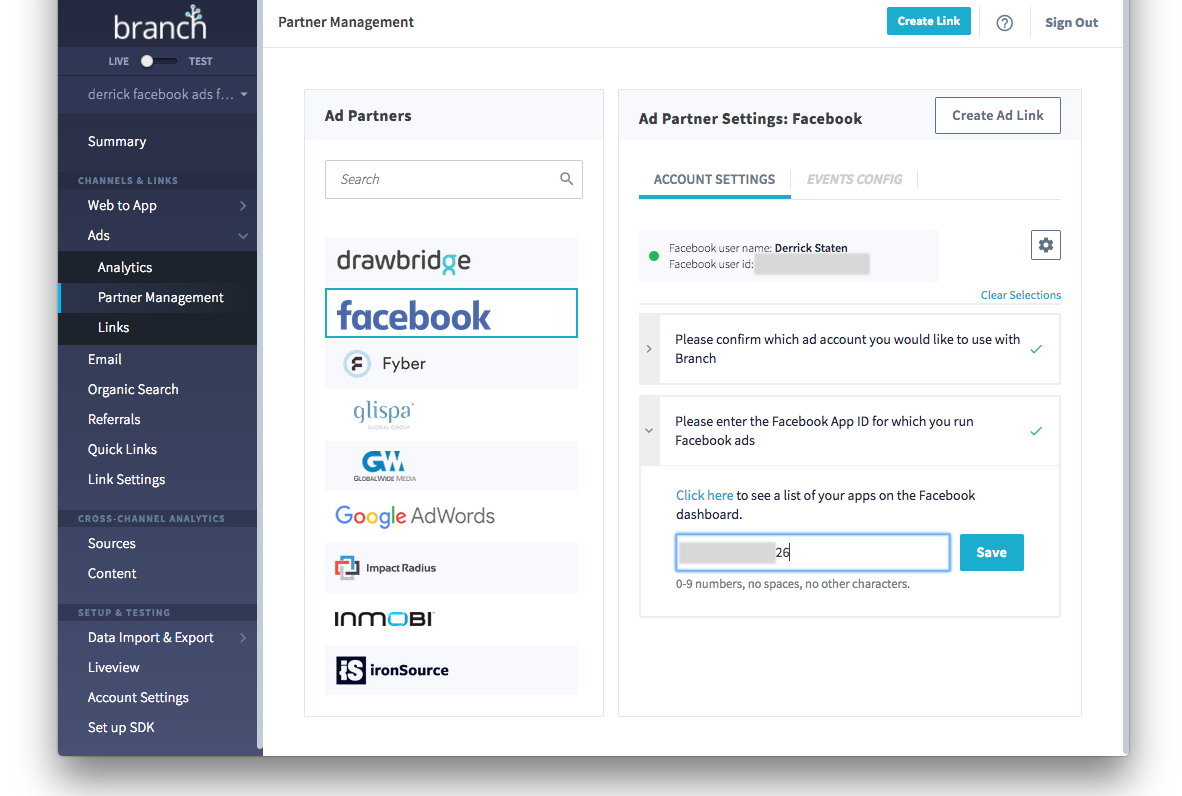
Meta Ads is now enabled as an ad partner!
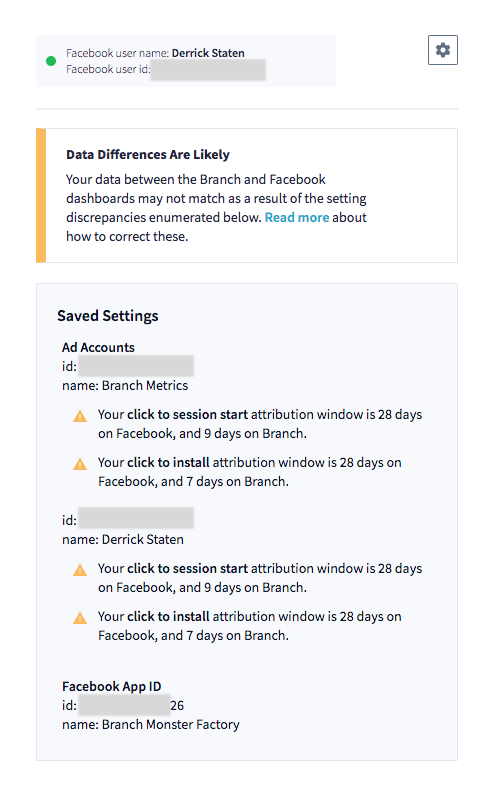
Note that if you have different attribution windows between Meta and Branch, those will be highlighted. The warning has a link to the docs on how to align these attribution windows.
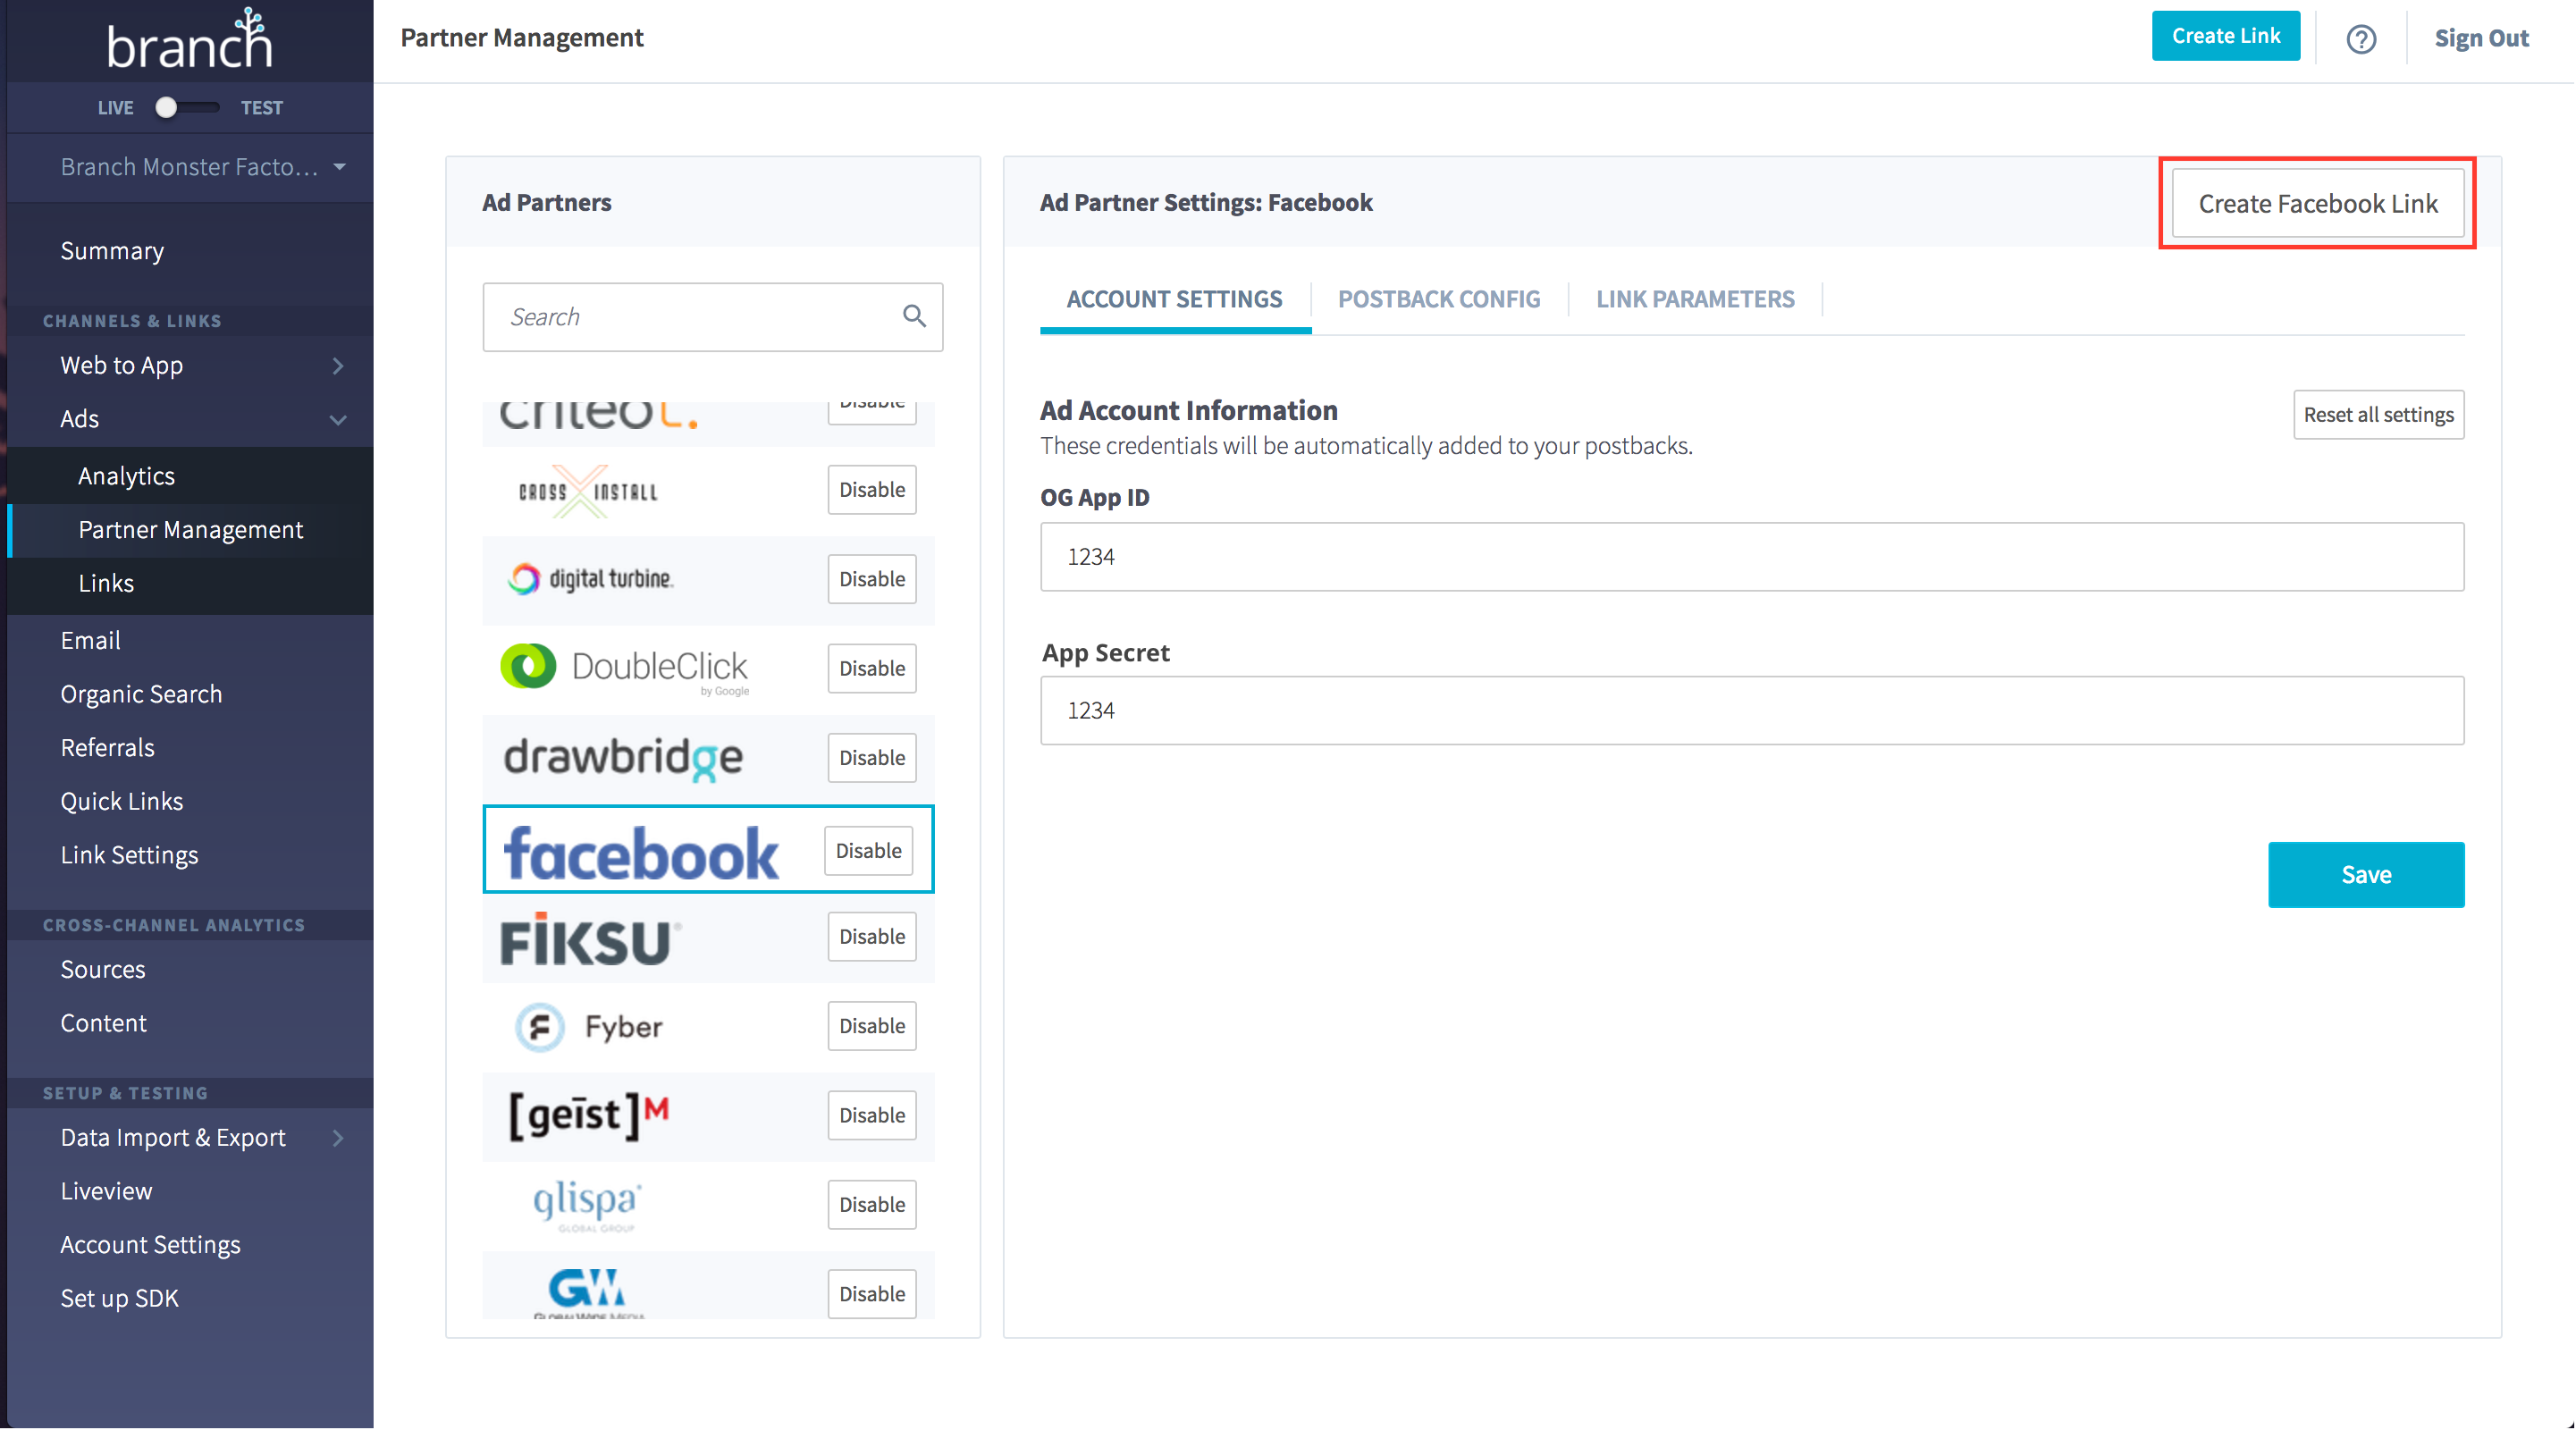
- Finally, to create a Meta Ads link click the Create Facebook Link button in the top right hand corner.
Create an Ad Link
Optional if Running App-Only Ads
This section is optional if you are running app-only ads. We will automatically pull in campaign, ad set, ad, and creative information from Meta. However, if you want users to be deep linked, you should follow the instructions in this section.
- Create a Branch Ad link from the Partner Management page
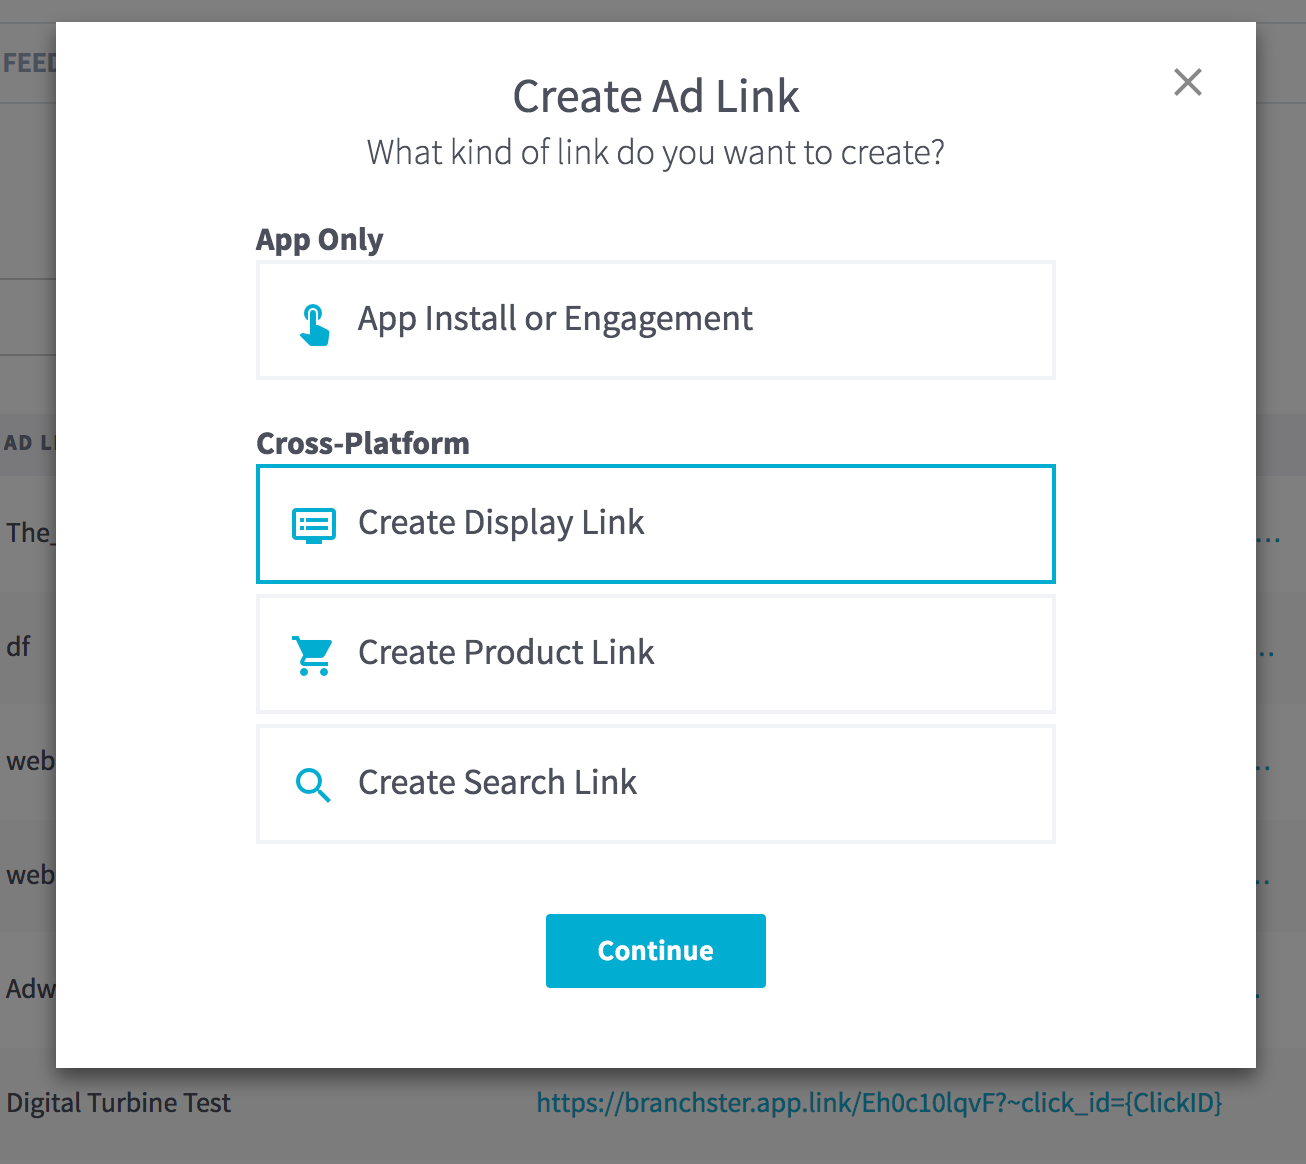
Create Facebook Linkbutton under the Facebook Partner and selectCreate Display Link.
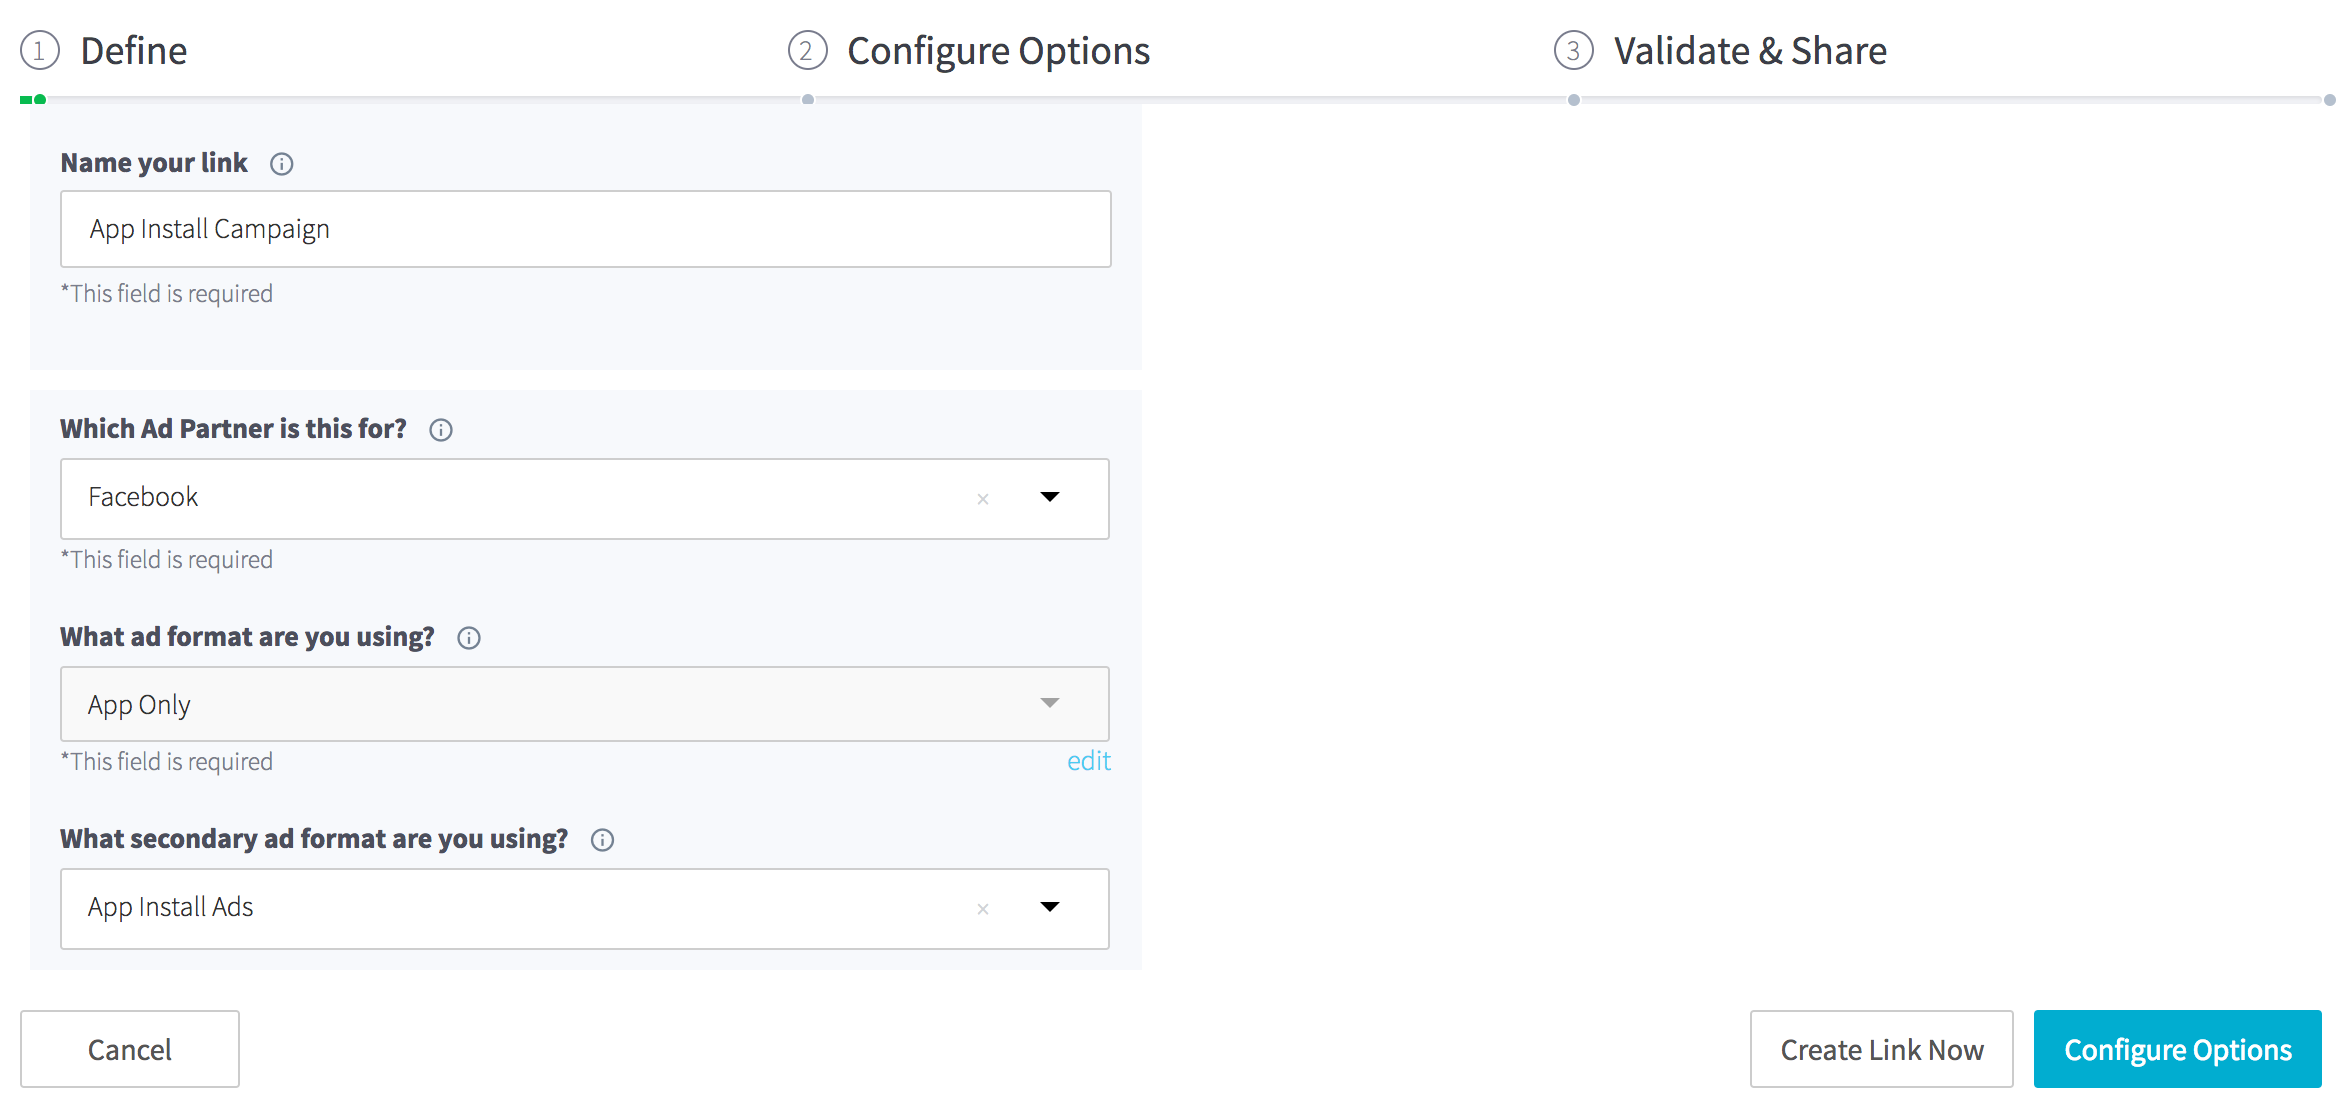
- Under the Define Section, pick a Link Name for later reference.
- Configure the link with the Ad Partner set to Facebook, and the Ad Format set to Cross-platform Display.
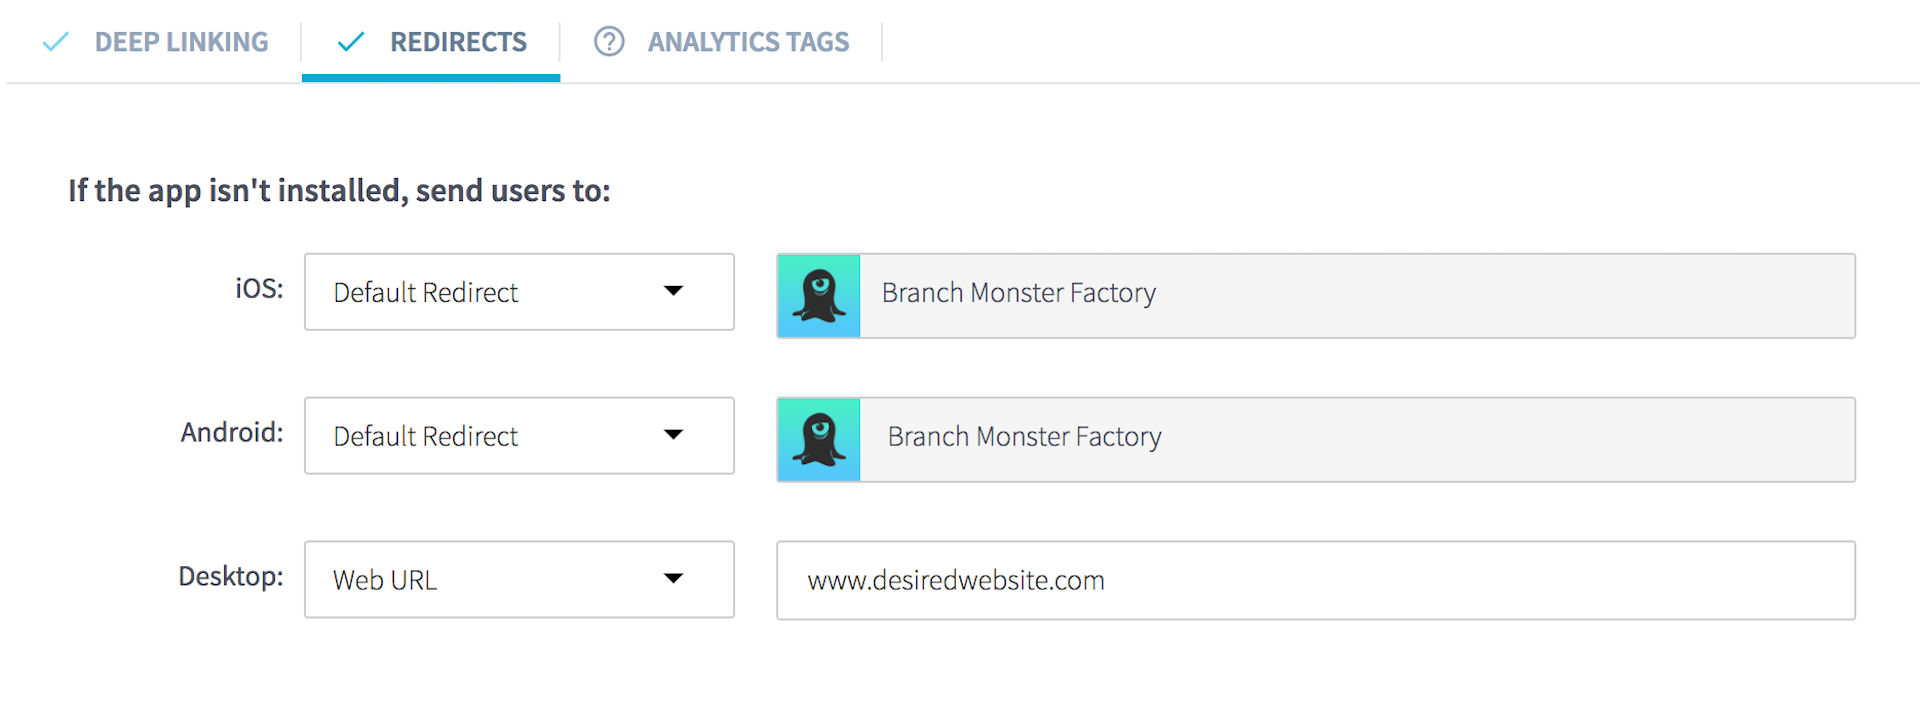
- Under the Configure Options tab, navigate to the Redirects sub section and ensure that the iOS/Android and Desktop redirects are set to the desired destinations being promoted by the ad campaign.
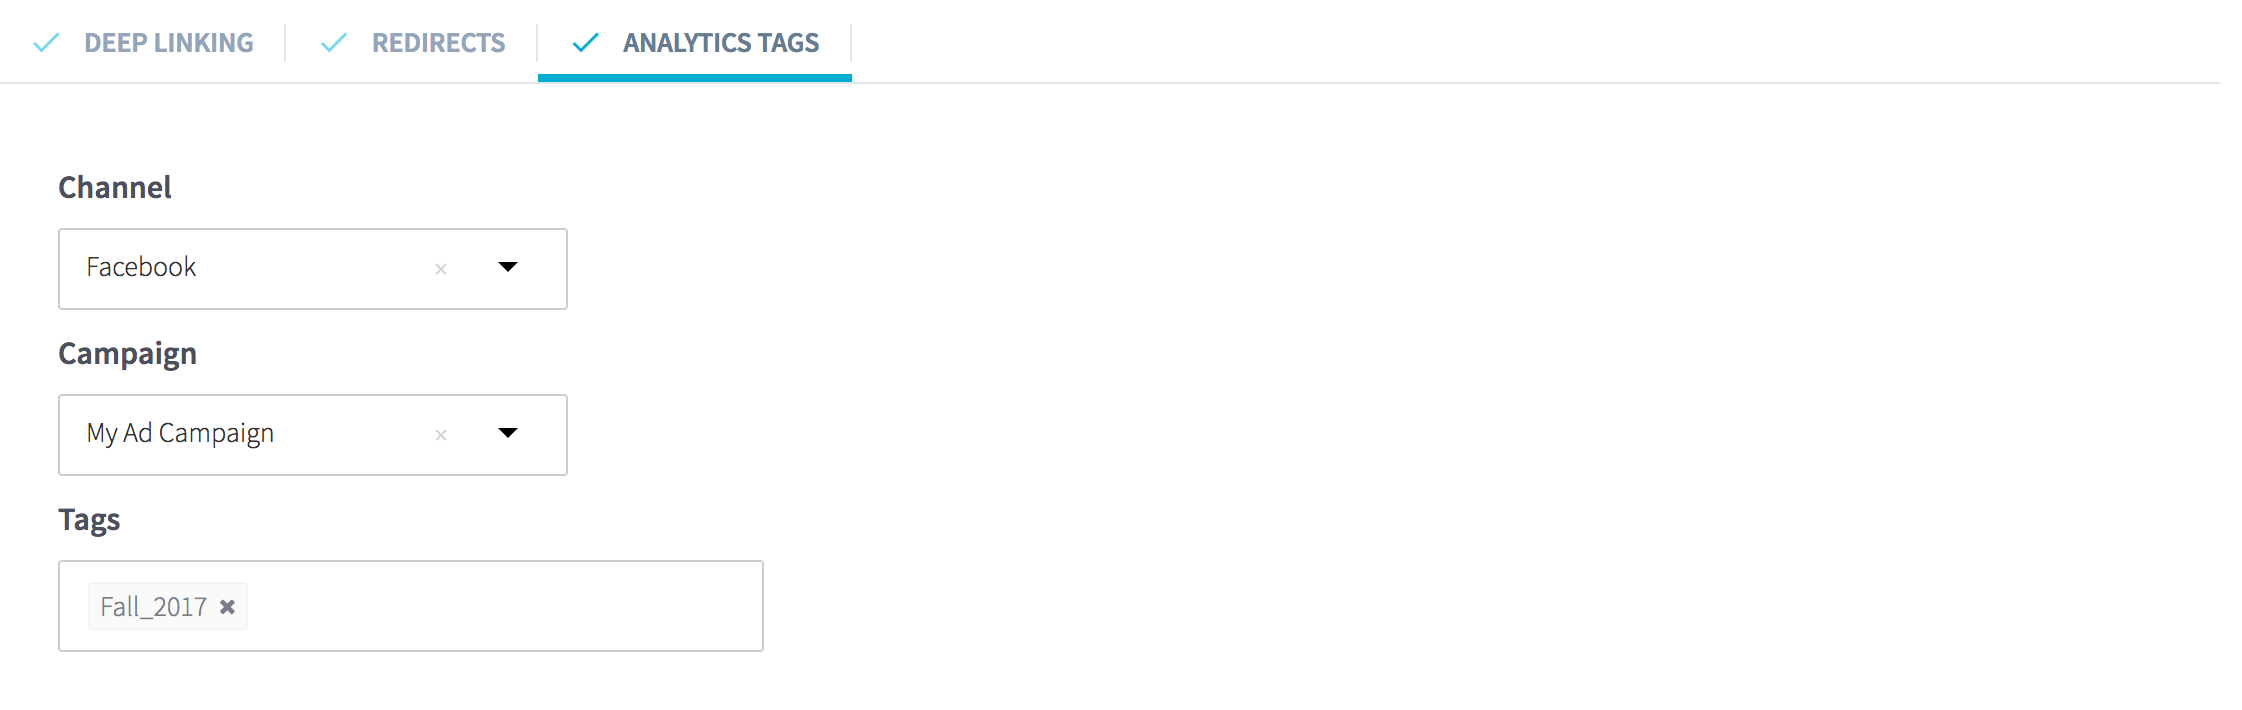
- Under the Analytics Tags sub-section additional tags can be set. It is recommended to fill in these fields as they can be used as filters in Branch's Ads Analytics view. To best connect your ad link with your Meta campaign, set the channel field to Meta Ads and set the campaign field to the same ad campaign name used in Meta Ads.
Disabling Deepviews
In order for your campaign to run effectively, be sure to disable Deepviews. You can either disable Deepviews for your entire account or disable Deepviews for one link.
Optional: Deep Link Data
You can use this configuration section to specify custom link parameters that will be deep linked into the app after install. These could include a coupon code or a page identifier to route the user. Visit the Deep Link Routing page to learn more.
Traffic Campaign Setup
Configure an Ad
To set up a Meta Traffic campaign, you will need to first create your campaign and use a Branch link as the Deep Link URL for the advertisements. Meta Traffic campaign information is available here.
Create Your Campaign
- Navigate to https://www.facebook.com/ads/create while logged in to the account that owns your Meta app.
- Select Traffic as the campaign marketing objective.
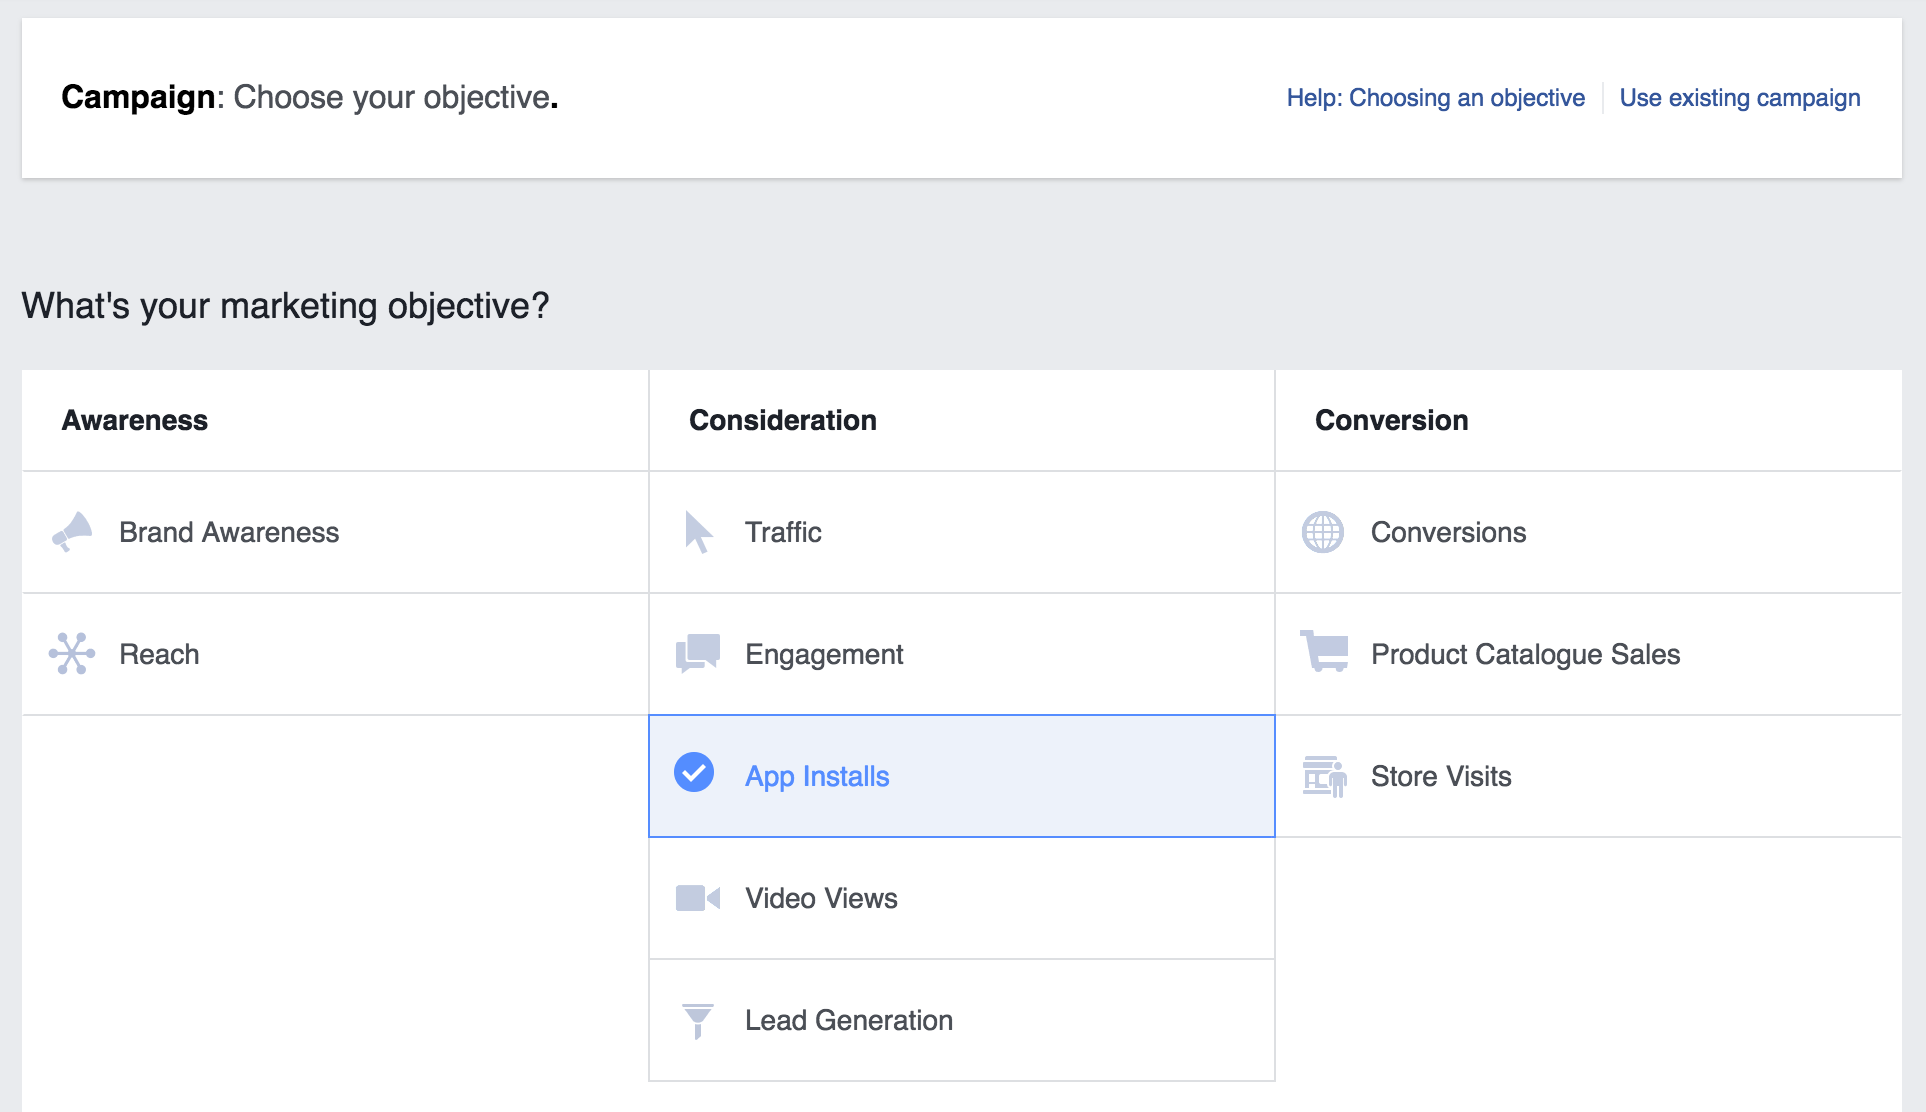
- Select either to drive traffic to your
Websiteor yourApp. - Continue with campaign creation selecting the app to advertise, audience, placement, and budget. Then press continue to enter the Advert creation step.
- Now select an advertisement format and customize your ad.
- Add your Branch Ad Link to your advertisement.
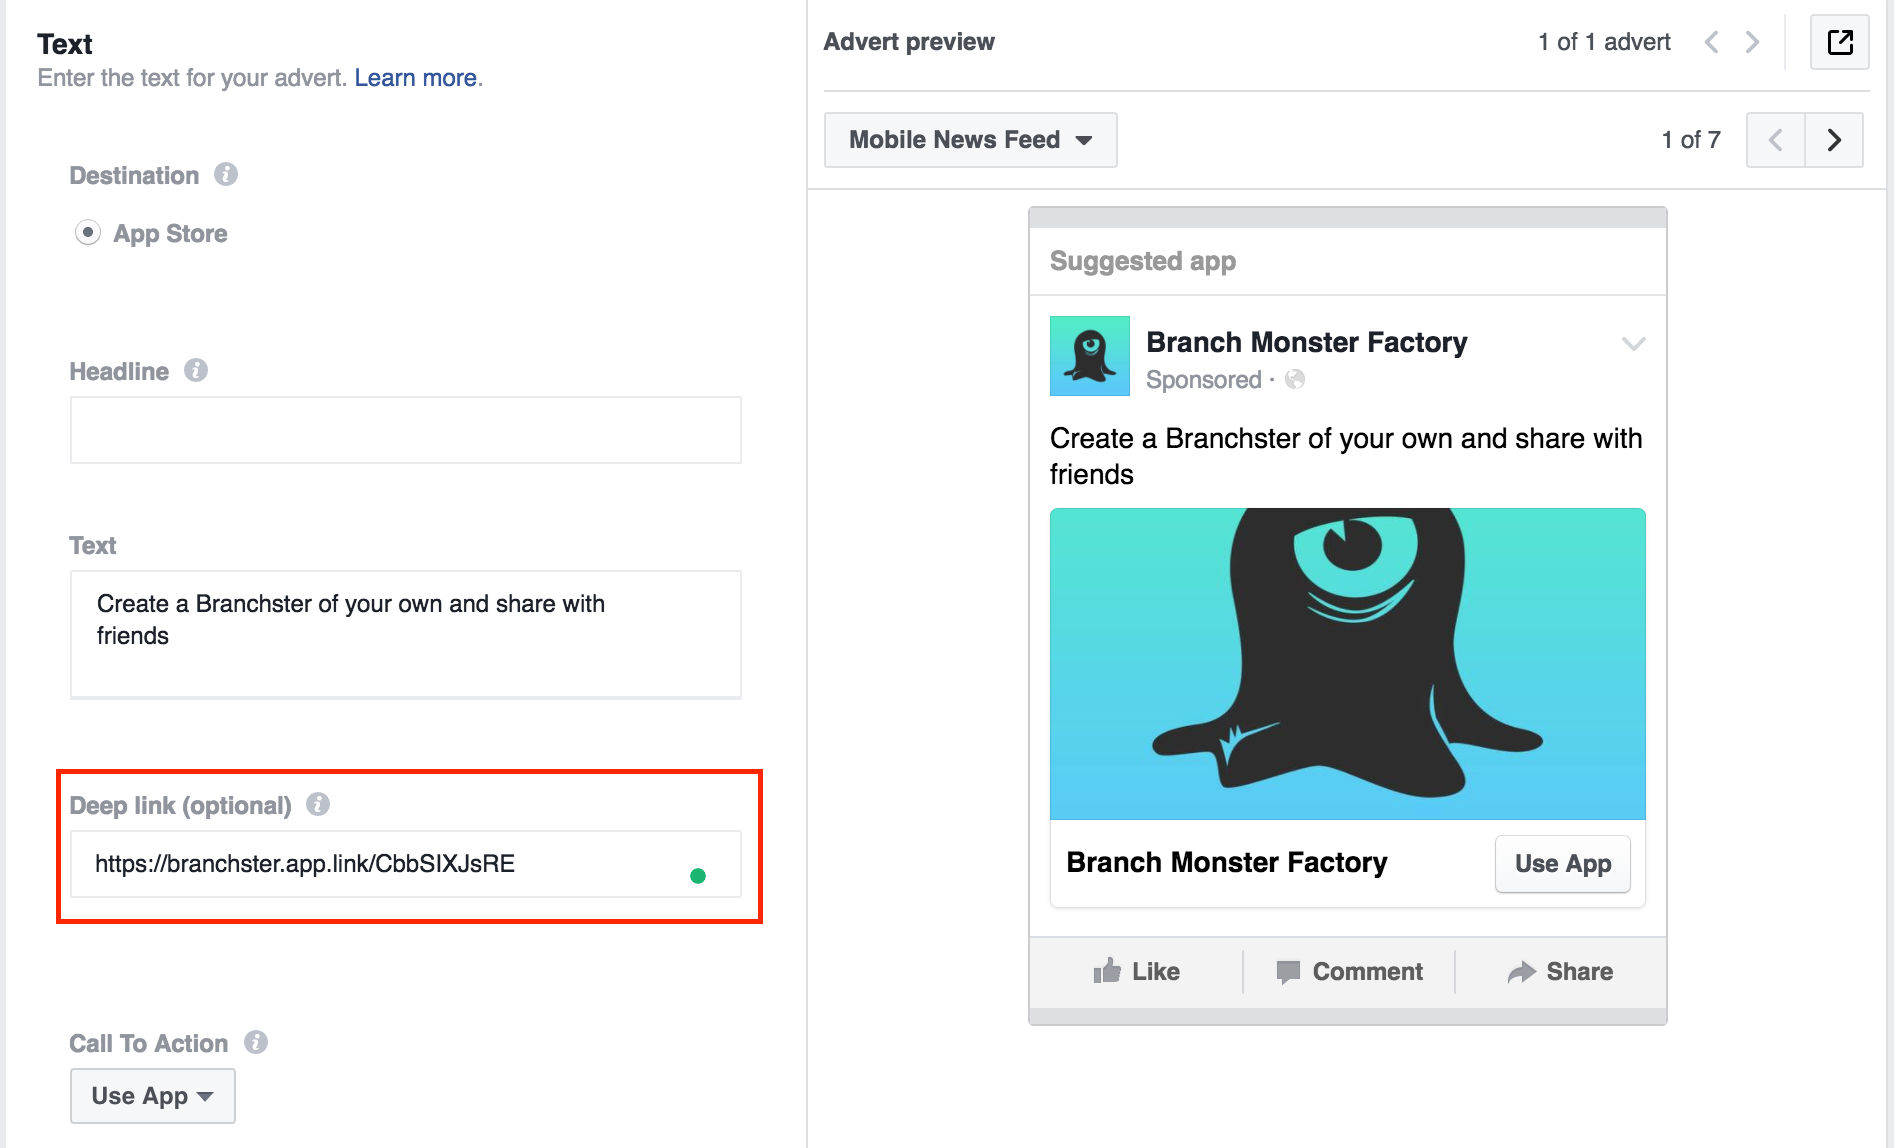
- If you chose to drive traffic to an App, locate the Deep Link field and copy and paste your Branch link there.
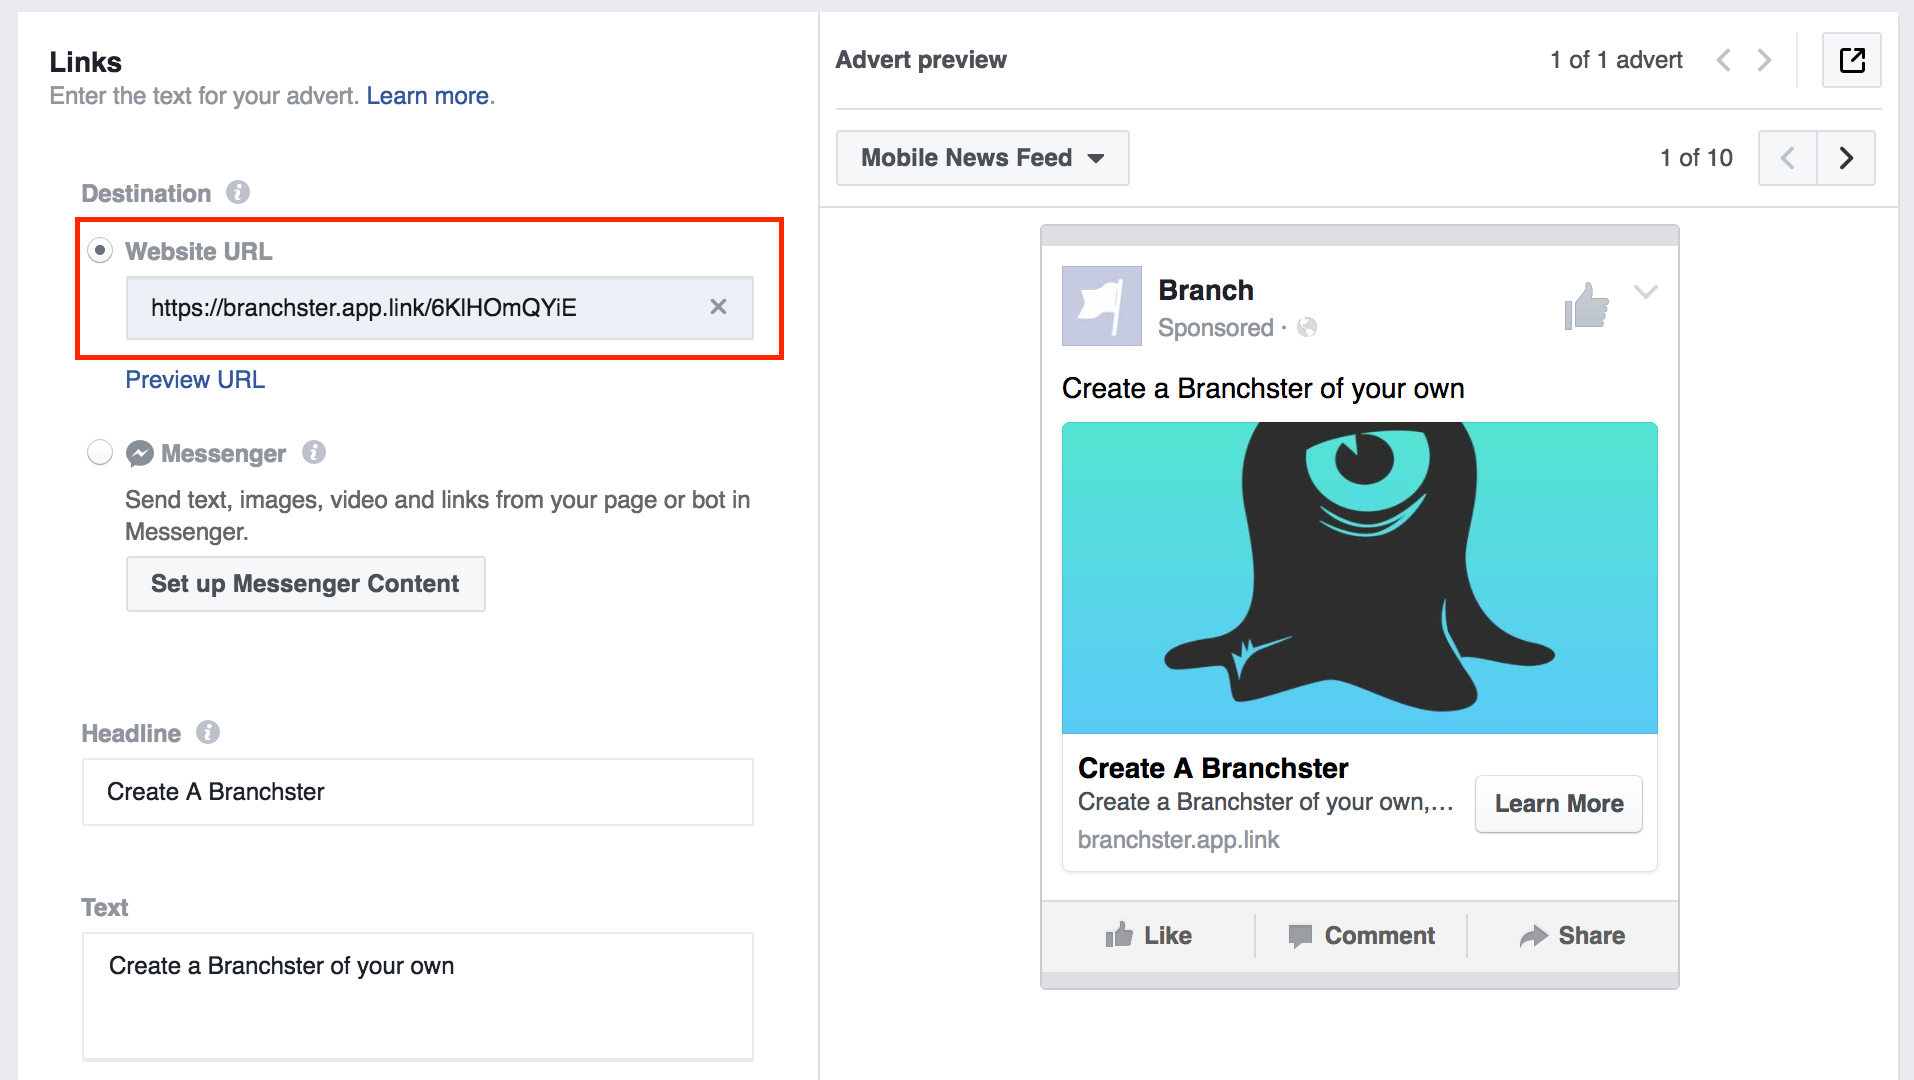
- If you chose to drive traffic to a Website, paste your Branch Ad link into the Website URL field.
- If you chose to drive traffic to a Website and are using a full-screen Canvas, add your Branch Ad link as the Destination URL for your canvas advertisement components.
- Complete the rest of the ad campaign setup.
Optional: Ad formats with Multiple Links
Some ad formats such as Carousel format can handle multiple deep links. To have link performance data on each image or component of the advertisement, create multiple Branch Ad links to be used in each part of the multiple link advertisement format. This format is useful if you want to drive customers to different content pieces or products.
Conversions Campaign Setup
Configure an Ad
To set up a Meta Conversions campaign, you will need to first create your campaign and use a Branch link as the Deep Link URL for the advertisements. Meta Conversions campaign information is available here.
Prerequisites
As a prerequisite, Meta requires you to report events about your users interacting with your content, for example: viewing, adding to cart, and purchasing. To add the Meta Pixel to your website, and event tracking using the Branch SDK (which forwards to Meta) to your app, follow these instructions:
Create Your Campaign
- Navigate to https://www.facebook.com/ads/create while logged in to the account that owns your Meta app.
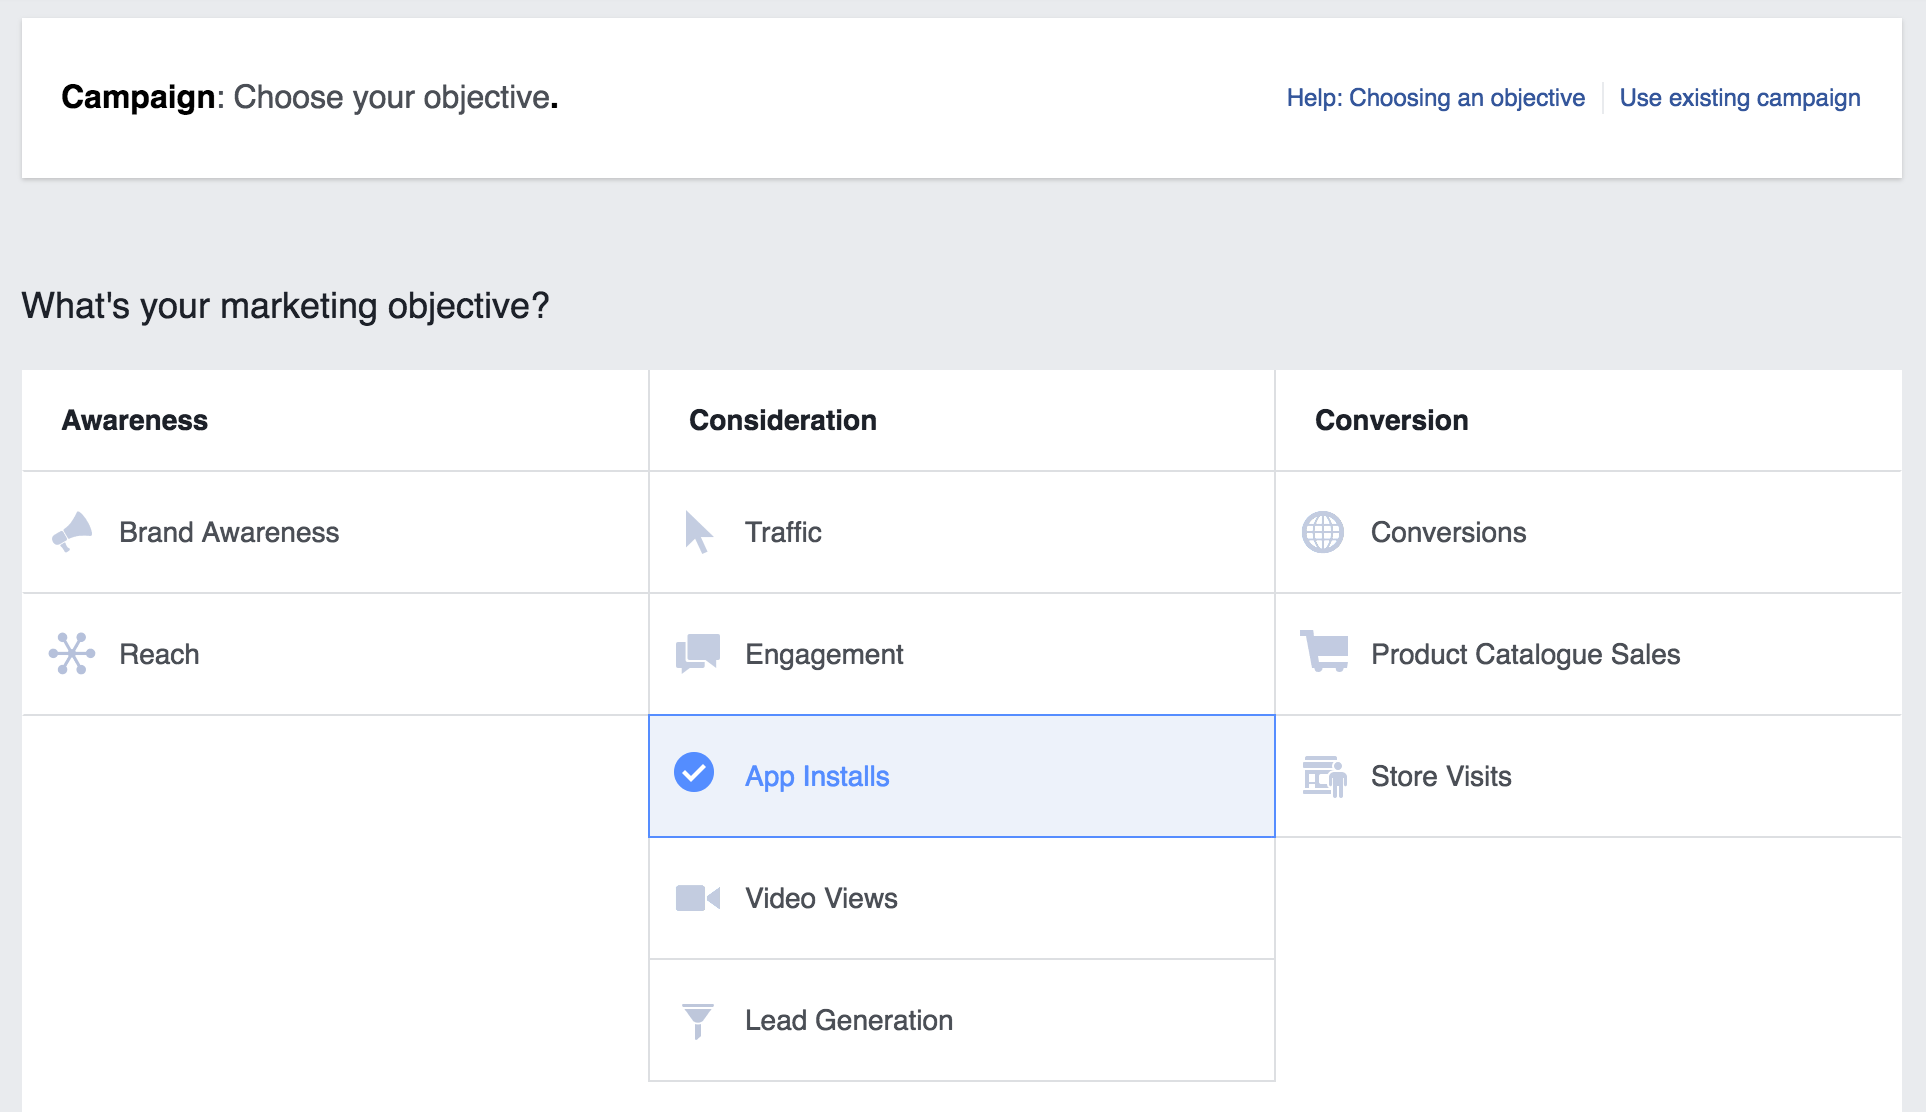
- Select Conversions as the campaign marketing objective.
- Select either to have the goal of having conversions on a
Websiteor in anApp. - Continue with campaign creation selecting an audience, placement, and budget. Then press continue to enter the Advert creation step.
- Now select an advertisement format and customize your ad.
- Add your Branch Ad Link to your advertisement.
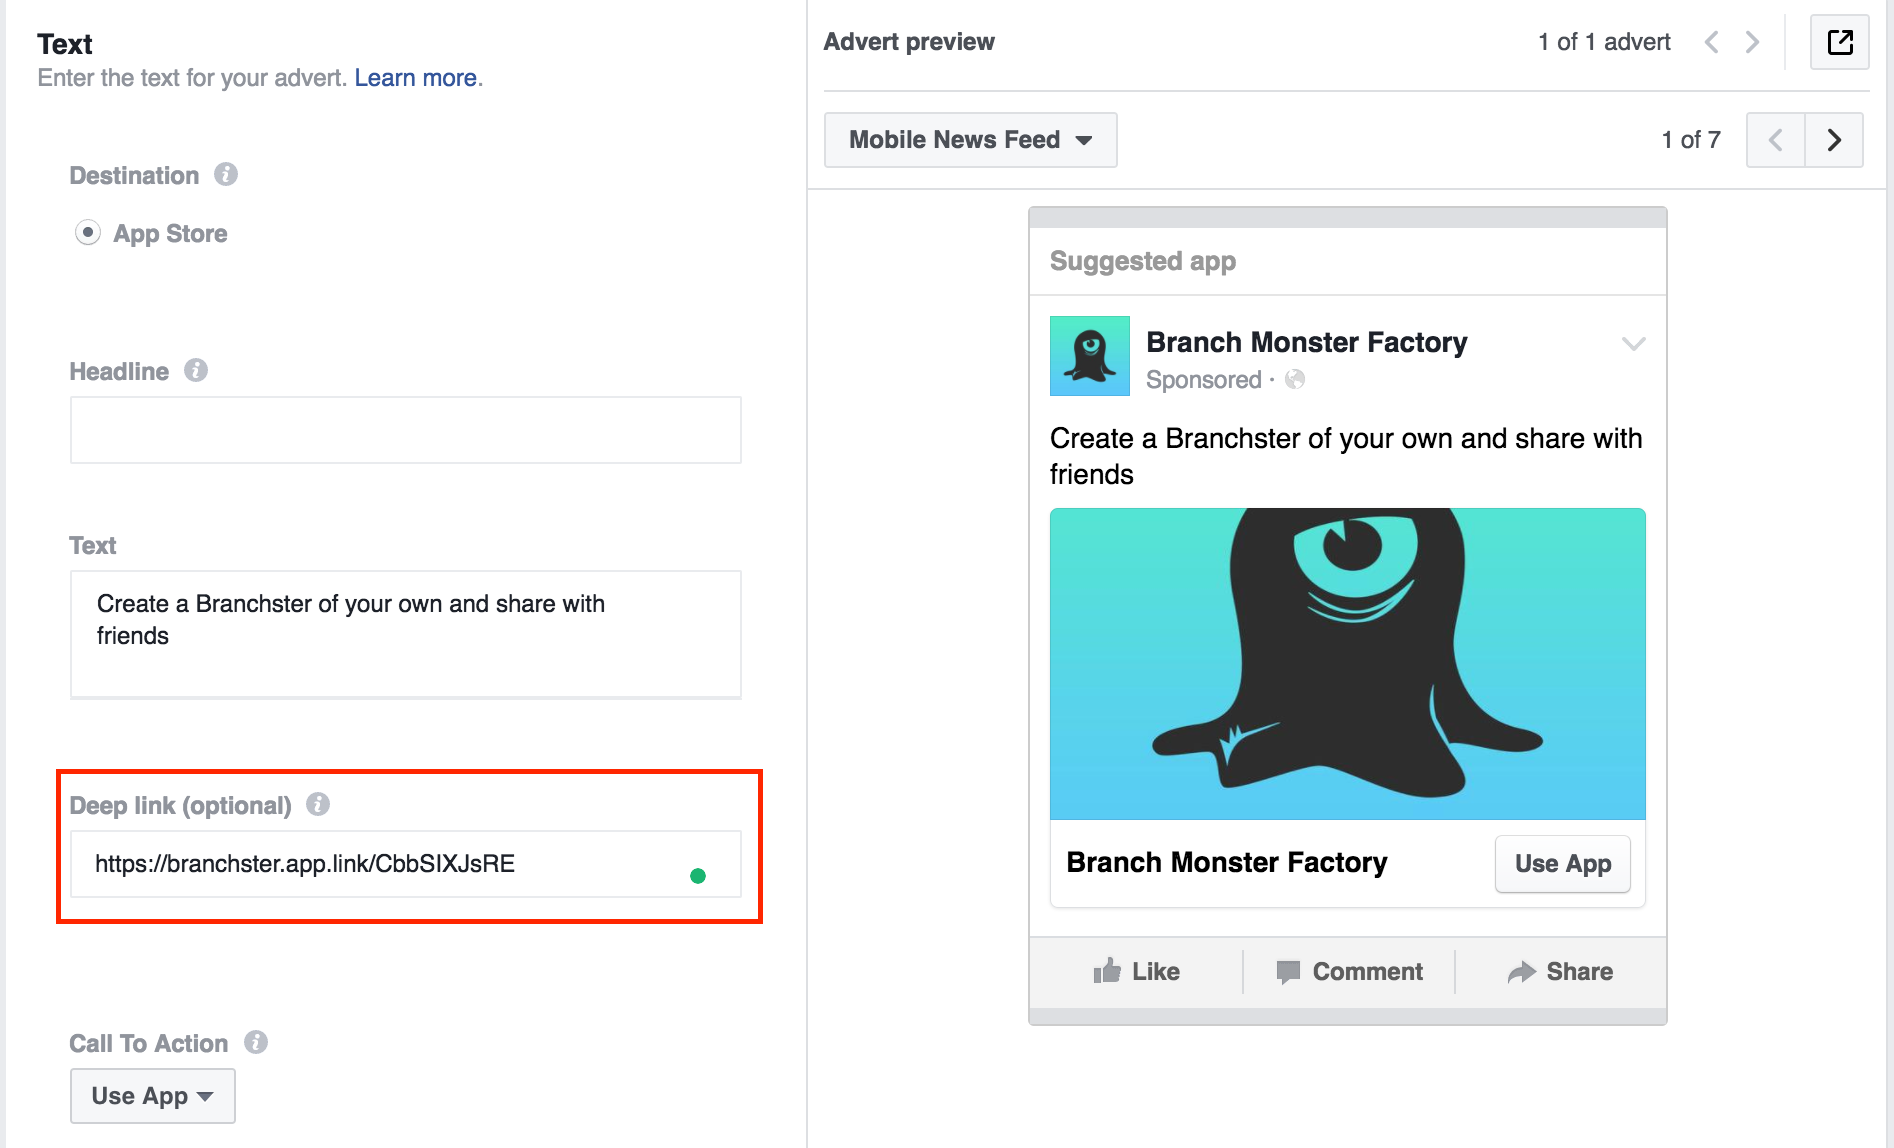
- If you chose app conversions App, copy and paste your Branch ad link for deep linking into the Deep Link field.
- If you chose Website conversions, paste your Branch Ad link into the Website URL field.
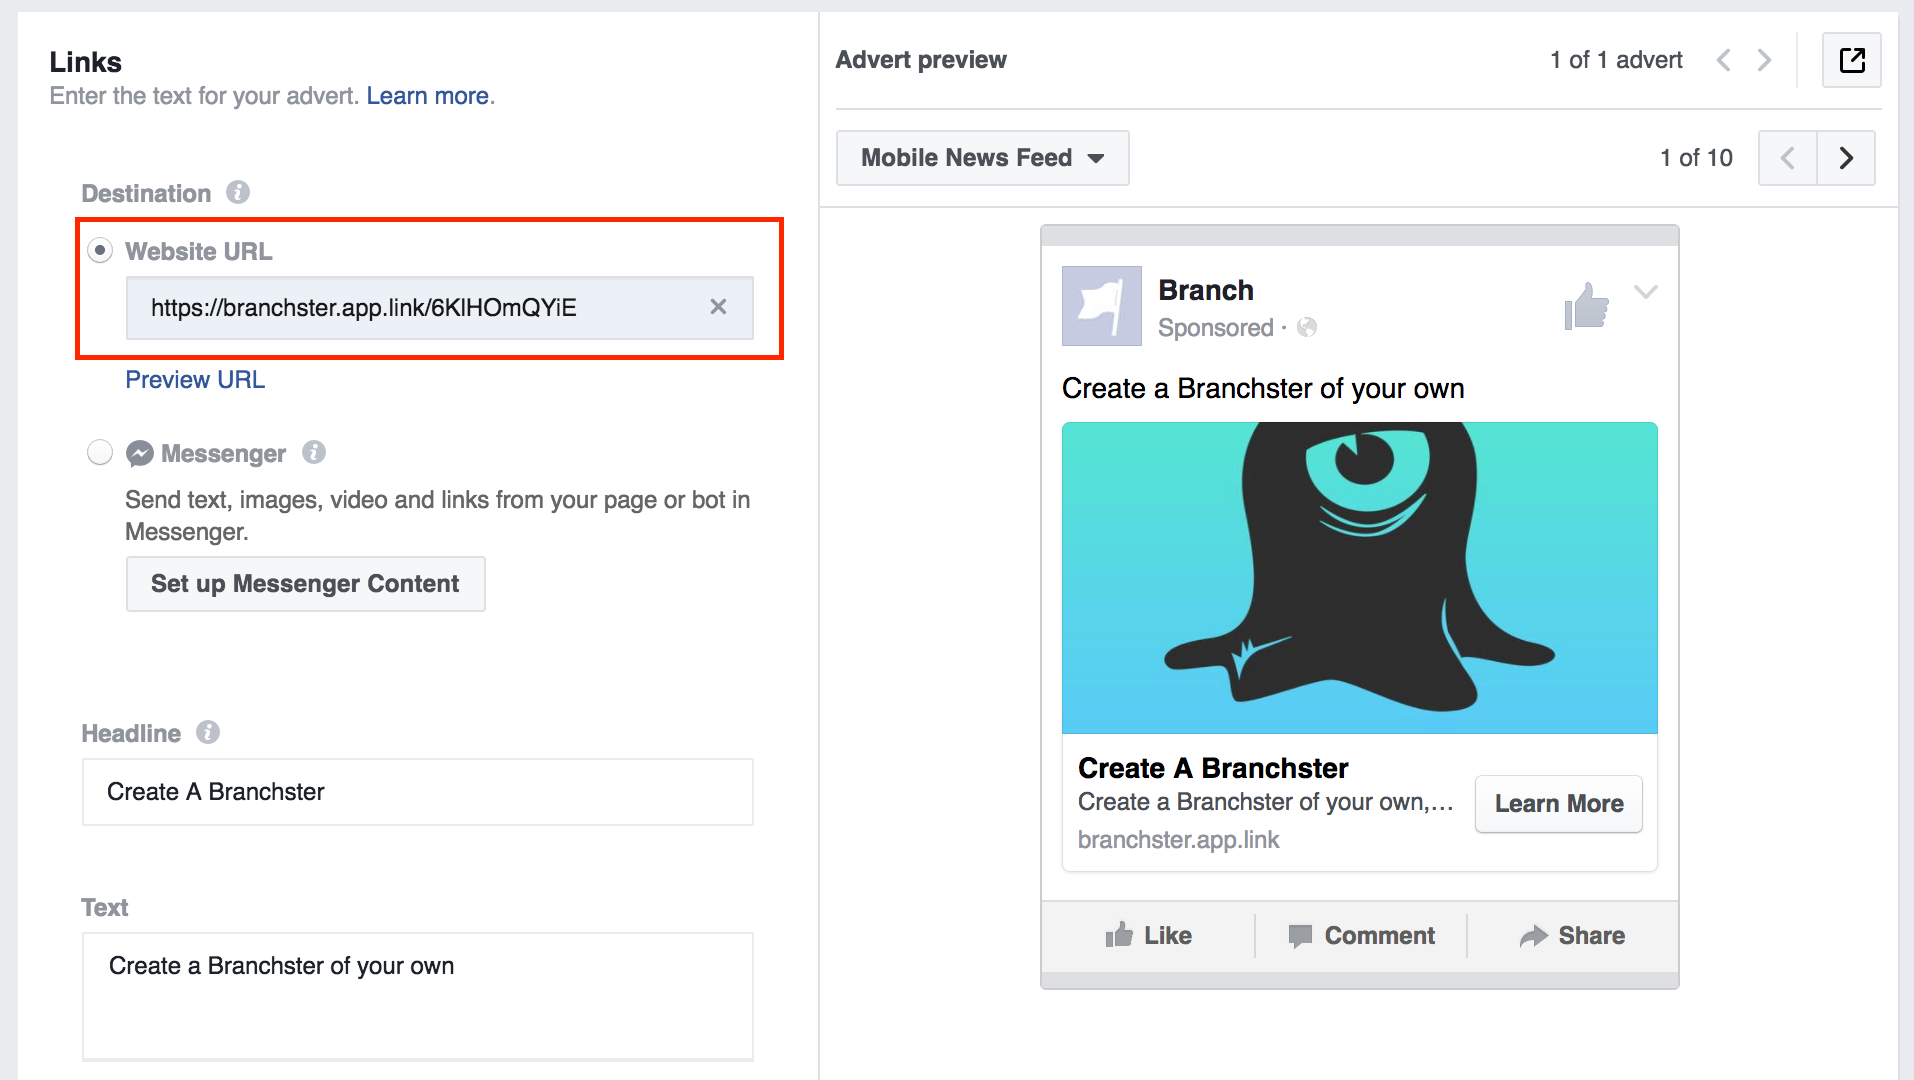
- If you chose Website conversions and are using a full-screen Canvas, add your Branch Ad link as the Destination URL for your canvas advertisement components.
- Complete the rest of the ad campaign setup.
Optional: Ad formats with Multiple Links
Some ad formats such as Carousel format can handle multiple deep links. To have link performance data on each image or component of the advertisement, create multiple Branch Ad links to be used in each part of the multiple link advertisement format. This format is useful if you want to drive customers to different content pieces or products.
View Your Data
The Ads Analytics Page on the Branch dashboard provides an interactive time series graph and table to view the performance of your Ad campaigns.
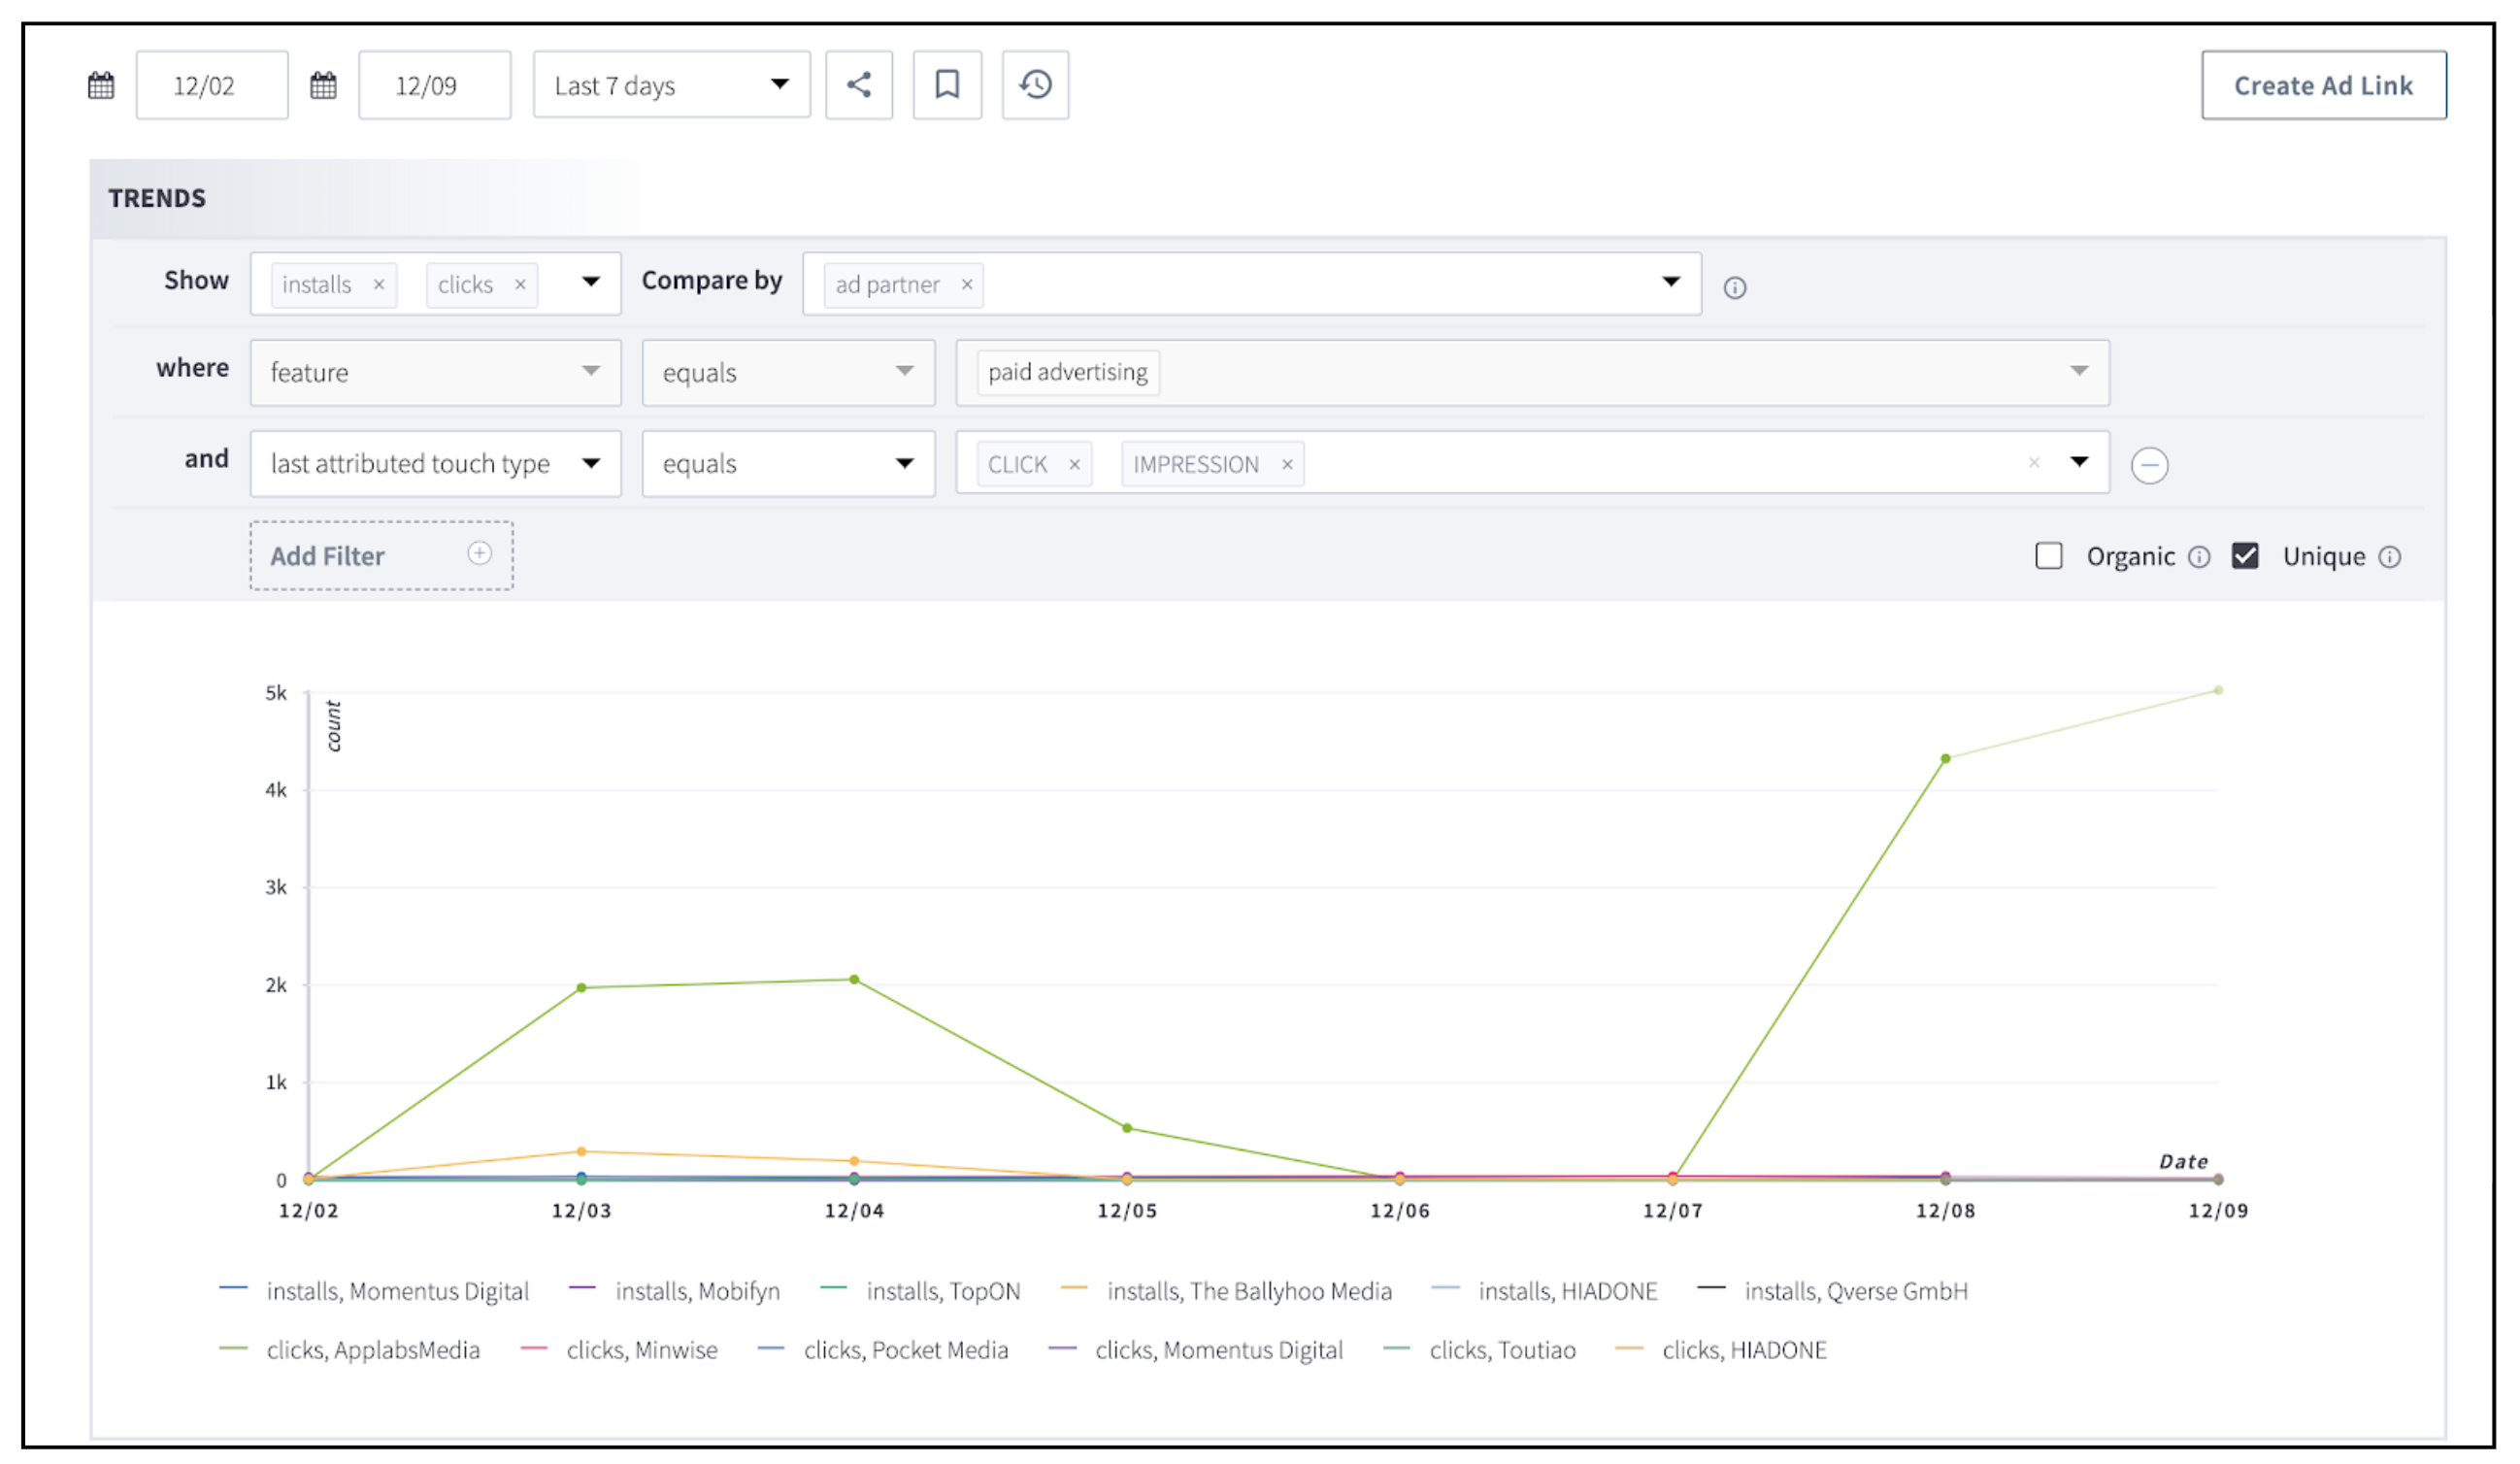
The table shows summary data on the performance of each Ad campaign. On the right top side of the table you can find a download button to retrieve the chart's content as a CSV file.
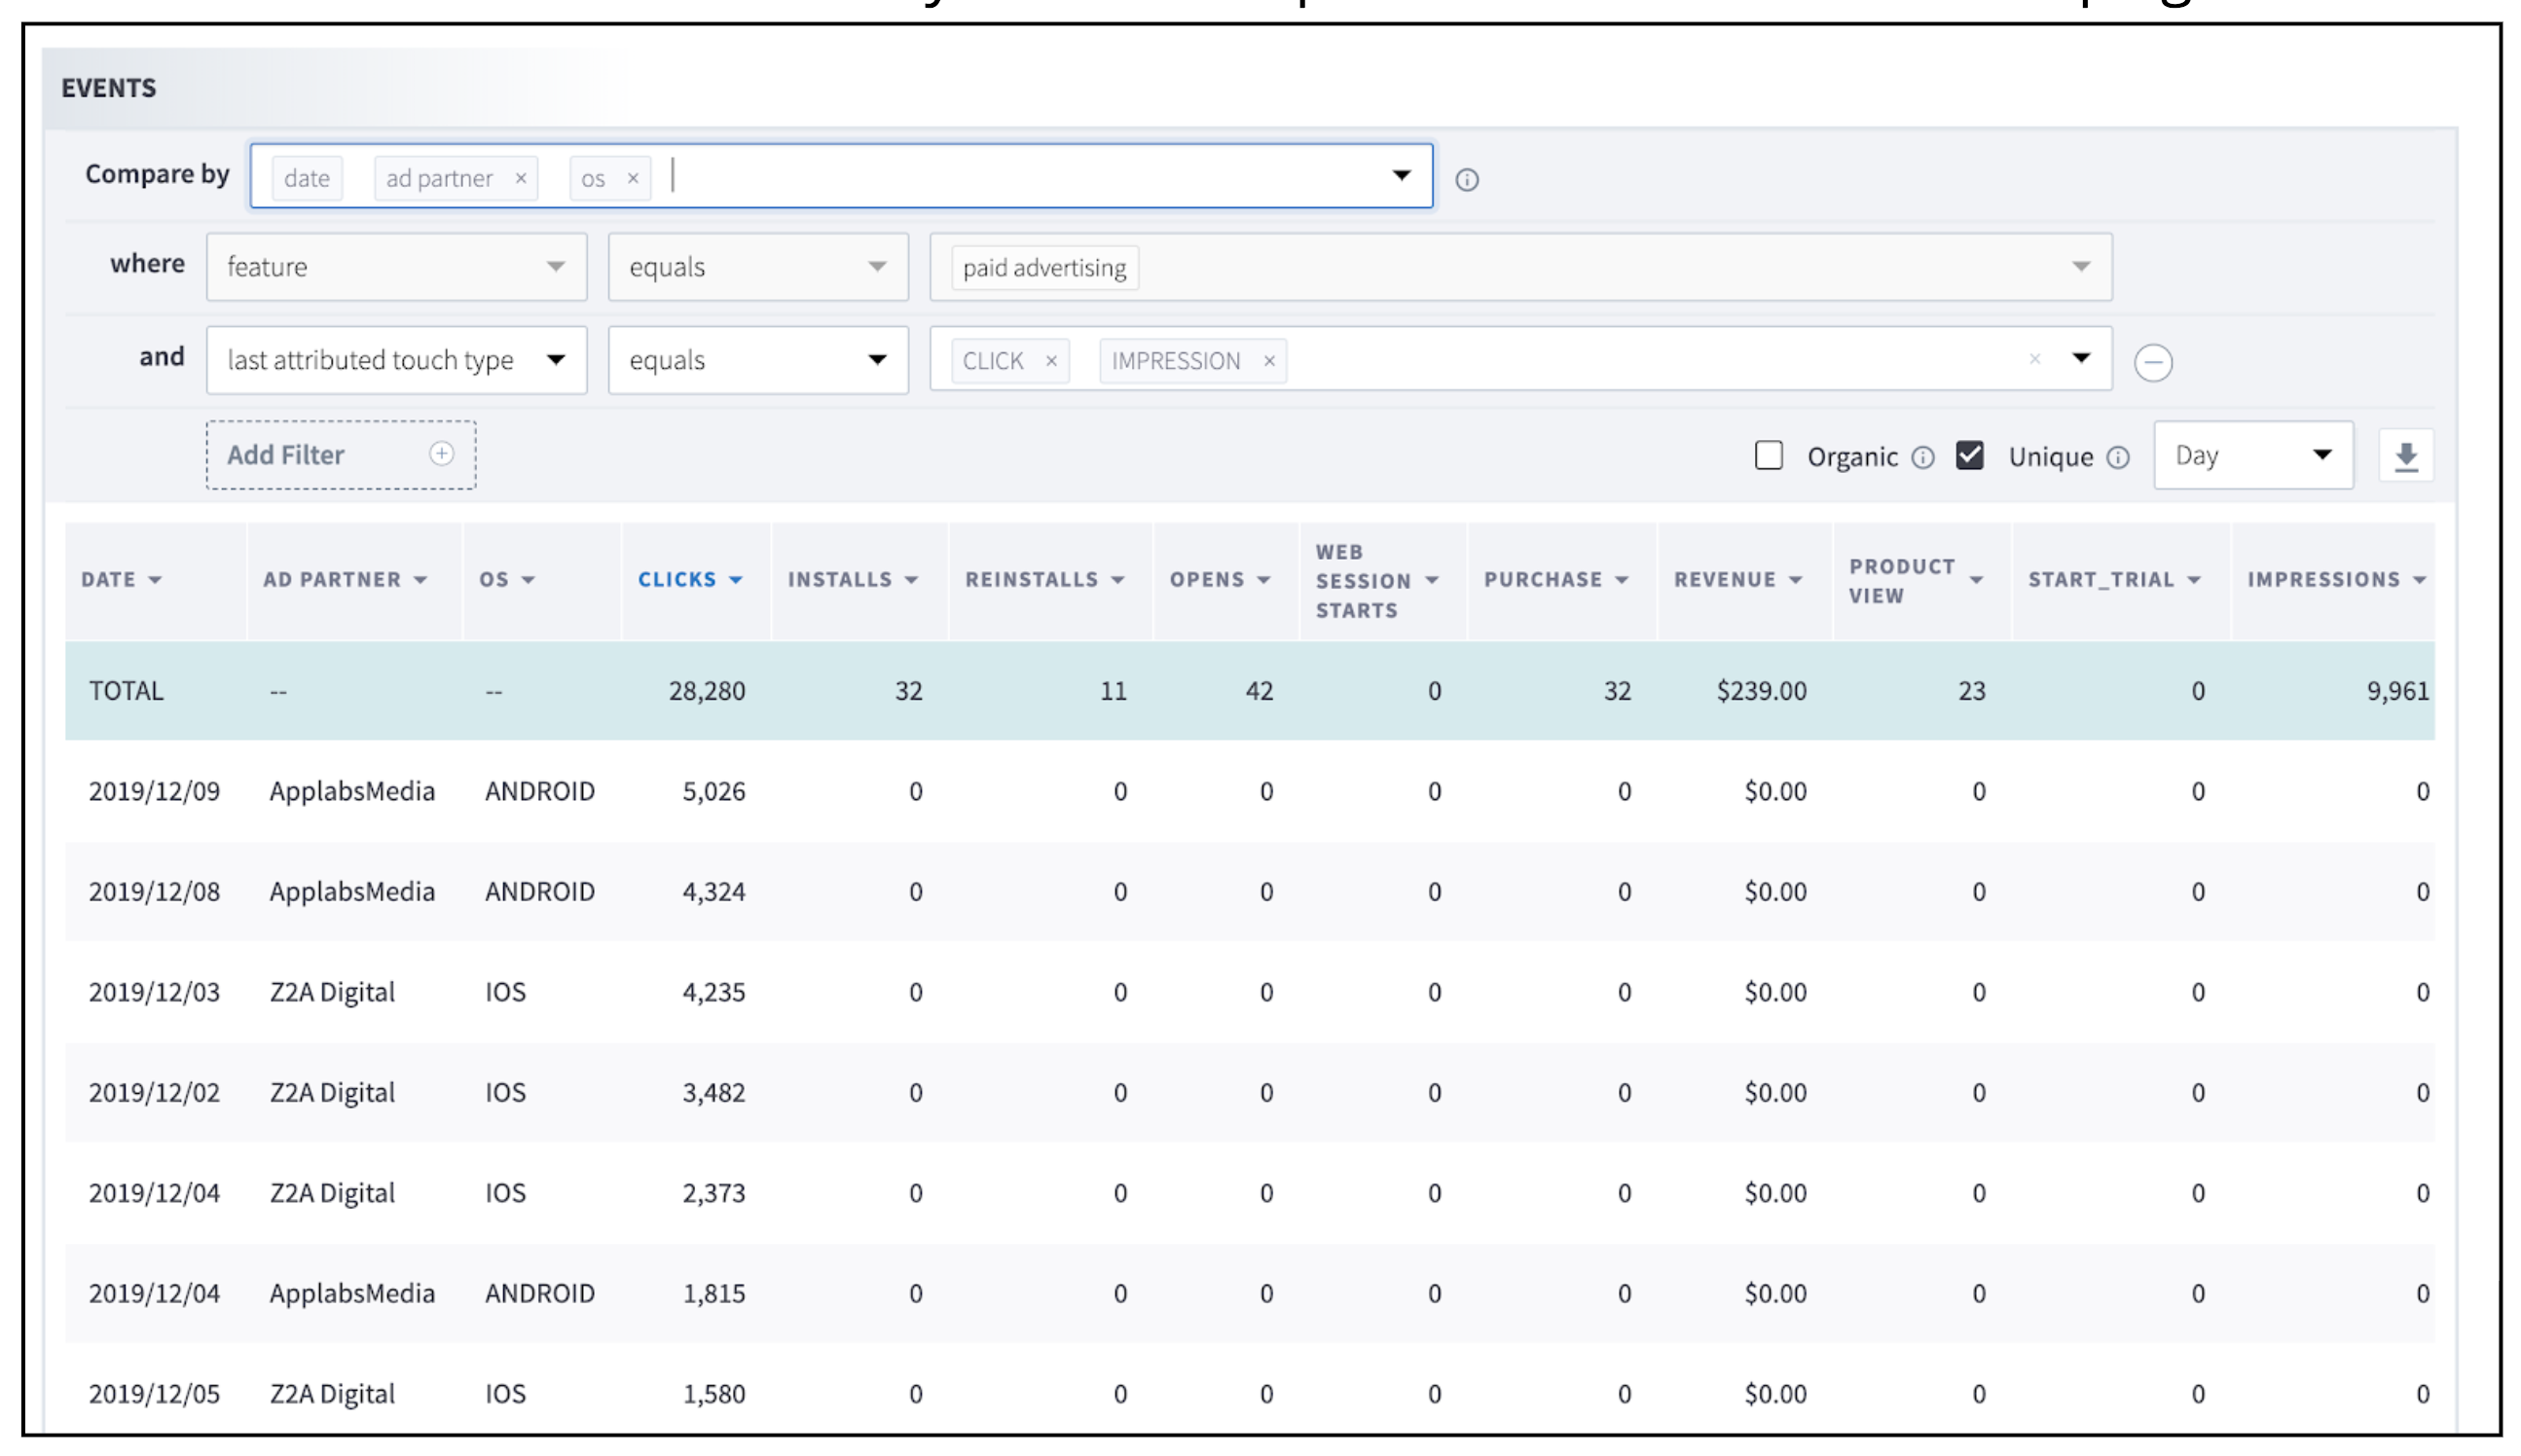
Interacting with your data
Breakdown and compare aspects of your Ad campaigns' performance by using the Compare by + button to add a parameter to split the data displayed data by.
Then use the and + button to refine the data displayed to gain deeper insight into the performance of your Ad campaigns.
Engagement Metrics
You can view data for view-through engagement (engaged view) conversion metrics for Meta through Branch Dashboard reports and exports:
| Report/Export | Parameter | Value |
|---|---|---|
| Dashboard Report | touch subtype | engaged_view |
| Dashboard Custom Exports | Column | Touch Subtype |
| Custom Exports API | fields | last_attributed_touch_data_tilde_touch_subtype |