
Overview
Jampp is the growth platform of choice for on-demand apps worldwide. We unlock programmatic advertising to drive incremental performance.
A demand-side platform (DSP) at heart, Jampp leverages unique contextual and behavioral signals to deliver customers and in-app purchases through programmatic user acquisition and retargeting.
We simplify programmatic growth for some of the biggest mobile advertisers.
Partner Capabilities
| Capability | Details |
|---|---|
| Company Type | • DSP • RTB |
| Deep Linking | Supported |
| Attribution | • Click-Through Attribution • View-Through Attribution |
| Ad Campaign Types | • Acquisition Campaigns • Retargeting Campaigns |
| Ad Formats | Contact support at Jampp for more information. |
| Click Types | • Client-side click |
| Supported Platforms | • iOS • Android |
| Link Wrapping | Not Supported |
| Cost Ingestion Support | Supported |
| Cost Ingestion Types | • via API (Beta) • Email Import • Manual File Upload |
| Cost Time Zone | GMT |
| Cost Data Scheduling | [ 4, 9, 12, 18, 24, 36, 48, 72, 96, 120, 240, 360, 480, 720 ] in hours from midnight |
| Pricing Models | • CPM |
Before you begin
In order to enable Jampp, you need to have completed the following:
Created a Branch Dashboard.
Have Branch's Performance product enabled for your Branch Account.
Implemented the Branch SDK into your mobile app (iOS | Android)
Running campaigns through Jampp.
Enable Jampp
1. Enable Jampp in Branch
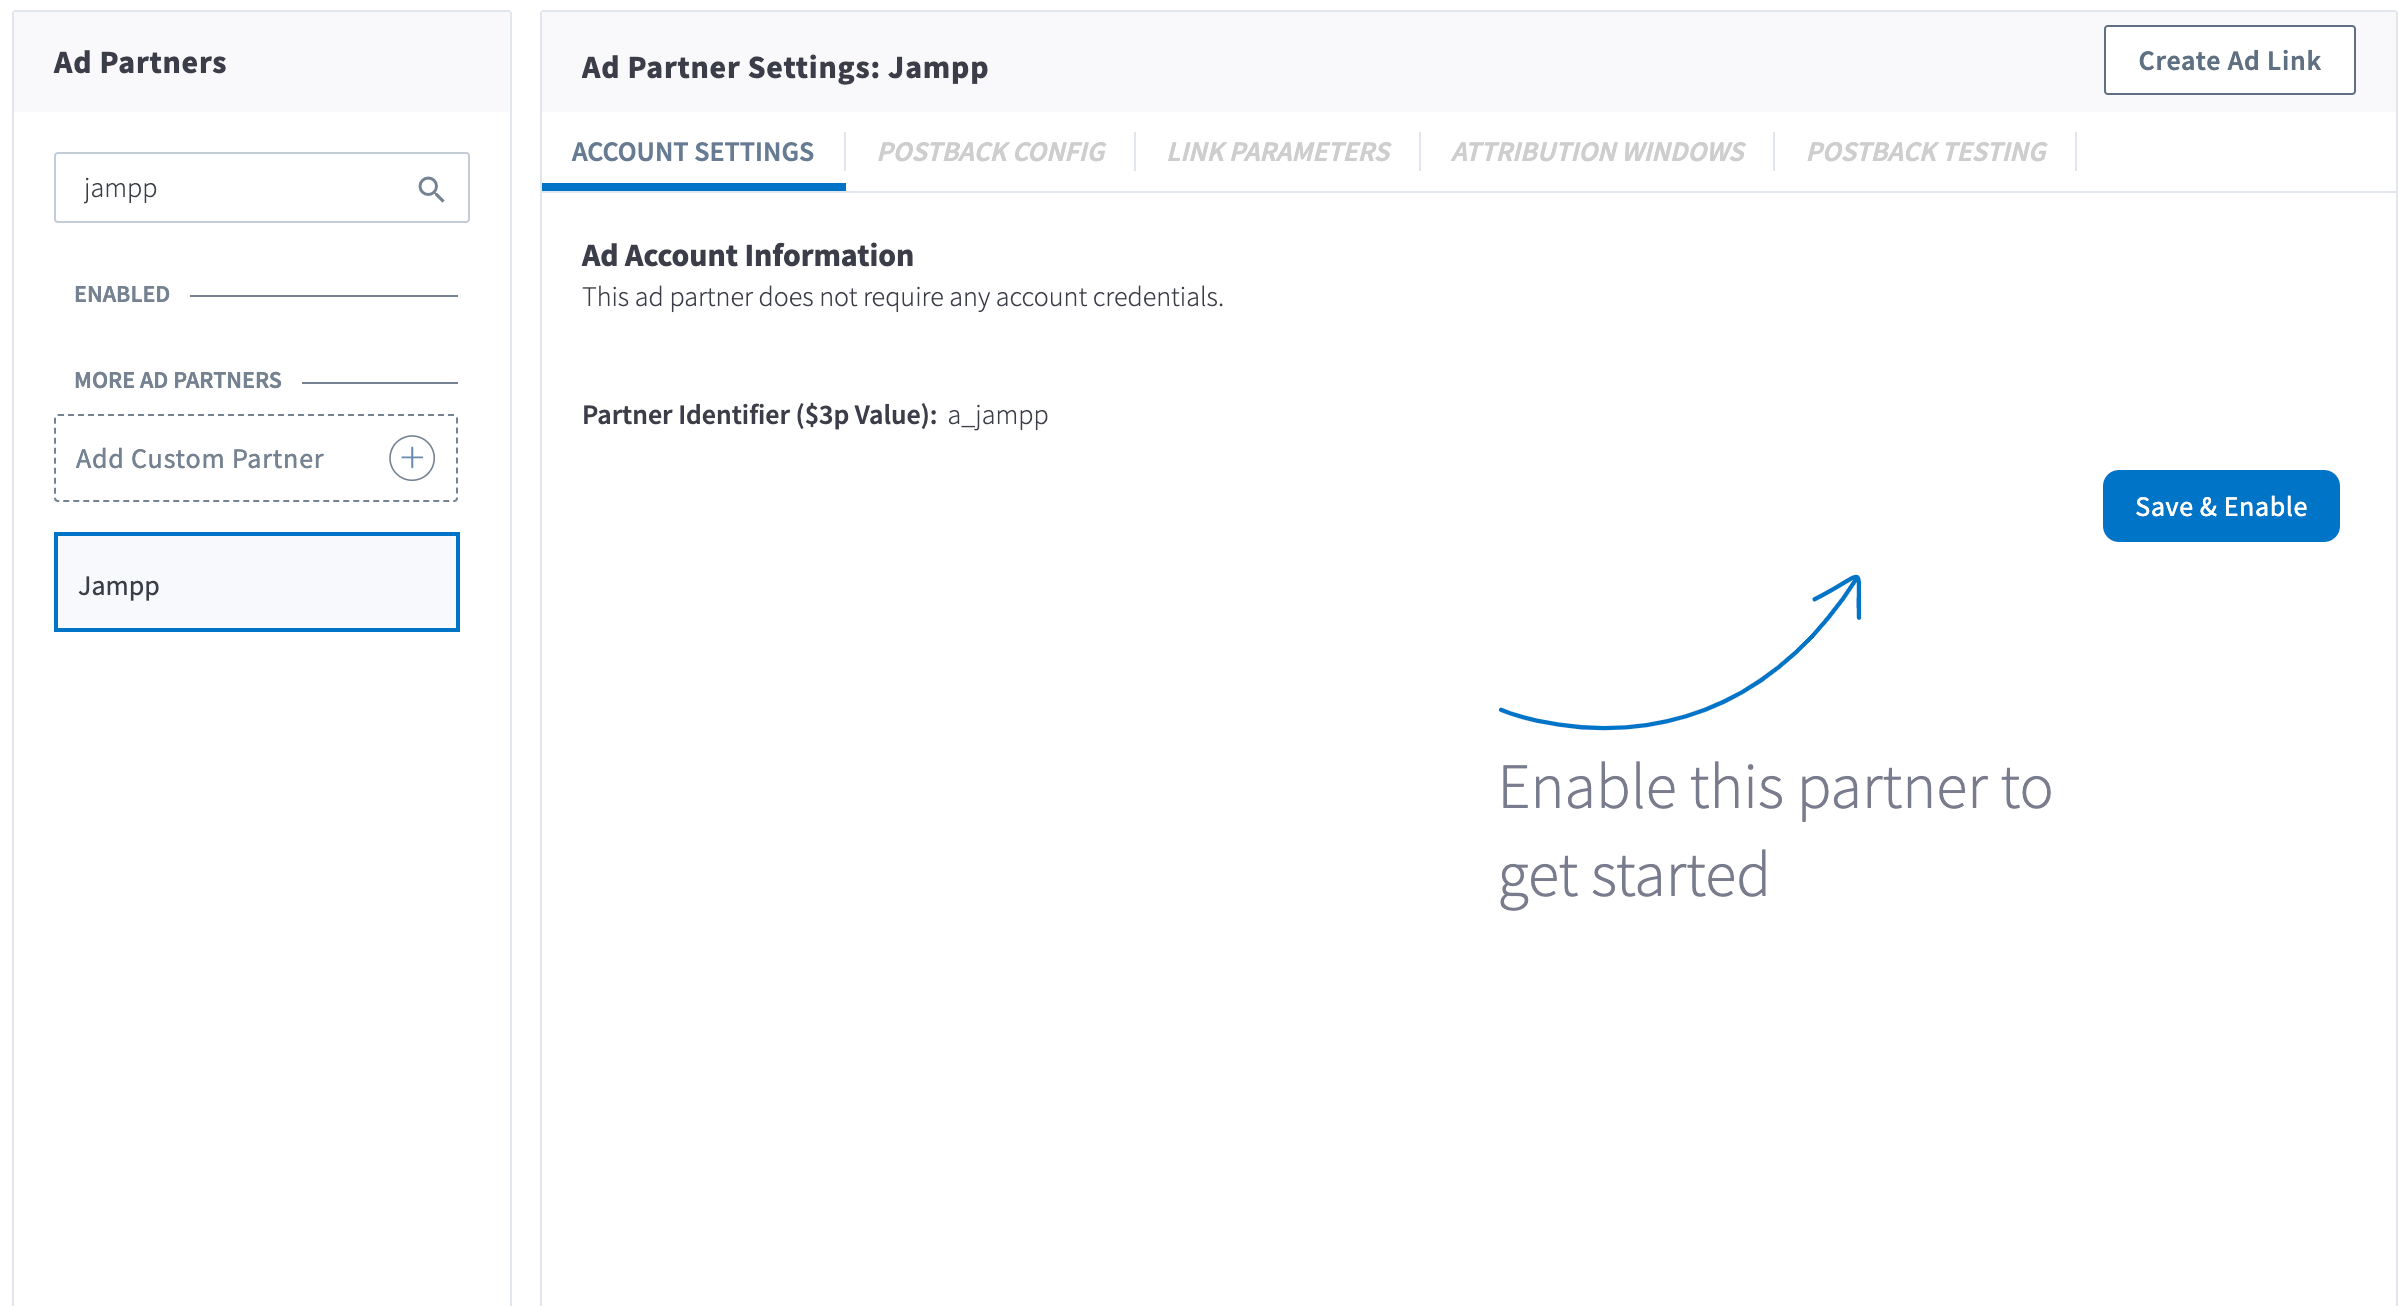
In the Branch Dashboard under Ads > Partner Management, find/search for Jampp. If you're already logged into the Branch Dashboard, you can also click here to go there directly.
Click the Save & Enable button.
2. Configure Postbacks
Enabling Jampp will automatically enable the following postbacks:
- INSTALL
- OPEN
- PURCHASE
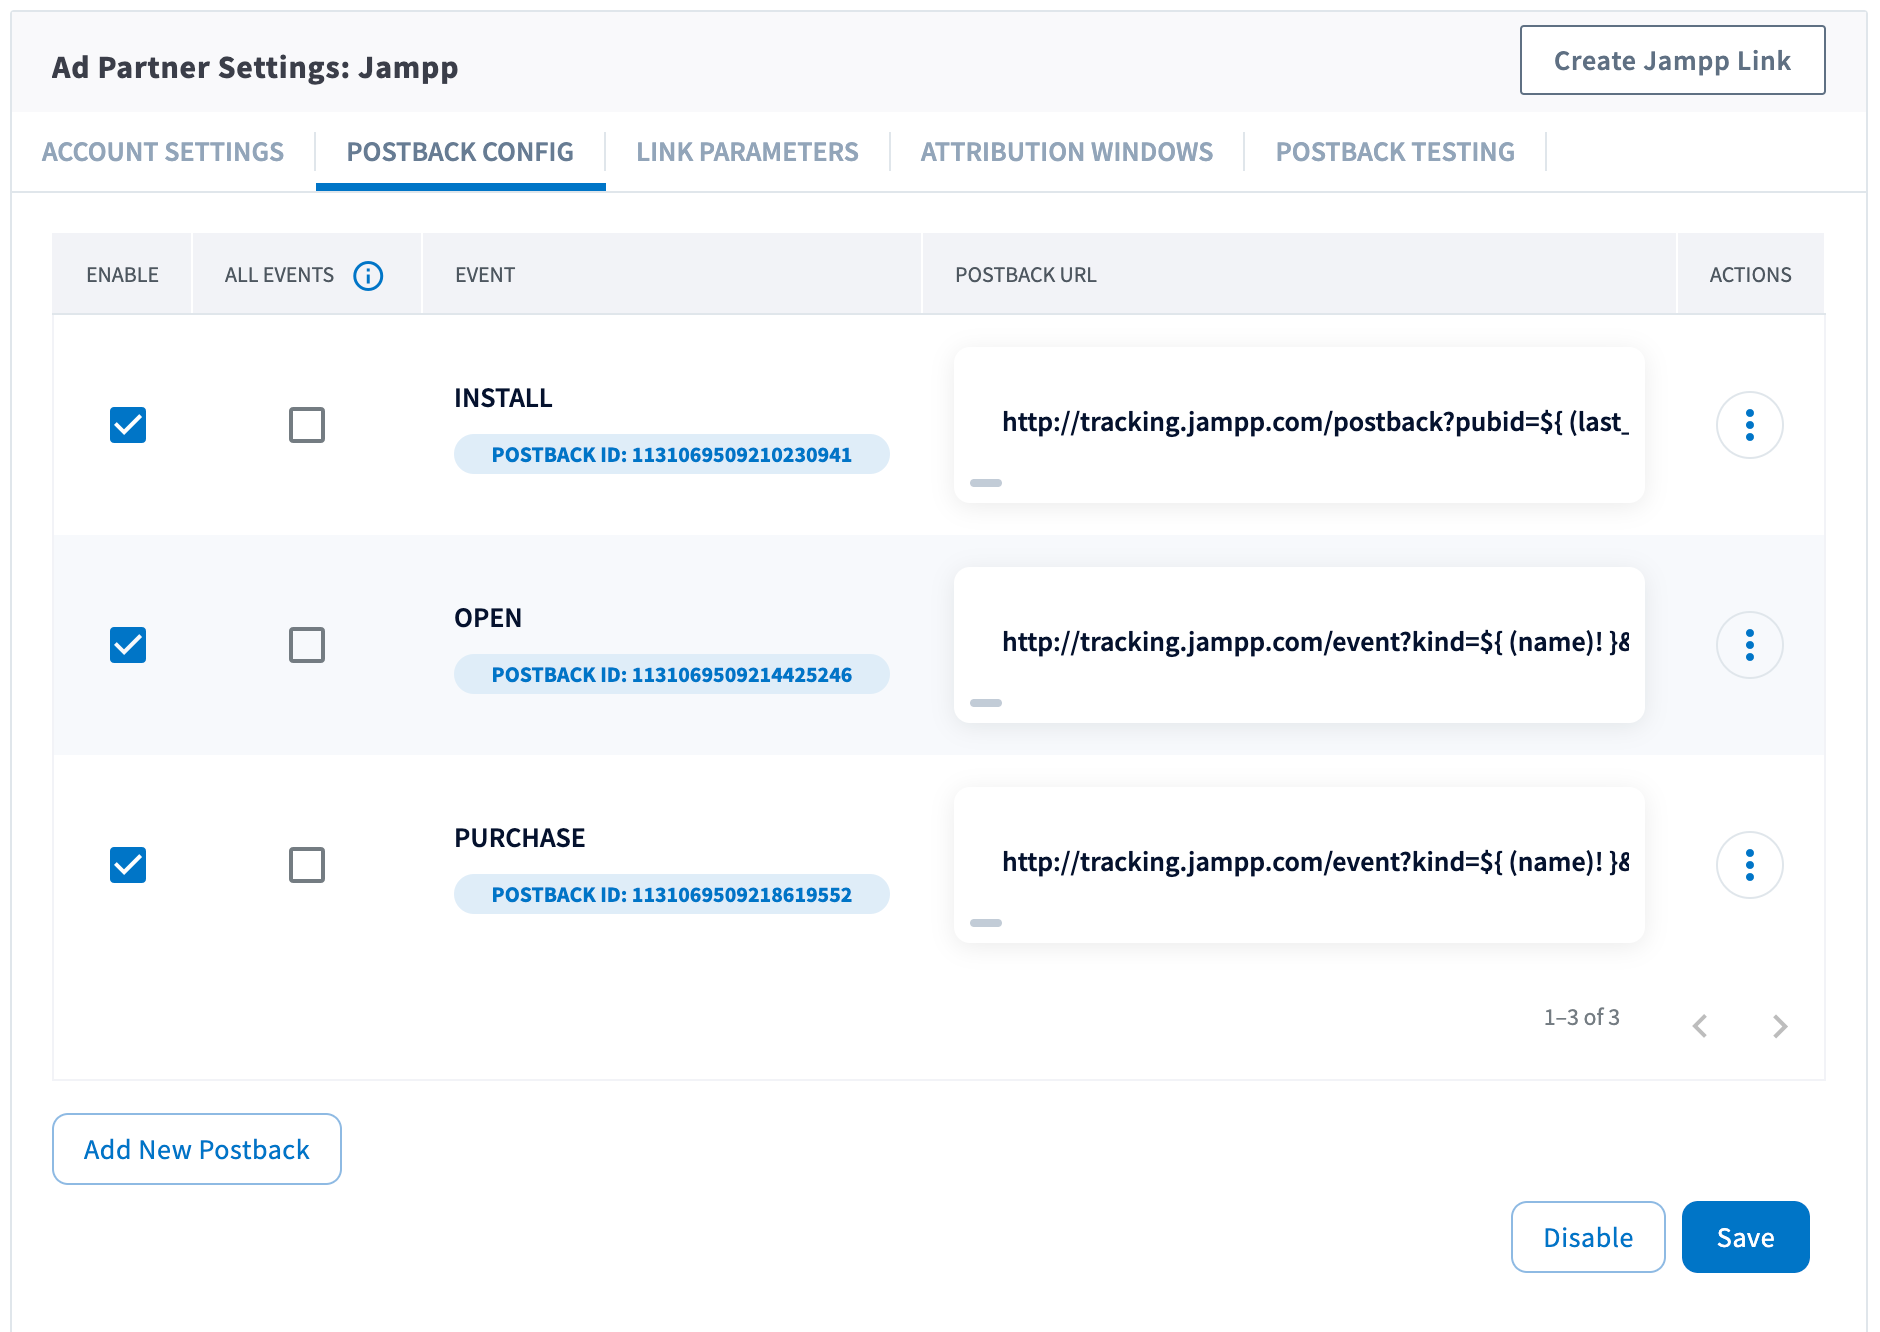
You can configure these postbacks or add more under the Postback Config tab.
Send All Events
Optionally, you can check the checkbox for a given postback for sending all events. When checked, all events will be sent regardless of attribution. Otherwise, the postback will only fire for events attributed to Jampp.
Adding Postbacks
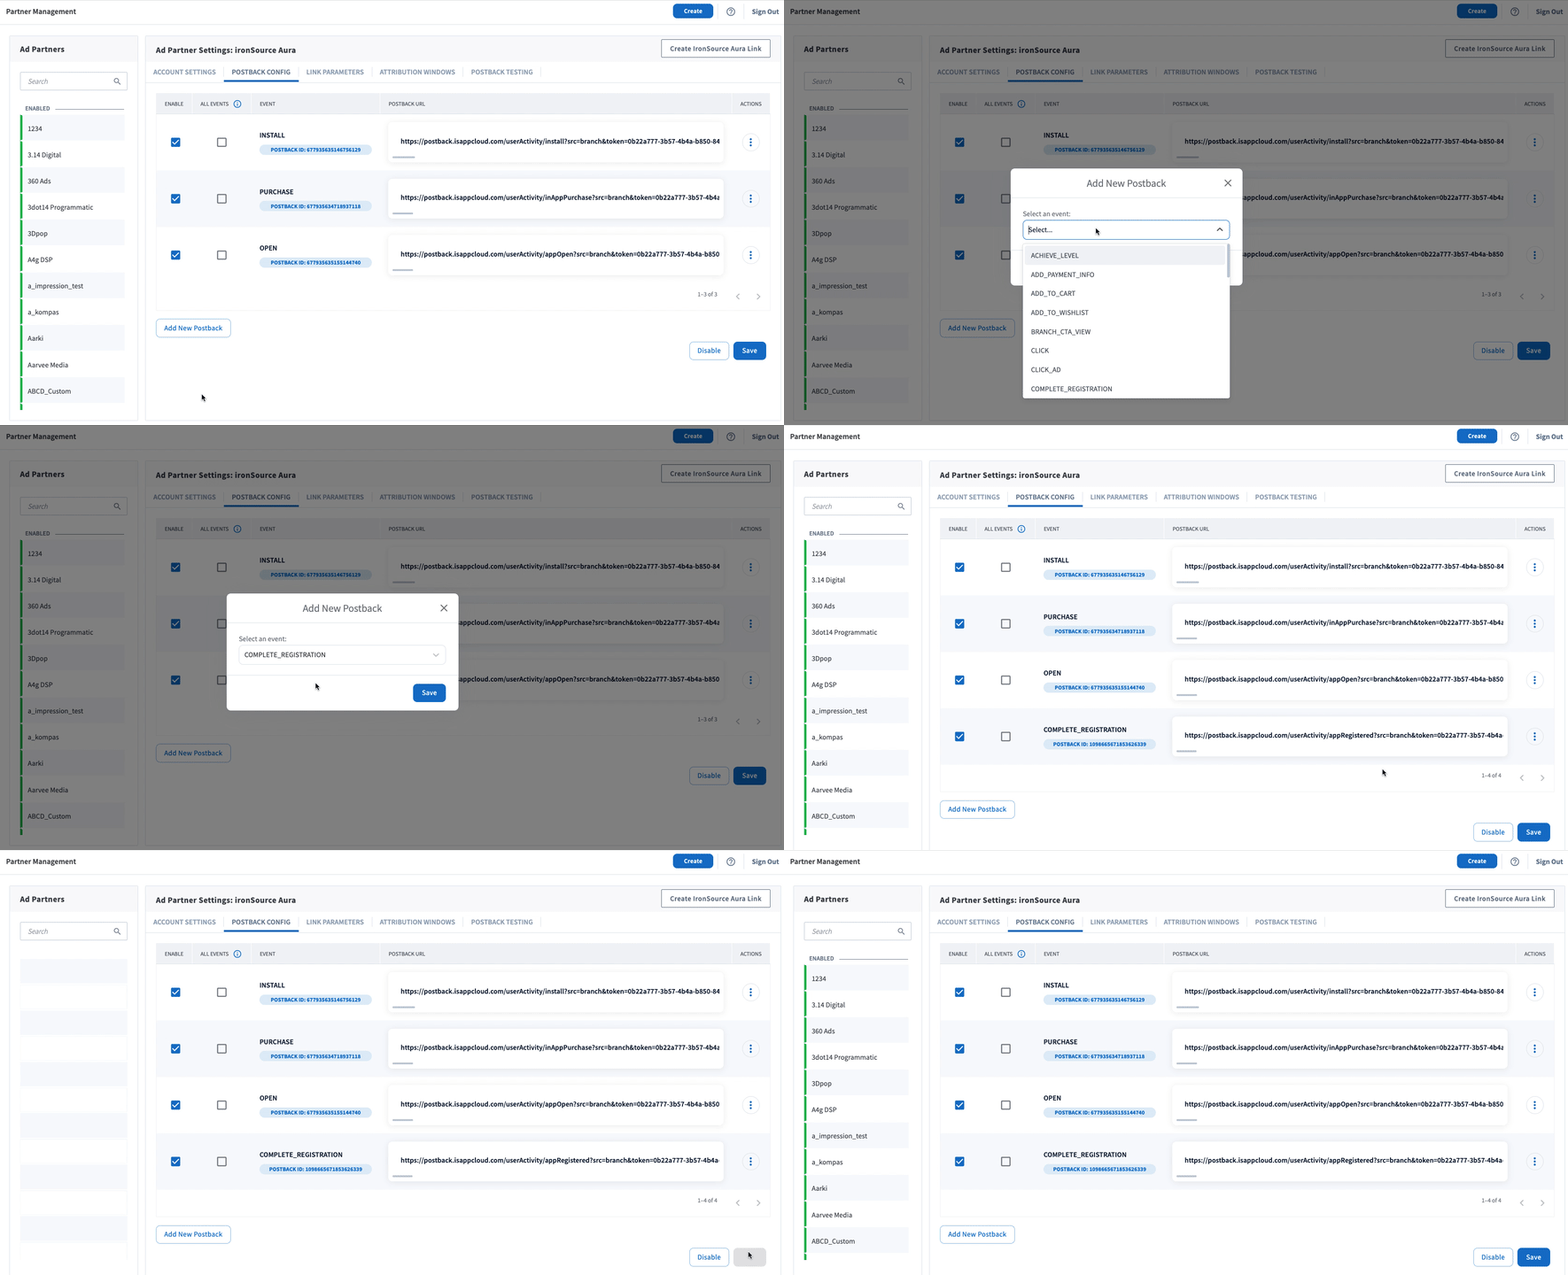
Click the Add New Postback button at the bottom of the screen. A modal will appear that will allow you to select an event that you are tracking with the Branch SDKs (including Custom Events).
For more in-depth postback configurations, view our guides:
3. Configure Attribution Windows
After configuring your events, navigate to the Attribution Windows tab to set windows by attribution type.
Recommended Attribution Windows
| Attribution Type | Window |
|---|---|
| click to session start | 90 days |
| click to install | 30 days |
| click to conversion event | 90 days |
| impression to session start | 1 day |
| impression to install | 1 day |
| impression to conversion event | 1 day |
4. Set up Cost Data
Beta for Non-SANs
Cost Data for Non-Self-Attributing Networks (Non-SANs) is a feature currently in Beta; be aware that there may be unexpected bugs/behaviors until the full release.
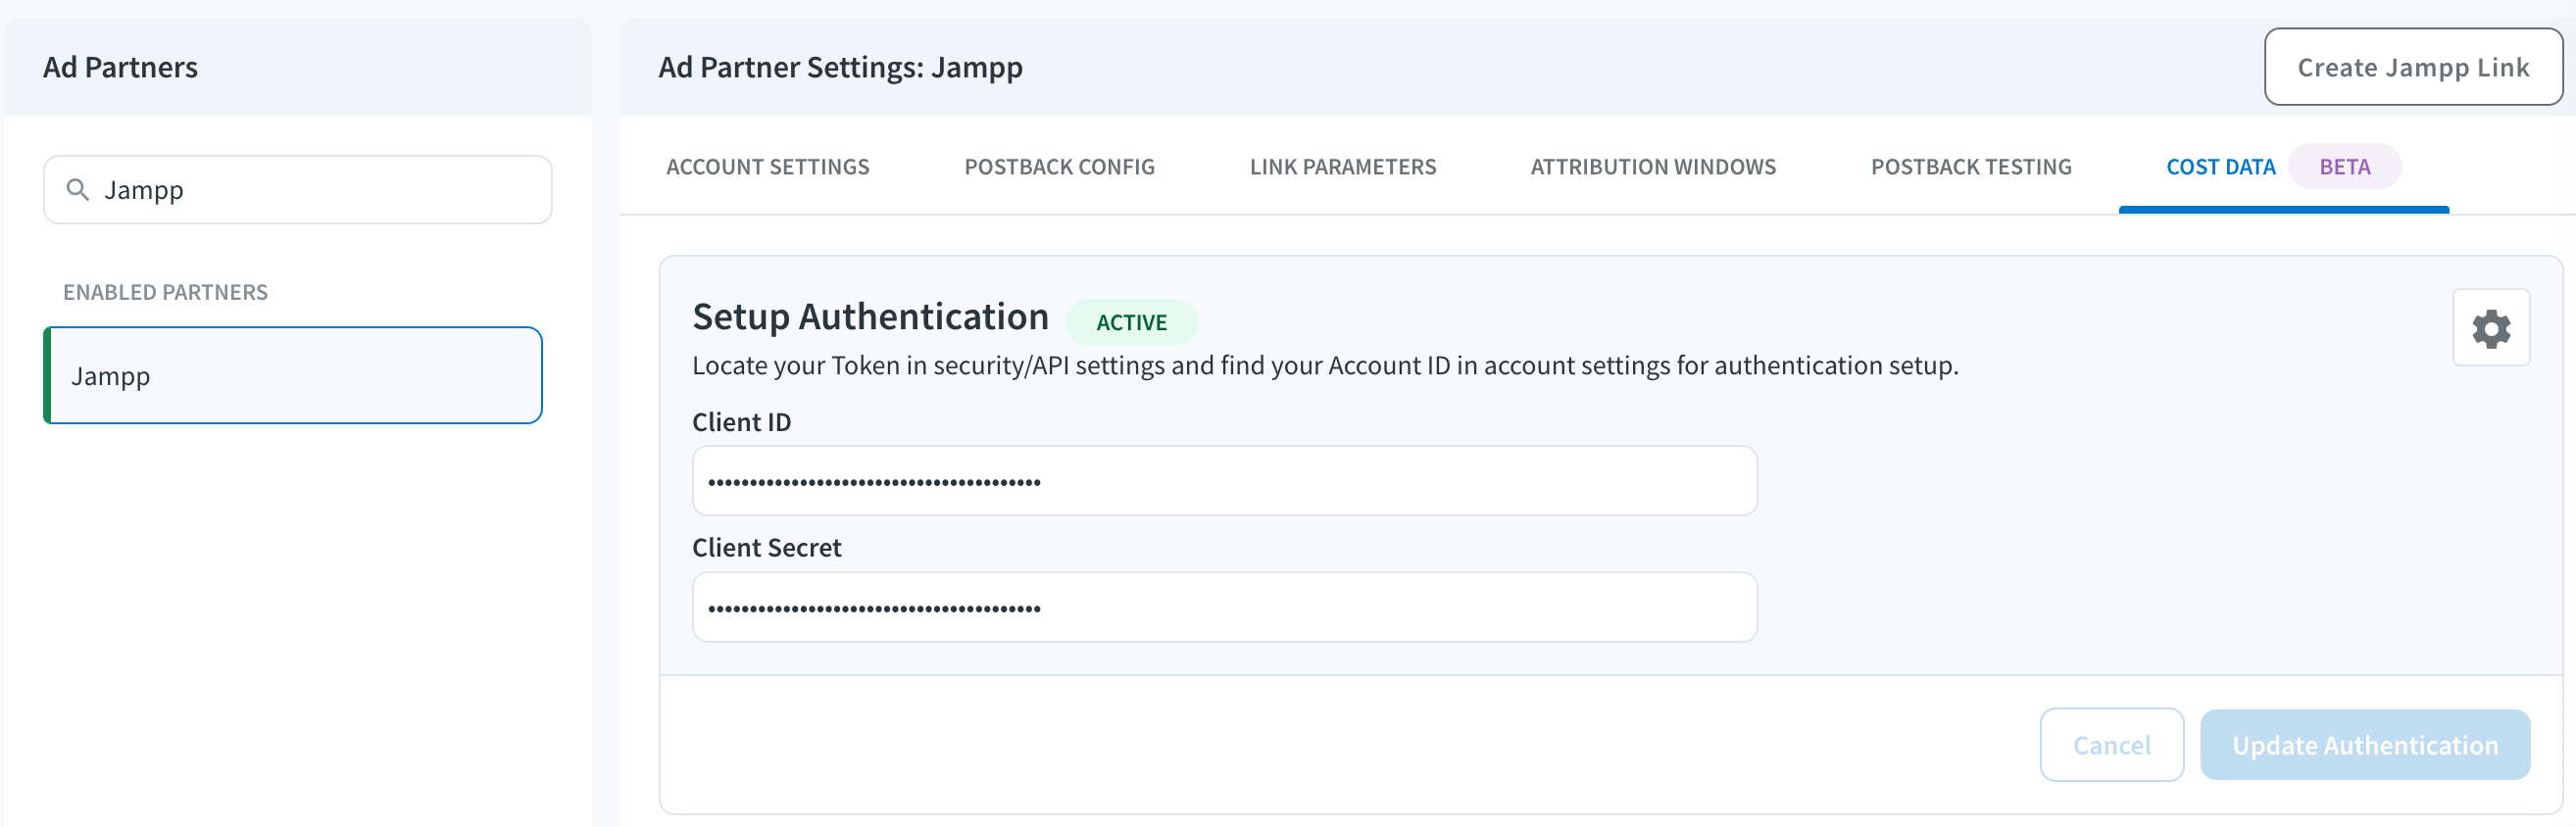
To set up cost ingestion for Jampp, you will need to authenticate using your Client ID and Client Secret. Please reach out to your Jampp account manager if you have trouble finding these values.
Enter your Client ID and Client Secret, and click Save Authentication.
5. Create Branch Ad Link
Next, you'll need to create a Branch Ad Link for your Jampp campaigns in order for Branch to properly attribute conversions.
The Branch Ad Link you create will be placed in your Jampp campaign.
6. Verify Data in Branch
After launching your Jampp campaigns, and conversions begin to happen, you'll want to verify data is being sent from Branch to Jampp. You can look at the Branch Dashboard's Liveview Webhook Records and apply the following filter:
| Filter | Operator | Value |
|---|---|---|
| ad partner (3p) | equals | a_jampp |
Once applied, data should flow through the Liveview, and you can see the data being sent to Jampp from Branch.
Verifying Cost Data
To verify that cost data is flowing into Branch, you need to have the following:
- Completed all implementation steps above
- You need to already be live with campaigns running for the ad network
- Wait 24 hours for data to be pulled in